

Introduction to Homemade Ladyfinger Cookies
There’s something magical about the aroma of freshly baked cookies wafting through the house. Homemade ladyfinger cookies are not just a treat; they’re a delightful experience waiting to happen. Whether you’re looking to impress guests or simply indulge in a sweet moment with your coffee, this recipe is your go-to. With just a handful of ingredients and a little bit of love, you can whip up these light, airy delights in no time. Perfect for a busy day or a cozy evening, these cookies are sure to bring a smile to your face and warmth to your heart.
Why You’ll Love This Homemade Ladyfinger Cookies
Homemade ladyfinger cookies are a dream come true for any home cook. They’re incredibly easy to make, requiring minimal ingredients and effort. In just 30 minutes, you can create a batch that’s perfect for dipping in coffee or serving alongside dessert. The light, airy texture is simply irresistible, making them a delightful treat for any occasion. Plus, they’re versatile enough to adapt to your taste, ensuring everyone will love them!
Ingredients for Homemade Ladyfinger Cookies
Gathering the right ingredients is the first step to creating your homemade ladyfinger cookies. Here’s what you’ll need:
- All-purpose flour: This is the backbone of your cookies, providing structure and a light texture.
- Granulated sugar: Sweetness is key! It helps create that delightful crispiness on the outside.
- Eggs: You’ll need large eggs, separated. The whites add fluffiness, while the yolks contribute richness.
- Salt: Just a pinch enhances the flavors and balances the sweetness.
- Vanilla extract: This adds a warm, aromatic flavor that elevates your cookies to the next level.
- Powdered sugar: For dusting, this gives your cookies a beautiful finish and a touch of sweetness.
For those looking to mix things up, consider these optional ingredients:
- Almond extract: A teaspoon can add a lovely nutty flavor to your ladyfingers.
- Cocoa powder: Swap out a bit of flour for cocoa to create chocolate ladyfingers that are simply divine.
Exact measurements for these ingredients can be found at the bottom of the article, ready for you to print and take to the kitchen!
How to Make Homemade Ladyfinger Cookies
Step 1: Preheat and Prepare
Start by preheating your oven to 350°F (175°C). This ensures your ladyfinger cookies bake evenly. While the oven warms up, line two baking sheets with parchment paper. This step is crucial; it prevents the cookies from sticking and makes cleanup a breeze. The parchment paper also helps the cookies maintain their shape, giving you that perfect ladyfinger look. Trust me, your future self will thank you for this simple prep!
Step 2: Beat the Egg Whites
In a large bowl, beat the egg whites with a pinch of salt until soft peaks form. This means the mixture should hold its shape but still be a bit wobbly. Gradually add the granulated sugar while continuing to beat. Keep going until you achieve stiff peaks, where the mixture stands tall and firm. This step is vital for creating that airy texture in your homemade ladyfinger cookies. It’s like magic in a bowl!
Step 3: Whisk the Egg Yolks
In another bowl, whisk the egg yolks and vanilla extract together until the mixture becomes pale and fluffy. This should take just a couple of minutes. Once you’ve achieved that light texture, gently fold the egg yolk mixture into the beaten egg whites. Be careful here; you want to keep all that lovely air you just whipped in. This combination is what gives your ladyfingers their delightful lift!
Step 4: Combine Ingredients
Now it’s time to add the flour. Sift it over the egg mixture to avoid lumps, then gently fold it in. Use a spatula and be patient; you want to combine everything without deflating the batter. The goal is a smooth, airy mixture that’s ready to be piped. This step is where the magic happens, transforming your ingredients into a light and fluffy batter that will become your ladyfinger cookies.
Step 5: Pipe the Cookies
Transfer your batter into a piping bag fitted with a round tip. This makes it easy to create those classic ladyfinger shapes. Pipe 3-inch long strips onto the prepared baking sheets, leaving some space between each one. Don’t worry if they’re not perfect; a little variation adds character! Just remember, the more uniform they are, the more they’ll bake evenly. It’s all about that homemade charm!
Step 6: Bake the Cookies
Place the baking sheets in your preheated oven and bake for 12-15 minutes. Keep an eye on them! You’ll know they’re done when they’re lightly golden and spring back when touched. This is the moment you’ve been waiting for—the aroma of freshly baked ladyfinger cookies will fill your kitchen, making it hard to resist sneaking a taste!
Step 7: Cool and Dust
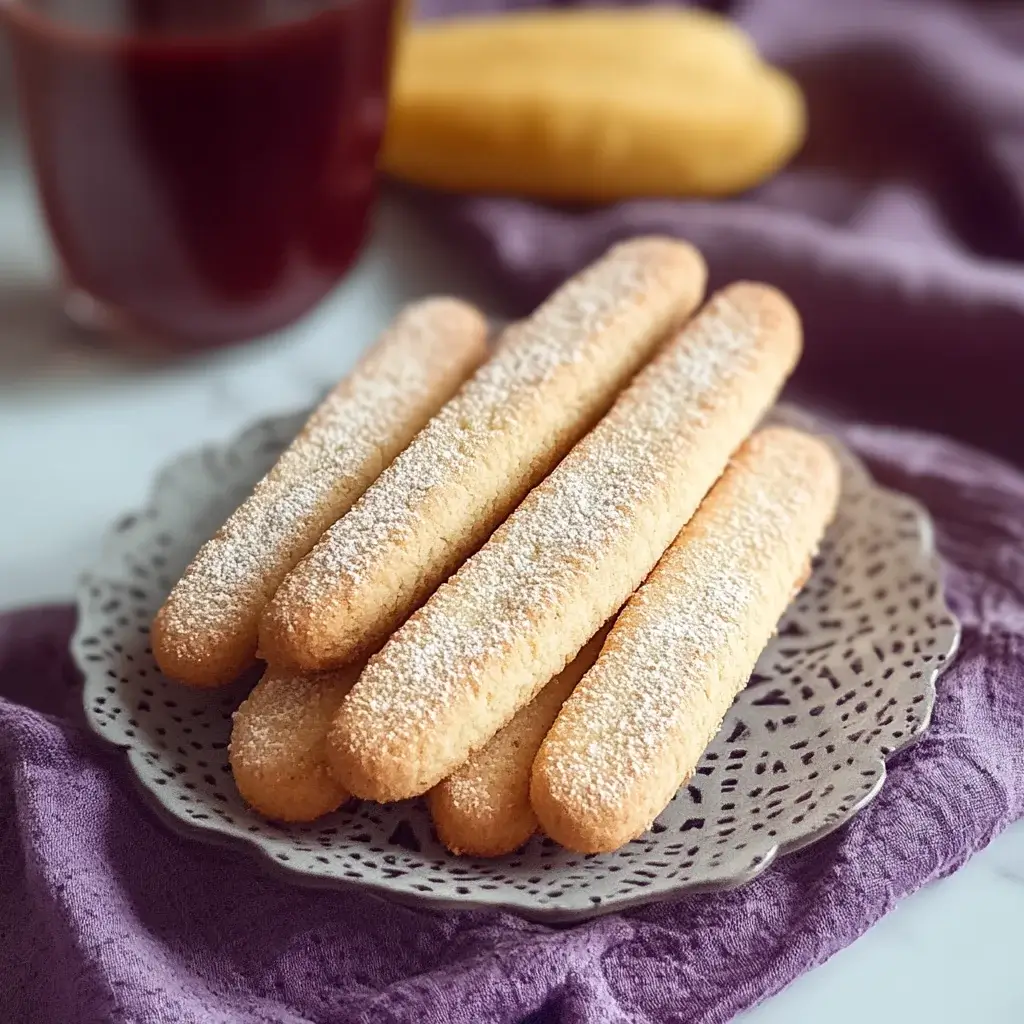
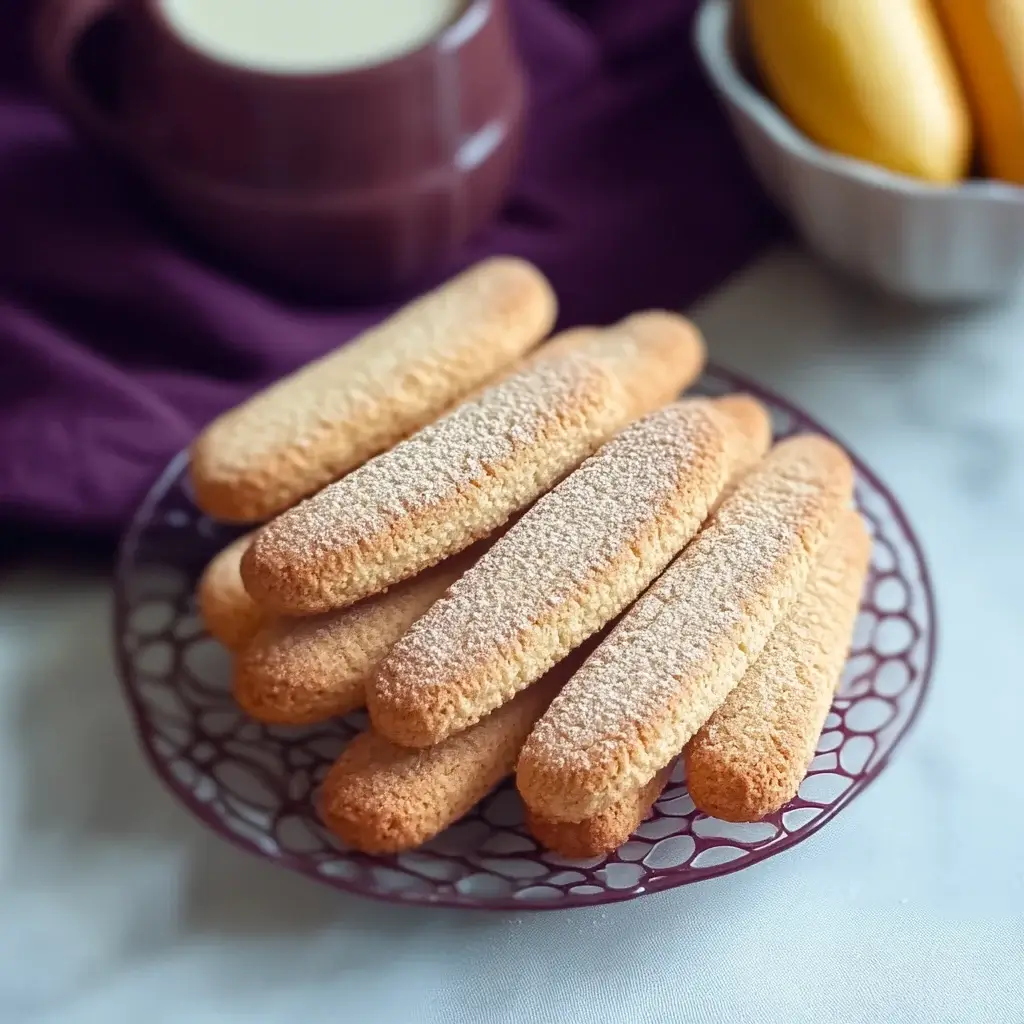
Once baked, remove the cookies from the oven and let them cool on the baking sheets for a few minutes. This helps them firm up a bit. After that, transfer them to a wire rack to cool completely. Once cooled, dust them with powdered sugar for that final touch. This not only adds sweetness but also gives your homemade ladyfinger cookies a beautiful, elegant finish. Enjoy the fruits of your labor!
Tips for Success
- Ensure your egg whites are at room temperature for better volume.
- Use a clean, dry bowl when beating egg whites to avoid any grease.
- Be gentle when folding in the flour to maintain that airy texture.
- Experiment with piping shapes; it’s all about your personal touch!
- Store cookies in an airtight container to keep them fresh longer.
Equipment Needed
- Mixing bowls: A set of various sizes is ideal; you can use any large bowl you have.
- Electric mixer: A hand mixer works great, but a stand mixer can save time.
- Piping bag: If you don’t have one, a resealable plastic bag with a corner cut off will do.
- Parchment paper: Use aluminum foil if you’re out; just grease the baking sheets well.
- Wire rack: A cooling rack is best, but a plate can work in a pinch.
Variations
- Citrus Zest: Add a teaspoon of lemon or orange zest to the egg yolk mixture for a refreshing twist.
- Matcha Ladyfingers: Incorporate a tablespoon of matcha powder into the flour for a unique flavor and vibrant color.
- Gluten-Free Option: Substitute all-purpose flour with a gluten-free blend to accommodate dietary needs.
- Spiced Ladyfingers: Mix in a pinch of cinnamon or nutmeg for a warm, cozy flavor that’s perfect for fall.
- Nutty Delight: Fold in finely chopped nuts like almonds or hazelnuts for added texture and flavor.
Serving Suggestions
- Pair your ladyfinger cookies with a rich espresso or cappuccino for a delightful coffee break.
- Serve alongside a scoop of gelato or a dollop of whipped cream for an indulgent dessert.
- Arrange them on a decorative platter, dusted with powdered sugar, for an elegant presentation.
- Try dipping them in melted chocolate for an extra layer of flavor.
FAQs about Homemade Ladyfinger Cookies
Can I make homemade ladyfinger cookies ahead of time?
Absolutely! You can bake them a day in advance. Just store them in an airtight container to keep them fresh. They’ll be perfect for your coffee or dessert pairing!
What can I do if my ladyfinger cookies are too dry?
If your cookies turn out dry, it might be due to overbaking. Keep an eye on them in the oven. For a softer texture, try adding a bit more egg yolk next time.
How do I store leftover ladyfinger cookies?
Store your homemade ladyfinger cookies in an airtight container at room temperature. They should stay fresh for about a week. If you want to keep them longer, consider freezing them!
Can I use egg substitutes for this recipe?
While traditional ladyfinger cookies rely on eggs for structure and texture, you can experiment with egg substitutes like aquafaba (chickpea water) for a vegan version. Just whip it until frothy!
What are some creative ways to use ladyfinger cookies?
These cookies are versatile! Use them in tiramisu, as a base for a trifle, or simply enjoy them with your favorite coffee. The possibilities are endless!
Final Thoughts
Creating homemade ladyfinger cookies is more than just baking; it’s about crafting moments of joy. The light, airy texture and delicate sweetness make them a perfect companion for coffee or dessert. Each bite transports you to a cozy café in Italy, where every cookie tells a story. Whether you’re sharing them with friends or savoring them solo, these cookies bring a sense of accomplishment and warmth to your kitchen. So roll up your sleeves, embrace the process, and enjoy the delightful experience of making these charming treats. Trust me, your taste buds will thank you!
Homemade Ladyfinger Cookies: Discover the Perfect Recipe!
Ingredients
Method
- Preheat your oven to 350°F (175°C) and line two baking sheets with parchment paper.
- In a large bowl, beat the egg whites with salt until soft peaks form. Gradually add granulated sugar while continuing to beat until stiff peaks form.
- In another bowl, whisk the egg yolks and vanilla extract until pale and fluffy. Gently fold the egg yolk mixture into the egg whites.
- Sift the flour over the egg mixture and carefully fold it in until just combined. Be gentle to retain the airiness.
- Transfer the batter to a piping bag fitted with a round tip. Pipe 3-inch long strips onto the prepared baking sheets, leaving space between each.
- Bake in the preheated oven for 12-15 minutes, or until the cookies are lightly golden and spring back when touched.
- Remove from the oven and let cool on the baking sheets for a few minutes before transferring to a wire rack to cool completely.
- Once cooled, dust with powdered sugar before serving.
Nutrition
Notes
- For a flavored twist, add a teaspoon of almond extract to the egg yolk mixture.
- To make chocolate ladyfingers, replace 2 tablespoons of flour with unsweetened cocoa powder.