

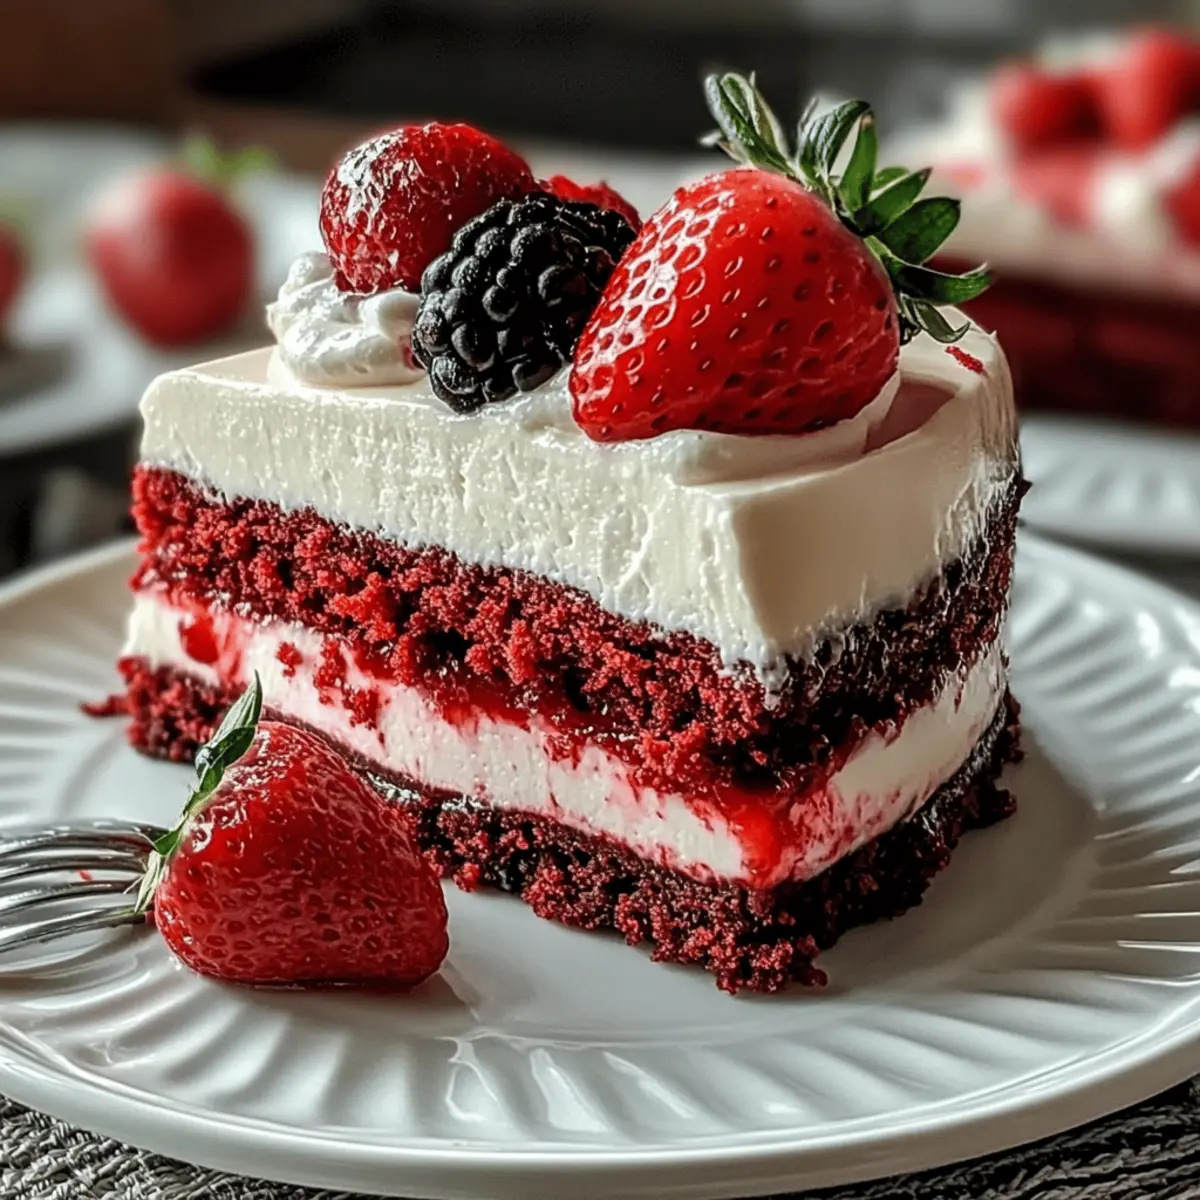
As I stood in my kitchen, the vibrant reds and pinks of fresh strawberries nestled against the biting chill of winter brought forth memories of summer picnics. That’s when the idea struck: why not combine that nostalgia with a show-stopping dessert? Enter the Red Velvet Strawberry Cheesecake—a stunning blend of moist red velvet cake layered with a luscious strawberry cheesecake filling. Not only is this dessert a feast for the eyes, but it also brings joy to the palate and is surprisingly easy to customize! Whether you’re celebrating a birthday, a special anniversary, or simply craving something sweet, this recipe is your ticket to impressing guests without spending all day in the kitchen. Are you ready to take your dessert game to new heights? Let’s indulge in a mouthwatering adventure together!

Why Is This Cheesecake So Irresistible?
Decadently Unique: This Red Velvet Strawberry Cheesecake is not just another dessert; it’s an experience that tantalizes your taste buds with contrasting flavors and textures.
Customizable Delight: Whether you’re going gluten-free or opting for a vegan version, this recipe allows you to tailor it to your dietary needs. It’s all about making it your own!
Quick and Simple: With straightforward steps, you can craft this stunning centerpiece without the need for professional baking skills. It’s perfect for both novice cooks and seasoned chefs looking for a fun, easy treat!
Crowd-Pleasing Appeal: Bring joy to your gatherings—everyone, from kids to grandparents, will adore this vibrant dessert. Pair it with a scoop of ice cream for an extra touch of indulgence!
Gorgeous Presentation: The striking colors make this cheesecake a showstopper at any event. Imagine serving this beauty at your next birthday party or anniversary celebration—it’s sure to be the highlight of the day!
Ready for more delicious cheesecake ideas? Check out my Red Velvet Cheesecakes and Mango Coconut Cheesecake for a playful twist!
Red Velvet Strawberry Cheesecake Ingredients
For the Cake
• All-Purpose Flour – Provides structure; can be substituted with gluten-free flour.
• Granulated Sugar – Adds sweetness; coconut sugar serves as a great alternative.
• Baking Powder – This leavening agent helps the cake rise; ensure it’s fresh for best results.
• Baking Soda – A crucial ingredient for the cake’s lift.
• Salt – Enhances overall flavor; sea salt adds a touch of complexity.
• Cocoa Powder – Gives a subtle chocolate flavor; carob powder is a caffeine-free substitute.
• Vegetable Oil – Ensures moisture in the cake; melted coconut oil works beautifully too.
• Buttermilk – Adds tanginess and moisture; milk with lemon juice is a quick substitute.
• Eggs – Provide structure and stability; flax eggs can be used for a vegan option.
• Red Food Coloring – Keeps the cake vibrantly red; gel food coloring is recommended for best results.
• Vanilla Extract – Infuses warmth and lovely flavor.
• White Vinegar – Reacts with baking soda for a light cake texture.
For the Cheesecake Filling
• Cream Cheese – The core ingredient for a rich filling; vegan cream cheese is a great alternative.
• Powdered Sugar – Sweetens the filling; remember to sift before use.
• Fresh Strawberries – The star flavor; thawed, drained frozen strawberries can also work in a pinch.
• Heavy Whipping Cream – Adds creaminess and volume to the filling; coconut cream keeps it dairy-free.
• Whipped Cream – Optional garnish to add a light topping for serving.
Dive into this delightful Red Velvet Strawberry Cheesecake and customize it just the way you love!
Step‑by‑Step Instructions for Red Velvet Strawberry Cheesecake
Step 1: Preheat the Oven
Begin by preheating your oven to 350°F (175°C). As the oven warms, lightly grease a 9-inch springform pan with butter or non-stick spray to ensure your cake releases easily after baking. Keep an eye on the temperature; a properly heated oven is essential for achieving a perfectly baked Red Velvet Strawberry Cheesecake.
Step 2: Make the Red Velvet Cake
In a large mixing bowl, sift together the all-purpose flour, cocoa powder, baking powder, baking soda, and salt. In another bowl, blend together the vegetable oil, granulated sugar, eggs, buttermilk, red food coloring, vanilla extract, and white vinegar until smooth. Gradually combine the wet and dry mixtures until just incorporated, then pour the vibrant batter into the prepared springform pan. Bake for 25-30 minutes, checking for doneness with a toothpick; it should come out clean.
Step 3: Cool the Cake
Once baked, remove the springform pan from the oven and allow the cake to cool in the pan for about 10 minutes. Then, carefully release and transfer the cake to a wire rack to cool completely. This step is crucial as your Red Velvet Strawberry Cheesecake will require a completely cooled base to support the creamy cheesecake filling without melting.
Step 4: Prepare the Strawberry Cheesecake Filling
In a mixing bowl, beat the cream cheese until smooth and free of lumps. Gradually add the sifted powdered sugar and vanilla extract, mixing until fully incorporated. Next, gently fold in the pureed fresh strawberries, creating a delightful pink hue that echoes the fresh, fruity flavor of the filling. This strawberry cheesecake filling will complement the rich red velvet base beautifully.
Step 5: Whip the Cream
In a separate, chilled mixing bowl, whip the heavy cream until it reaches stiff peaks. This step adds a fluffy texture to your cheesecake filling, balancing the richness of the cream cheese. Once ready, carefully fold the whipped cream into the strawberry mixture, making sure to maintain its airy texture for a light and creamy cheesecake filling.
Step 6: Assemble the Cheesecake
With your cooled red velvet cake as the base, pour the luscious strawberry cheesecake filling evenly over the top. Use a spatula to spread it gently to the edges, ensuring an even layer. This striking contrast of the cheesecake filling against the vibrant red velvet will create a stunning presentation for your Red Velvet Strawberry Cheesecake.
Step 7: Chill the Cheesecake
Cover the assembled cheesecake with plastic wrap and place it in the refrigerator for at least 4 hours, or preferably overnight. This chilling period allows the cheesecake to set properly, enhancing flavors and creating a perfect slice when it’s time to serve. Be patient; the wait will be worth it!
Step 8: Serve and Garnish
When you’re ready to serve, carefully remove the cheesecake from the springform pan. Garnish the top with fresh strawberries and a dollop of whipped cream for a beautiful finishing touch. Slice the cheesecake with a warm knife for clean cuts, revealing the layers of the Red Velvet Strawberry Cheesecake, and get ready to impress your guests with this delightful dessert!
What to Serve with Red Velvet Strawberry Cheesecake
Elevate your dessert experience with delightful pairings that enhance the vibrant flavors of this show-stopping cheesecake.
- Vanilla Ice Cream: A classic pairing, the creamy ice cream contrasts beautifully with the rich cheesecake, providing a refreshing chill.
- Fresh Berries: A medley of raspberries and blueberries will add a burst of flavor and a pop of freshness to each decadent bite.
- Chocolate Drizzle: A warm drizzle of melted chocolate adds a luxurious touch, tying together the cake’s sweetness with a hint of bitterness.
- Whipped Cream: Light and fluffy, this simple garnish enhances the cheesecake’s richness and adds a delightful texture contrast.
- Mint Sprigs: A sprinkle of fresh mint not only brightens the plate but also refreshes the palate after each delicious slice.
- Sparkling Wine: A glass of bubbly complements the sweetness of the cheesecake, making every bite feel celebratory and special.
Serve up these delightful accompaniments for an unforgettable dessert experience centered around the lovely Red Velvet Strawberry Cheesecake!
Make Ahead Options
These Red Velvet Strawberry Cheesecake layers are perfect for meal prep! You can bake the red velvet cake and store it tightly wrapped in plastic wrap up to 2 days in advance, ensuring it remains moist. Additionally, the strawberry cheesecake filling can be made and refrigerated for up to 24 hours before assembling. Just remember to cover it well to prevent any absorption of odors. When you’re ready to impress your guests, simply assemble the cheesecake by spreading the filling over the cooled cake and refrigerate for at least 4 hours (or overnight) to set before serving. This preparation allows you to enjoy a stunning dessert with minimal last-minute effort!
Red Velvet Strawberry Cheesecake Variations
Customize your dessert adventure with these delightful twists on the classic Red Velvet Strawberry Cheesecake!
- Gluten-Free Option: Replace all-purpose flour with your favorite gluten-free blend for a deliciously safe treat. Enjoy indulging worry-free!
- Vegan Adaptation: Swap out cream cheese for vegan cream cheese and use flax eggs to create a plant-based version that is just as luscious. It’s a win-win for everyone!
- Nutty Delight: Add crushed pecans or walnuts to the cake batter for a delightful crunch that complements the creamy filling beautifully. The unexpected texture will truly elevate your cheesecake experience!
- Fruit Puree Swap: Experiment with a different puree, like blueberry or raspberry, instead of strawberries for a unique flavor profile. The color and taste will keep your taste buds guessing!
- Chocolate Indulgence: Mix cocoa powder into the cheesecake filling for a rich chocolate flavor that pairs perfectly with the red velvet base. This decadent twist will satisfy all chocolate cravings!
- Citrus Zest: Stir in some lemon or orange zest into the filling for a refreshing zesty kick that brightens up the cheesecake. This flavor burst will transport you straight to a summer garden party!
- Seasonal Spices: Incorporate autumn spices like cinnamon or nutmeg for a warm, cozy flavor profile. This is perfect for holiday gatherings when you want to impress your guests!
- Tropical Flavor: Swap strawberries with mango puree for a refreshing tropical vibe that’s perfect for summer barbecues. Picture yourself enjoying it on a sunny day with friends—pure bliss!
For those looking for more inspiration, don’t forget to check out my delightful Mango Coconut Cheesecake or indulge in some vibrant Red Velvet Cheesecakes!
Storage Tips for Red Velvet Strawberry Cheesecake
Fridge: Store leftovers in an airtight container in the refrigerator for up to 3 days. This will keep your Red Velvet Strawberry Cheesecake fresh and delicious.
Freezer: For longer storage, wrap the cheesecake tightly in plastic wrap and aluminum foil. It will stay good in the freezer for up to 2 months.
Thawing: To enjoy your cheesecake after freezing, transfer it to the fridge to thaw overnight. This gradual process helps retain its texture and flavor.
Reheating: Best served cold; allow the cheesecake to sit at room temperature for about 30 minutes before serving to enhance its wonderful taste and texture.
Tips for the Best Red Velvet Strawberry Cheesecake
-
Use Room Temperature Ingredients: Allow your cream cheese, eggs, and buttermilk to come to room temperature for smooth blending, ensuring a creamy filling without lumps.
-
Be Gentle with the Whipped Cream: When folding the whipped cream into the cheesecake mixture, use a light hand to maintain airiness, preventing a dense texture in your Red Velvet Strawberry Cheesecake.
-
Cool Completely: Make sure your red velvet cake is completely cooled before adding the cheesecake filling; a warm base can cause melting, leading to a less-than-perfect dessert.
-
Double Check Rising Agents: Ensure your baking powder and baking soda are fresh; expired leavening agents could result in a dense cake rather than a light, fluffy one.
-
Chill Time Matters: Avoid skipping the chill time; letting the cheesecake set for at least 4 hours helps it hold its shape and enhances flavors, making for a better presentation.
-
Warm Knife Technique: For clean slices, dip your knife in hot water for a few seconds before cutting into the cheesecake, ensuring a beautiful presentation with each serving.
Red Velvet Strawberry Cheesecake Recipe FAQs
What is the best way to select ripe strawberries for the filling?
Absolutely! Look for strawberries that are vibrant red, firm, and fragrant. Avoid any with dark spots or signs of mushiness. If you’re using frozen strawberries, choose those that are unsweetened, and ensure they are thawed and drained before adding to your filling for the best texture and flavor.
How should I store leftover Red Velvet Strawberry Cheesecake?
Very simple! Store any leftovers in an airtight container in the fridge for up to 3 days. This helps maintain its freshness and flavor. If you want to keep it longer, wrap it tightly in plastic wrap followed by aluminum foil and freeze it for up to 2 months. It’s a delicious treat to save for later!
Can I freeze my Red Velvet Strawberry Cheesecake?
Absolutely! To freeze, allow the cheesecake to set fully, then carefully wrap it in plastic wrap, followed by aluminum foil. This will protect it from freezer burn. When you’re ready to enjoy it, transfer it to the fridge overnight to thaw. This gradual process keeps the cheesecake’s texture dreamy and delicious.
What should I do if my cheesecake filling is too runny?
Don’t worry; this can happen sometimes! If your filling is too runny, it might need more cold whipping cream folded in, or it may require additional chilling time. Make sure your whipped cream is whisked to stiff peaks and consider letting the assembled cheesecake set in the fridge for longer than 4 hours, preferably overnight, to help it firm up.
Are there any dietary modifications for the Red Velvet Strawberry Cheesecake?
Certainly! For a gluten-free version, simply substitute all-purpose flour with a gluten-free blend. If you’d like a vegan option, replace the cream cheese with vegan cream cheese and use flax eggs in place of regular eggs. This way, everyone can enjoy this delicious dessert, regardless of dietary needs!
How can I ensure my cheesecake slices come out clean?
For beautifully clean slices, use a warm knife! Just dip your knife in hot water for a few seconds, wipe it clean, and then cut your cheesecake. This little technique helps keep the layers intact and makes your presentation look as stunning as the cake tastes!
Indulge in Red Velvet Strawberry Cheesecake Bliss at Home
Ingredients
Equipment
Method
- Preheat the oven to 350°F (175°C) and grease a 9-inch springform pan.
- Sift all-purpose flour, cocoa powder, baking powder, baking soda, and salt in a bowl. In another bowl, blend vegetable oil, granulated sugar, eggs, buttermilk, red food coloring, vanilla extract, and white vinegar until smooth. Combine wet and dry mixtures, then pour into the prepared pan.
- Bake for 25-30 minutes. Check for doneness with a toothpick; it should come out clean.
- Let the cake cool in the pan for about 10 minutes, then transfer to a wire rack to cool completely.
- In a bowl, beat cream cheese until smooth. Gradually mix in sifted powdered sugar and vanilla extract. Fold in pureed strawberries.
- In a separate bowl, whip heavy cream until stiff peaks form. Fold whipped cream into the strawberry mixture.
- Pour the cheesecake filling over the cooled red velvet cake. Spread evenly to the edges.
- Cover with plastic wrap and chill in the refrigerator for at least 4 hours, preferably overnight.
- Garnish with fresh strawberries and whipped cream before serving. Slice with a warm knife.