

“Fudgy, rich, and oh-so-satisfying—these are Miso Brownies, a delightful twist on your traditional treat! I stumbled upon the idea of adding white miso during one of my baking experiments, and let me tell you, it raised the bar from ordinary to extraordinary. This Miso Brownies recipe isn’t just easy to whip up; it surprises with a subtle umami kick that beautifully complements the sweet chocolate. Perfect for a cozy night in or as the star of your next gathering, they’re bound to become a new favorite. Plus, with customizable add-ins like nuts or chocolate chips, you can make them totally your own! Ready to redefine dessert? Let’s dive in!”
Why are Miso Brownies a Must-Try?
Unique Flavor Twist: The addition of white miso elevates these brownies with a savory depth that balances the sweetness beautifully. Quick and Easy: With simple ingredients and straightforward steps, you can whip up these fudgy delights in no time. Customizable Options: Add your favorite nuts or extra chocolate chips to personalize each batch. Crowd-Pleasing Treat: Perfect for gatherings, these brownies will leave your guests impressed and craving more. For a comforting classic dessert, check out my Chocolate Chip Cookies!
Miso Brownies Ingredients
• Discover the delightful flavors!
For the Brownie Base
- Dark Chocolate (150g) – Richness and main flavor base; use semi-sweet or bittersweet for varied sweetness.
- Natural Cocoa Powder (50g) – Enhances chocolate flavor; ensure it’s unsweetened.
- Espresso Powder (1 tsp, optional) – Boosts chocolate depth and flavor.
- Unsalted Butter (115g) – Adds moisture and nuttiness when browned.
- Large Eggs (2) – Provides structure and richness; best at room temperature for emulsion.
- Granulated Sugar (200g) – Increases sweetness; balances flavors.
- Brown Sugar (100g) – Adds moisture and complexity to the taste.
- White Miso Paste (60g) – Adds umami depth; can substitute with tahini for a nut-free option.
- All-Purpose Flour (120g) – Provides structure; mix gently to avoid toughness.
Optional Add-Ins
- Chopped Nuts (100g, optional) – Introduces crunch; walnuts or pecans work great.
- Additional Chocolate Chips (100g, optional) – For more chocolate richness in your Miso Brownies!
Step‑by‑Step Instructions for Miso Brownies Recipe
Step 1: Prep Chocolate Mixture
Start by chopping the dark chocolate into small pieces and placing it in a medium heatproof bowl. Add the unsweetened cocoa powder and optional espresso powder for richness. Set the bowl aside while you prepare the browned butter, which will enhance your Miso Brownies with a nutty flavor.
Step 2: Brown the Butter
In a saucepan, melt the unsalted butter over medium heat, stirring frequently until it turns a beautiful golden brown and emits a nutty aroma—this should take about 5 minutes. Immediately pour this melted butter over your chocolate mixture, stirring until everything is smooth and well combined. This step is crucial for that fudgy texture!
Step 3: Preheat Oven & Prepare Pan
While your chocolate mixture cools slightly, preheat your oven to 350°F (175°C). Line a 9×9-inch baking pan with parchment paper, leaving some overhang to make it easier to lift the brownies out later. This preparation is a key step in ensuring perfect Miso Brownies that are simple to remove once baked.
Step 4: Whip Egg Mixture
In a large mixing bowl, add the room temperature eggs alongside granulated sugar, brown sugar, and white miso paste. Using a whisk, beat the mixture for about 5 minutes until it becomes thick, fluffy, and pale in color. This aeration adds structure to your Miso Brownies and enhances their wonderful texture.
Step 5: Combine Mixtures
Now, gently fold the cooled chocolate mixture into the whipped egg mixture until they are just combined. Be careful not to overmix! Next, add the all-purpose flour, folding gently until no spots of flour remain. This step is crucial to maintain the fudgy consistency of your Miso Brownies.
Step 6: Fill and Bake
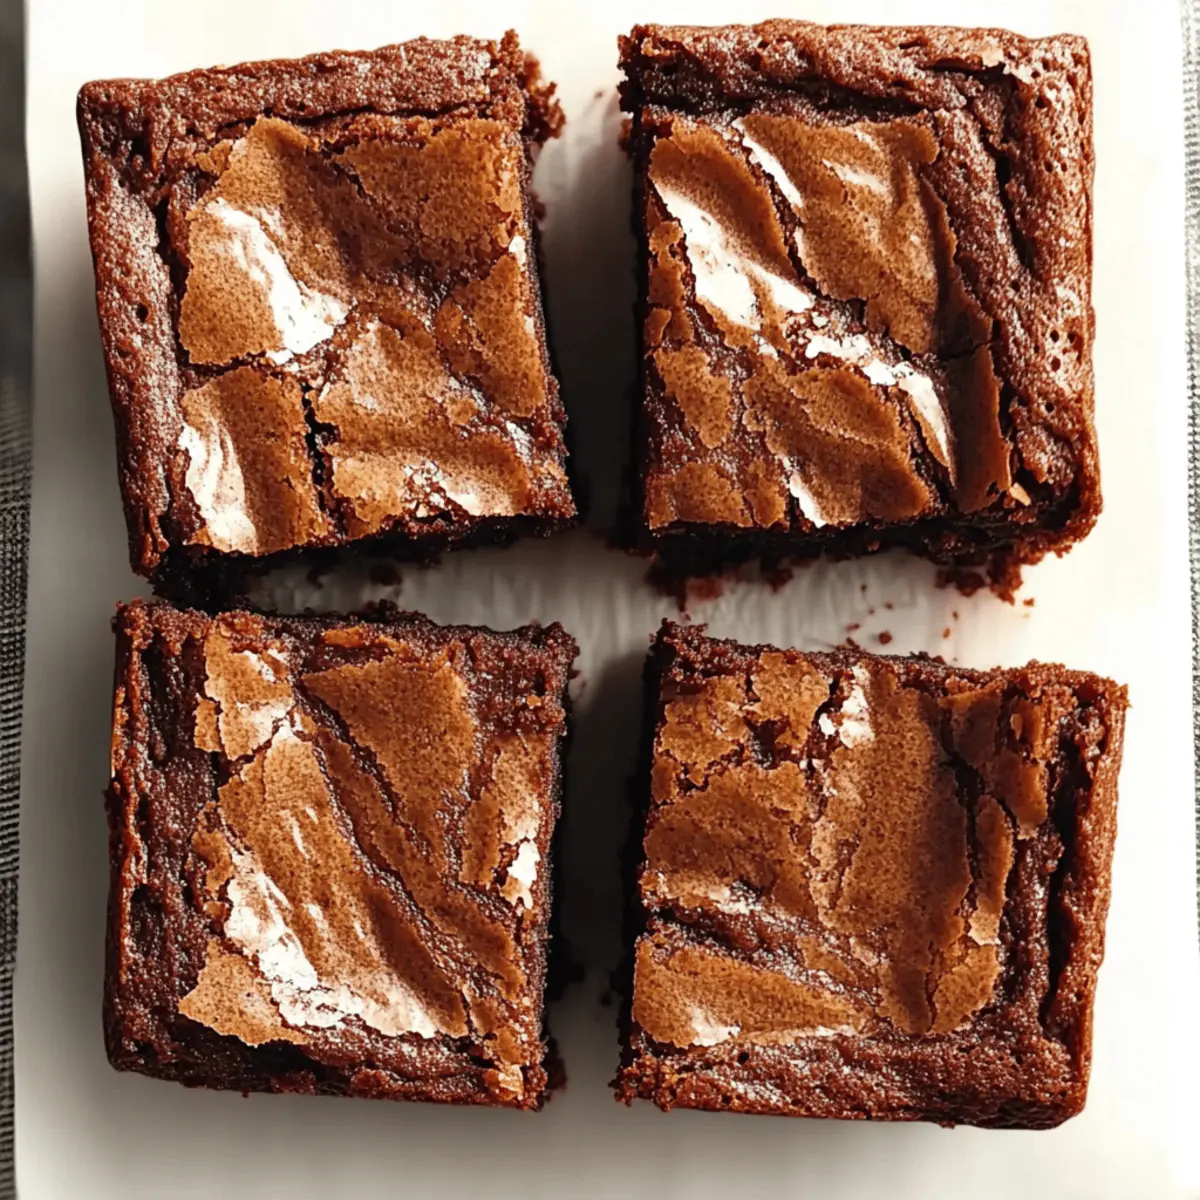
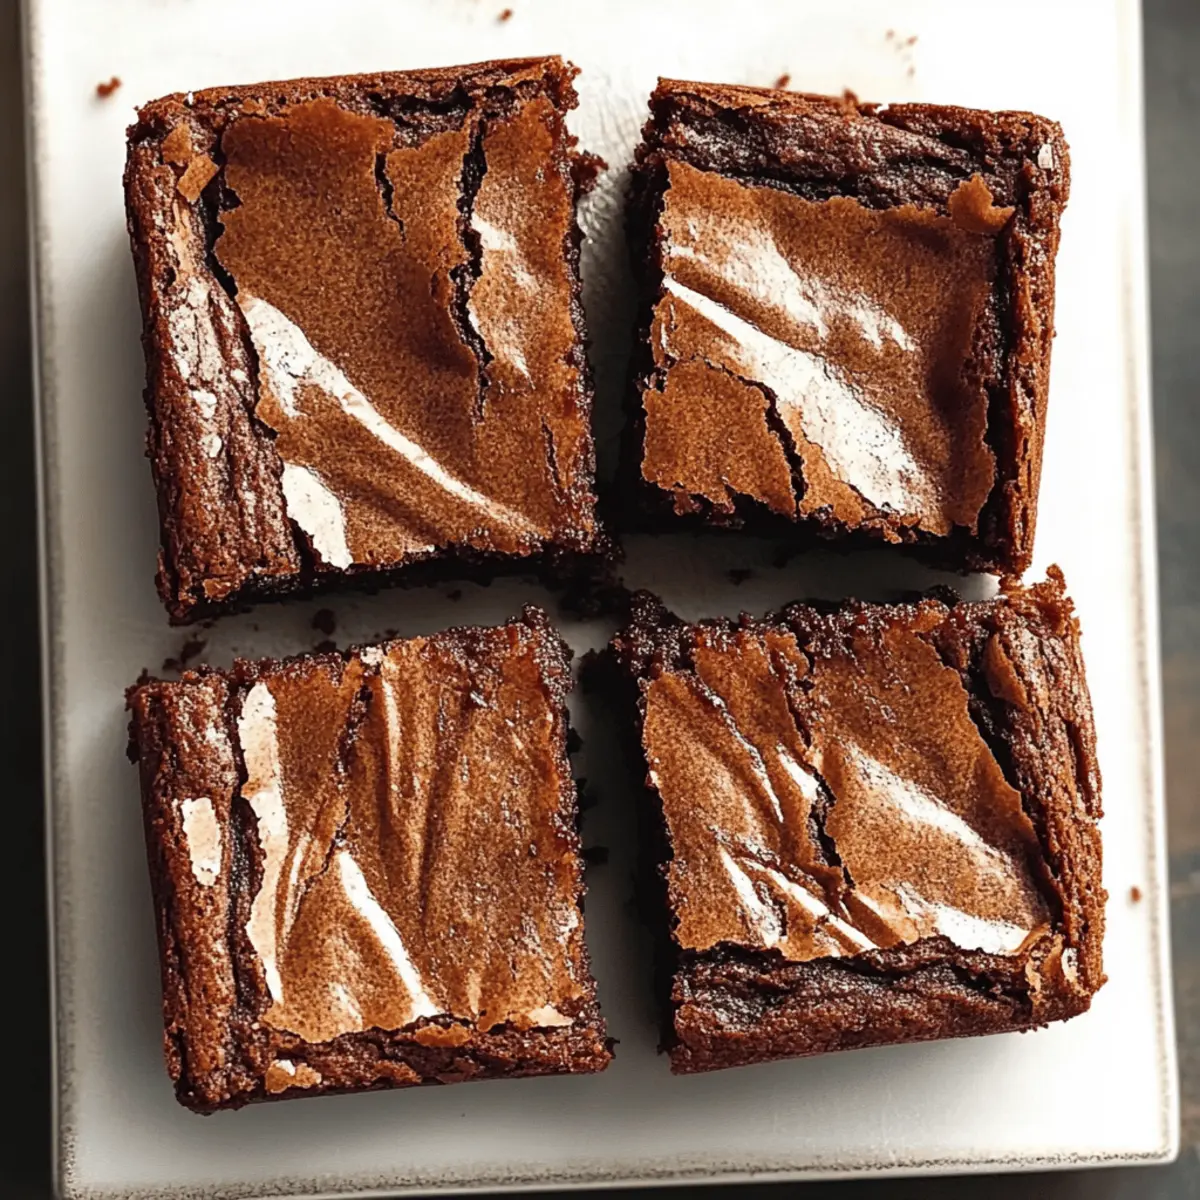
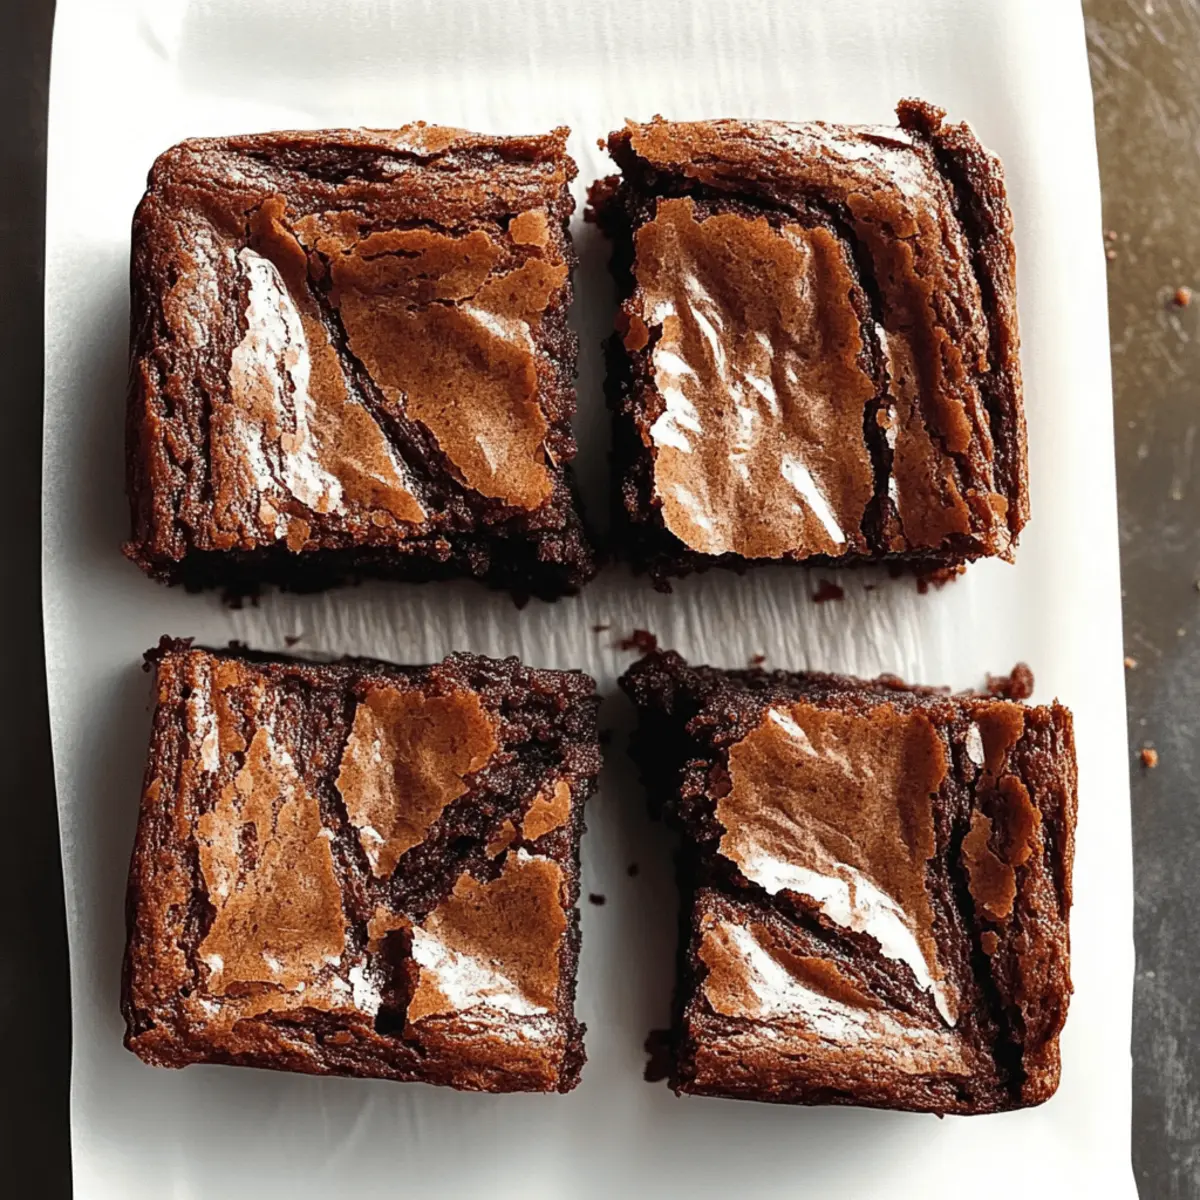
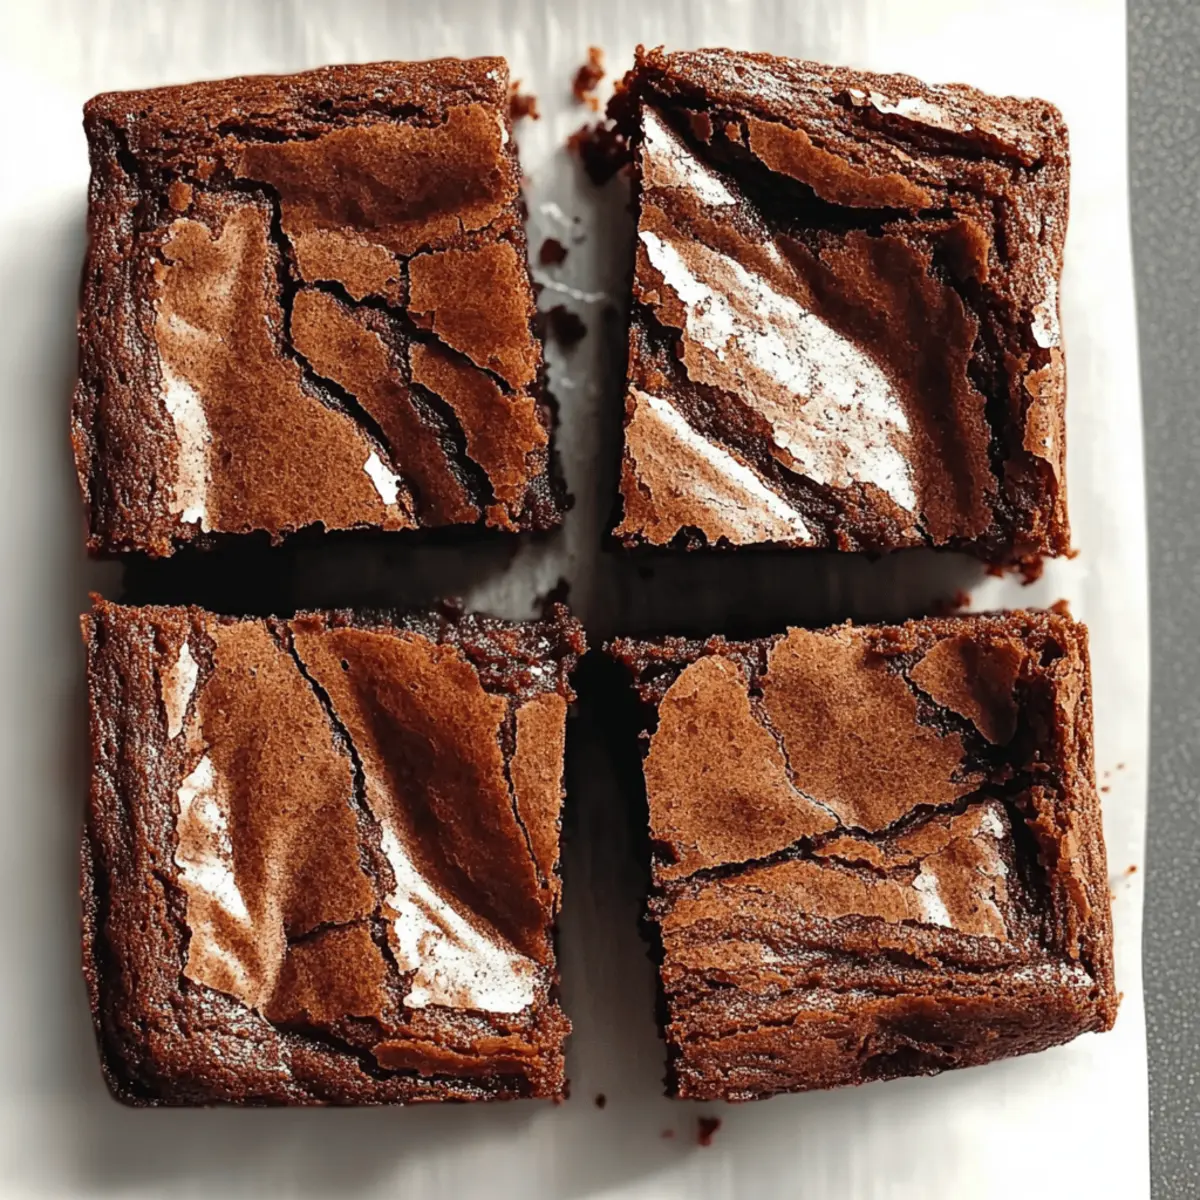
Pour the brownie batter into the prepared baking pan, smoothing the top with a spatula for an even bake. Place in the preheated oven and bake for 23-25 minutes, or until the top is shiny and the brownies are barely jiggly in the center. They will continue to firm up as they cool, creating the perfect fudgy texture.
Step 7: Cool Completely
Once baked, remove the Miso Brownies from the oven and allow them to cool in the pan on a wire rack. It’s best to let them cool completely before slicing, as this helps achieve clean cuts and ensures that they are fully set. Enjoy the enticing aroma as they cool, promising a delicious treat ahead!
What to Serve with Miso Brownies
Indulging in these fudgy delights opens the door to a world of perfect pairings that enhance every bite.
-
Vanilla Ice Cream: The creamy coldness complements the rich, fudgy texture, creating a delightful contrast. Pairing a scoop alongside your brownies adds a touch of decadence.
-
Whipped Cream: Light and airy, this topping brings balance to the dense brownies, enhancing both presentation and flavor. A dollop is all you need for a sophisticated touch.
-
Fresh Berries: Their tartness cuts through the sweetness beautifully, adding a refreshing pop of flavor that brightens each mouthful. Raspberries or strawberries elevate the experience!
-
Chocolate Sauce Drizzle: For the ultimate indulgence, drizzle warm chocolate sauce over the brownies. It intensifies the chocolate flavor and adds an irresistible gooeyness.
-
Espresso or Coffee: A cup of rich espresso or a strong brew complements the chocolate’s depth perfectly, allowing the umami notes of miso to shine through. Sip alongside your treat!
-
Nutty Crumble Topping: Toasted nuts like almonds or pistachios add a delightful crunch, contrasting wonderfully with the soft brownie texture. A sprinkle on top can elevate both taste and aesthetics.
-
Coconut Whipped Cream: For a tropical twist, serve with homemade coconut whipped cream. It offers a light, creamy texture that pairs wonderfully with the rich fudginess of the brownies.
-
Mint Sprig Garnish: A simple mint sprig can elevate the presentation and add a refreshing hint that pairs surprisingly well with the umami flavors of miso.
Expert Tips for Miso Brownies
- Room Temperature Eggs: Using eggs at room temperature helps create a smoother batter, ensuring your Miso Brownies have a better texture.
- Don’t Overmix: Mix the batter gently after adding flour; overmixing can lead to tough brownies. Keep that fudgy consistency!
- Check for Doneness: Start checking your brownies a few minutes before the timer goes off. A toothpick should come out with a few moist crumbs for the perfect fudgy texture.
- Pan Preparation: Lining your baking pan with parchment paper makes it easier to lift out the Miso Brownies once they’ve cooled. Don’t skip this step!
- Customizable Fun: Feel free to add chopped nuts or chocolate chips to tailor your Miso Brownies and keep things exciting for your taste buds!
Miso Brownies Recipe Variations
Feel free to customize your Miso Brownies and make them uniquely yours—delight in the fun of creativity!
-
Nutty Bliss: Add your favorite chopped nuts for a satisfying crunch; walnuts or pecans are perfect companions.
-
Different Miso: For varied flavor profiles, swap white miso with yellow or red miso, each adding its unique twist.
-
Tahini Twist: Use tahini instead of miso for a nut-free option that brings a creamy richness unlike any other.
-
Flavor Boost: Stir in a teaspoon of vanilla extract to elevate the aroma and enhance the overall flavor experience.
-
Extra Chocolate: Incorporate additional chocolate chips into the batter for delicious, gooey bites in every mouthful.
-
Spicy Kick: Add a pinch of cayenne pepper to introduce a surprising heat that contrasts beautifully with the sweetness.
-
Gluten-Free Option: Substitute almond or oat flour for all-purpose flour to make these brownies gluten-free while keeping them delightful.
If you’re in the mood for more unique sweets, be sure to explore my Covered Pretzel Brownies or give the classic recipe a twist with my Patriotic Star Brownies!
Make Ahead Options
These Miso Brownies are ideal for meal prep, making your busy weeknights sweeter and easier! You can prepare the brownie batter up to 24 hours in advance, allowing the flavors to meld beautifully in the refrigerator. Simply mix the chocolate and butter mixture, followed by the egg and miso mixture, and then fold in the flour. Cover tightly with plastic wrap or transfer it to an airtight container to maintain freshness. When you’re ready to bake, let the mixture sit at room temperature for a few minutes before pouring it into your prepared pan and baking. By prepping ahead, you’ll enjoy the same fudgy, delightful taste with less stress—perfect for last-minute cravings or gatherings!
Storage Tips for Miso Brownies
Room Temperature: Keep your Miso Brownies in an airtight container at room temperature for up to 3 days to maintain their fudgy texture and flavor.
Fridge: If you want them to last longer, refrigerate the brownies in an airtight container for up to 5 days; they’ll still be deliciously fudgy!
Freezer: For extended storage, freeze the brownies in a tightly sealed freezer bag or container for up to 1 month. Thaw at room temperature before serving.
Reheating: If you prefer warmed brownies, reheat in the microwave for about 10-15 seconds; enjoy that melty goodness!
Miso Brownies Recipe FAQs
How do I choose the right miso for Miso Brownies?
Absolutely! For optimal flavor, go with white miso as it offers a milder taste that complements the sweetness of chocolate. If you’re feeling adventurous, try using yellow or red miso for a bolder umami punch. Each option will provide a distinct twist to your Miso Brownies.
What’s the best way to store Miso Brownies?
Very! To keep your Miso Brownies fresh and fudgy, place them in an airtight container at room temperature for up to 3 days. For longer storage, refrigerate them in a container lined with parchment paper to maintain moisture, good for about 5 days. Enjoy them chilled, or allow to come to room temperature for the full fudge experience!
Can I freeze Miso Brownies?
Absolutely! To freeze, let your Miso Brownies cool completely, then slice them if desired. Wrap each piece tightly in plastic wrap or aluminum foil and place in a freezer-safe container. They can be frozen for up to 1 month. When you’re ready to enjoy, simply thaw them in the fridge or at room temperature overnight.
What should I do if my brownies are too dry or hard?
Oh no! If your Miso Brownies turn out too dry, it might be due to overbaking. Always check them a few minutes before the end time; they should be shiny on top and barely jiggle in the center. If you’ve already baked them and they seem dry, consider serving them with a scoop of ice cream or drizzling them with warm chocolate sauce to add moisture back.
Are Miso Brownies safe for people with nut allergies?
Very! You can easily make Miso Brownies nut-free by opting for tahini instead of miso paste, and leaving out any nuts like walnuts or pecans. Always double-check labels on your ingredients to ensure there’s no cross-contamination with allergens, especially if you’re preparing them for guests with dietary restrictions.
What can I do if I want gluten-free Miso Brownies?
Of course! To make gluten-free Miso Brownies, you can substitute the all-purpose flour with almond flour or oat flour instead. This change will not only make them gluten-free but will also give them a delightful nutty flavor. You might need to adjust the baking time slightly, so keep an eye on the brownies while they bake to achieve that perfect fudgy texture.
Miso Brownies Recipe: Indulge in Fudgy Umami Goodness
Ingredients
Equipment
Method
- Chop the dark chocolate into small pieces and place it in a medium heatproof bowl. Add cocoa and espresso powder. Set aside.
- Melt the unsalted butter in a saucepan over medium heat, stirring until golden brown. Pour over the chocolate mixture and stir until smooth.
- Preheat oven to 350°F (175°C). Line a 9x9-inch pan with parchment paper.
- In a large mixing bowl, whisk the room temperature eggs, granulated sugar, brown sugar, and white miso paste for about 5 minutes until thick and pale.
- Gently fold the chocolate mixture into the egg mixture until combined, then add flour and fold gently until no flour spots remain.
- Pour batter into the prepared pan and bake for 23-25 minutes until shiny on top and barely jiggly.
- Cool the brownies in the pan on a wire rack before slicing.