

As the autumn leaves swirl, I can’t help but recall the first Halloween gathering where I made these Spooky Skull Potatoes. Transforming creamy mashed potatoes into playful skull shapes not only ignited laughter around the table but also brought out my inner child. This Halloween recipe is a fun twist on a classic, perfect for impressing guests young and old. It’s so simple to prepare yet delivers a surprisingly striking presentation that will surely be the highlight of your festive feast. Plus, these vegetarian-friendly delights can be prepped ahead of time, freeing you up to enjoy the festivities. Are you ready to add a dash of creepiness to your holiday meal?

Why will you love Spooky Skull Potatoes?
Creepy Creativity: This recipe turns classic mashed potatoes into a playful, spooky shape that adds a fun twist to any Halloween gathering.
Easy Preparation: Even beginners can master these skulls with just a few simple steps.
Vegetarian-Friendly: Perfect for all guests, these delightful potatoes cater to various dietary preferences.
Customizable Design: Feel free to experiment with different molds or food coloring for unique themes! Check out our Garlic Butter Potatoes for more creative side ideas.
Make-Ahead Magic: Prep these ahead of time, so you can focus on other Halloween delights. These treats are bound to be the crowd-pleaser at your spooky feast!
Spooky Skull Potatoes Ingredients
For the Potatoes
• Large Russet Potatoes – The base for the creamy mashed potatoes; Yukon Gold can provide a richer flavor.
• Heavy Cream – Ensures a luxurious texture; substitute with milk or a dairy-free option if desired.
• Unsalted Butter – Adds creaminess; can be replaced with margarine or olive oil for a dairy-free version.
• Salt and Pepper – Essential for flavor; adjust to taste, or consider using fresh herbs for an extra layer of taste.
For Decoration
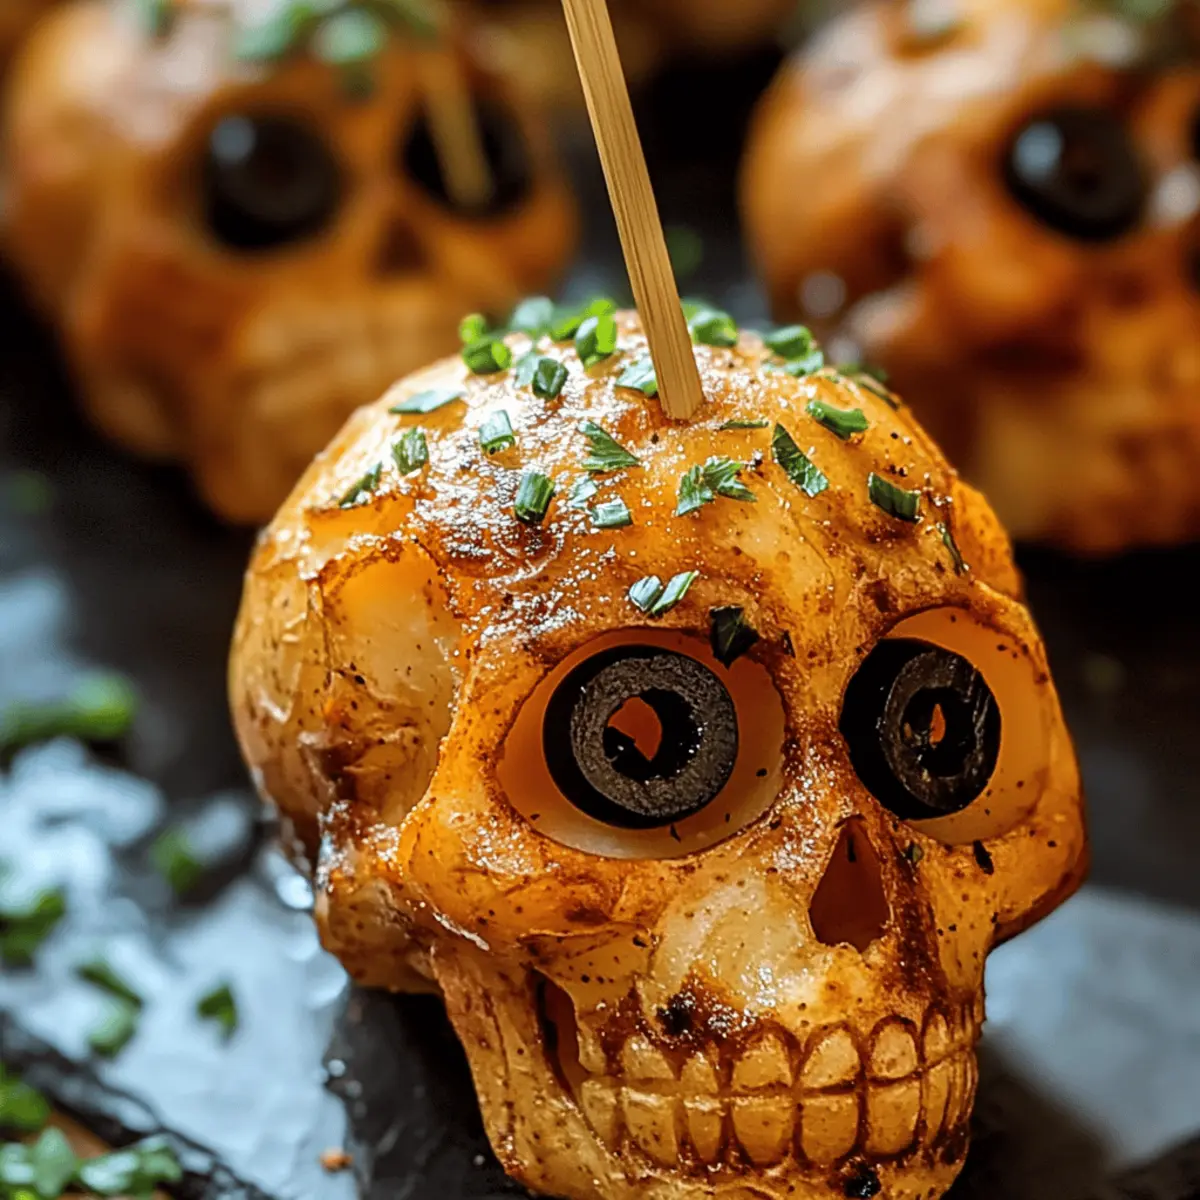
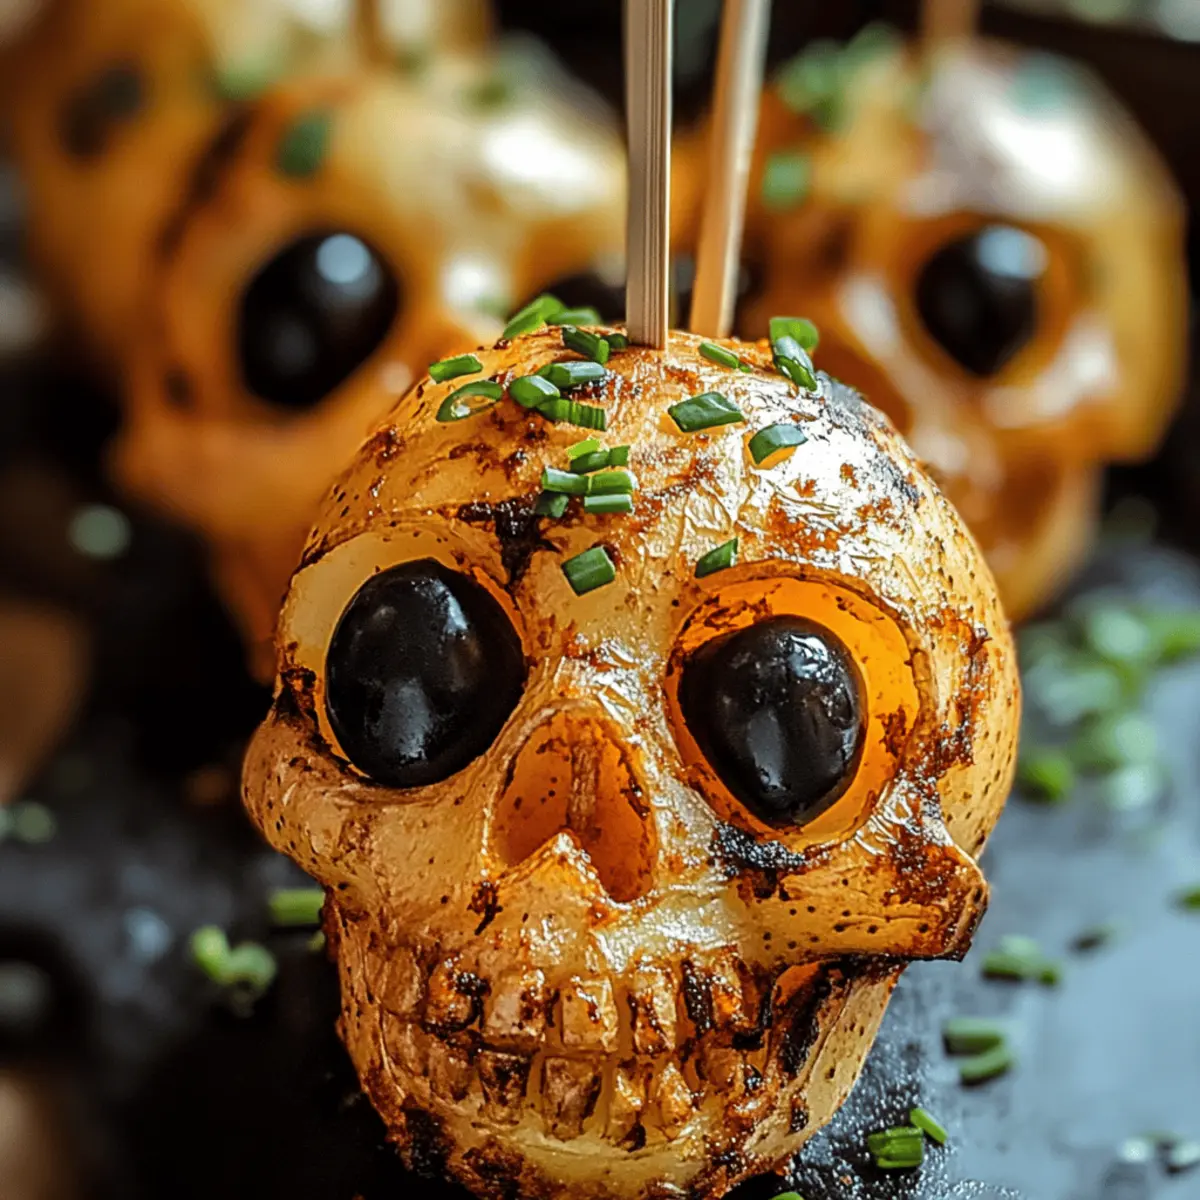
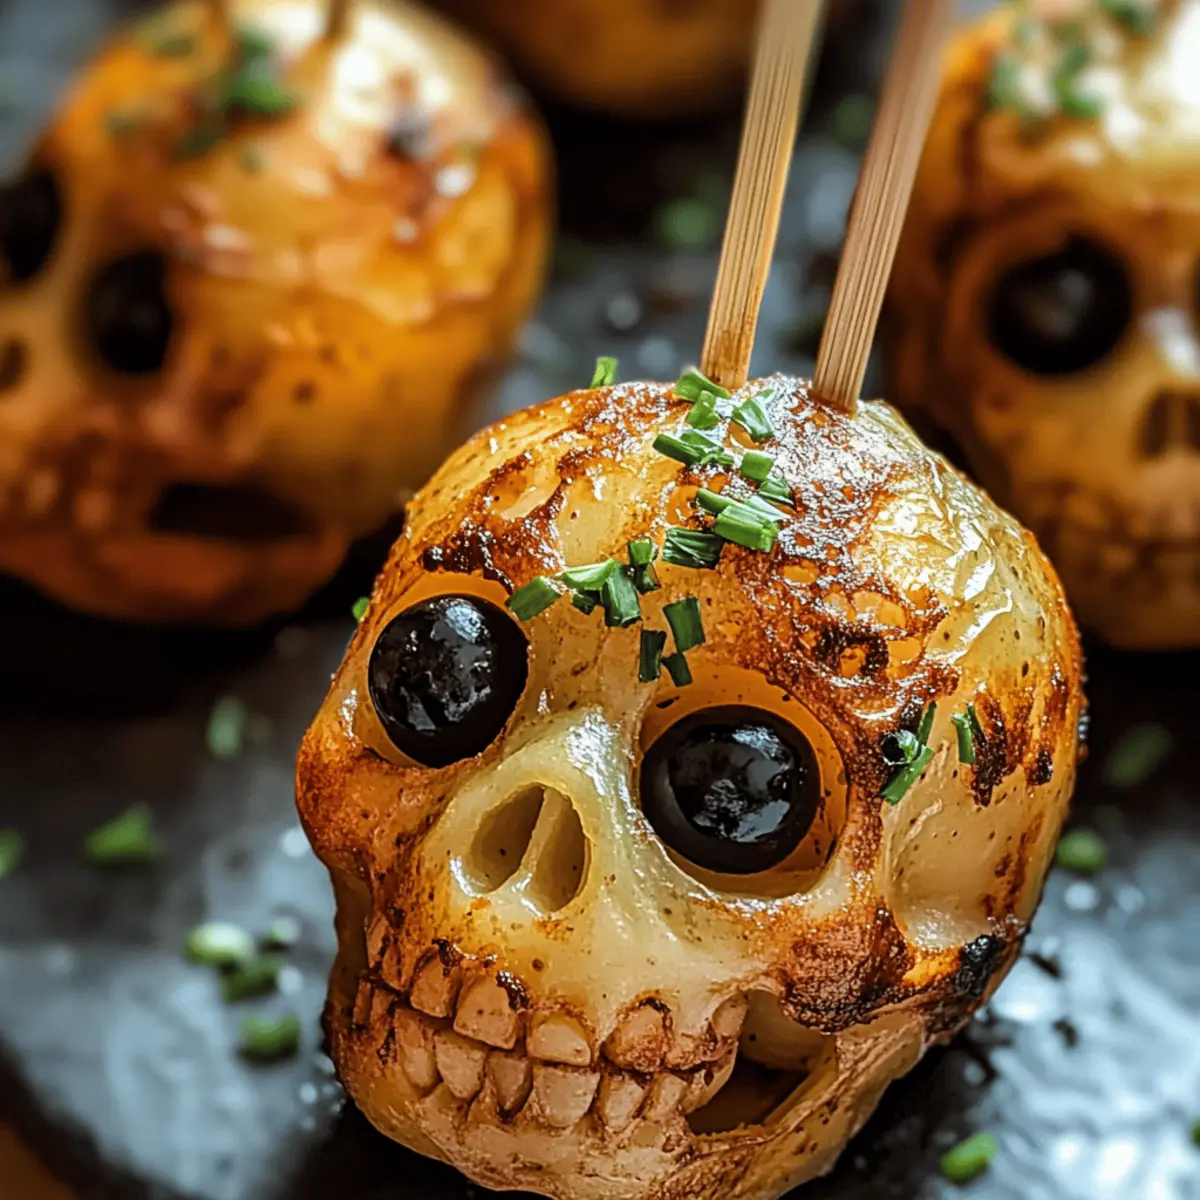
• Black Olives – Perfect for the eerie eyes of the skulls; pitted green olives or cherry tomatoes make great alternatives.
• Fresh Chives or Green Onions (optional) – Adds a pop of color and freshness; feel free to omit if you don’t have them on hand.
Step‑by‑Step Instructions for Spooky Skull Potatoes
Step 1: Prepare Potatoes
Begin by peeling and chopping 4 large russet potatoes into 2-inch chunks. Place them in a large pot and cover with salted cold water. Bring the water to a boil over medium-high heat, then reduce the heat and let it simmer for about 15-20 minutes. Test the potatoes with a fork; they should be tender and easily pierced.
Step 2: Mash
Once the potatoes are fork-tender, drain them well and return them to the pot. Add in ½ cup of heavy cream, ¼ cup of melted unsalted butter, along with salt and pepper to taste. Using a potato masher, mash the mixture until it’s smooth and creamy, ensuring there are no lumps, as this will help create your Spooky Skull Potatoes’ delightful texture.
Step 3: Shape into Skulls
After mashing, take a skull mold or use your hands to shape the creamy potato mixture into fun skull forms, packing it tightly to maintain their shape. Place each formed skull on a parchment-lined baking sheet. This playful presentation makes the spooky theme of the potatoes come to life, ready for baking!
Step 4: Bake
Preheat your oven to 375°F (190°C). Once the oven is ready, put the baking sheet with the skull potatoes inside and bake for 15-20 minutes. Keep an eye on them until the tops turn golden brown and crispy, adding a delightful crunch to your spooky skulls that will complement their creamy texture.
Step 5: Decorate
Once baked, remove the Spooky Skull Potatoes from the oven. Carefully add black olives as eyes for each skull for an eerie touch. If desired, garnish with fresh chives or green onions for an extra pop of color. Serve the potatoes warm at your Halloween gathering for a striking and playful centerpiece!
How to Store and Freeze Spooky Skull Potatoes
Refrigerator: Store leftover Spooky Skull Potatoes in an airtight container for up to 3 days. Make sure they cool down completely before sealing to preserve their creaminess.
Freezer: For longer storage, freeze the skull potatoes before baking. Wrap each skull in plastic wrap and then place them in a freezer-safe bag. They can last up to 1 month.
Reheating: To reheat, thaw in the refrigerator overnight, then bake in a preheated oven at 375°F (190°C) for about 15 minutes until heated through and the tops are crispy again.
Make-Ahead Tip: You can prepare the skull shapes a day in advance and refrigerate them until you’re ready to bake, saving you time on the day of your Halloween celebration!
Expert Tips for Spooky Skull Potatoes
-
Perfect Potatoes: Make sure to use large russet potatoes for a creamy base; they yield the best results. Substituting with Yukon Gold can add extra richness if desired.
-
Avoid Overcooking: Test your potatoes with a fork to avoid a mushy texture. Overcooked potatoes can lead to a less desirable consistency in your Spooky Skull Potatoes.
-
Tight Packing: When shaping the mashed potatoes into skulls, pack them tightly into molds to ensure they hold their shape during baking. This prevents any collapse when cooked.
-
Seasoning Check: Always taste the mashed potatoes before shaping. Adjust flavors with salt and pepper to ensure each bite of your Spooky Skull Potatoes is delicious.
-
Decoration Flexibility: Feel free to use different decorative items for the skulls’ eyes, like green olives or cherry tomatoes; they can create equally fun and spooky effects!
What to Serve with Spooky Skull Potatoes
Enhance your Halloween feast with delightful sides that complement the playful spirit of these spooky skulls.
- Crispy Brussels Sprouts: Roasted to perfection, these add a crunchy texture and slightly bitter flavor that pairs wonderfully with creamy potatoes.
- Pumpkin Soup: A warm, velvety soup that introduces a seasonal element, perfect for warming the soul during chilly October evenings.
- Garlic Bread Sticks: Soft and buttery, these are great for dipping in that delicious pumpkin soup, creating a comfortable and comforting meal.
- Roasted Beet Salad: Earthy beets bring vibrant color and a hint of sweetness, providing a beautiful contrast to the spooky presentation of the potatoes.
- Sautéed Green Beans: Tender-crisp beans add freshness and a pop of green, balancing the richness of the potatoes while enhancing your holiday table.
- Cranberry Sauce: A tart and sweet addition that brings a festive zing to your meal; it complements both the potatoes and any protein you might serve.
- Autumn Spiced Apple Cider: A warm, spiced drink with comforting flavors of cinnamon and nutmeg, perfect for sipping alongside your Halloween spread.
- Chocolate Mousse Cups: End on a sweet note with rich and creamy chocolate mousse, adding a touch of decadence to your spooky holiday meal.
Make Ahead Options
Preparing these Spooky Skull Potatoes ahead of time is a fantastic way to save time and reduce stress during your Halloween festivities! You can shape the mashed potato skeletons and refrigerate them for up to 24 hours before baking. Simply follow the instructions to prepare and mash the potatoes, then form them into skulls and place on a parchment-lined baking sheet. Cover tightly with plastic wrap to prevent dryness. When you’re ready to serve, preheat your oven to 375°F (190°C) and bake the skulls for 15-20 minutes until golden brown. This allows you to enjoy a fun, delicious centerpiece with minimal effort on the big day!
Spooky Skull Potatoes: Fun Twists Await!
Embrace the creativity in your kitchen and explore the delightful possibilities of customizing your Spooky Skull Potatoes!
- Dairy-Free: Swap heavy cream for coconut milk to create a light and creamy texture that’s entirely dairy-free.
- Flavor Explosion: Mix in roasted garlic or caramelized onions for an irresistible, savory twist that adds depth to your skulls.
- Veggie Boost: Stir in steamed broccoli or spinach to sneak in some greens, creating a fun and nutritious option that both kids and adults will adore.
- Spice it Up: Add crushed red pepper flakes for a touch of heat that will make your spicy skull potatoes unforgettable.
- Fun Shapes: Experiment with different molds, like pumpkins or bats, for a creative spin on your festive treats. This adds excitement to your Halloween festivities!
- Colorful Presentation: Incorporate food coloring into the mashed potatoes for vibrant hues, creating a playful look that captivates your guests. Check out our Garlic Butter Potatoes to see how you can add bursts of color to your table!
- Textural Contrast: Fold in crispy bacon bits or crunchy fried onions to add a delightful crunch to the creamy mashed potatoes.
- Can’t Resist Cheese: Mix in shredded cheddar or mozzarella for a gooey surprise that will have everyone asking for seconds!
Spooky Skull Potatoes Recipe FAQs
What type of potatoes should I use for Spooky Skull Potatoes?
Absolutely! Large Russet potatoes work best for creamy mashed potatoes. If you’re looking for something with a buttery flavor, Yukon Gold potatoes are a fantastic alternative.
How should I store leftover Spooky Skull Potatoes?
You can store any leftover Spooky Skull Potatoes in an airtight container in the refrigerator for up to 3 days. Make sure they cool completely before sealing to maintain their creamy texture!
Can I freeze Spooky Skull Potatoes?
Yes, you can freeze these delightful skulls before baking! Wrap each shaped skull tightly in plastic wrap and place them in a freezer-safe bag. They’ll last up to 1 month. When you’re ready to enjoy, simply thaw them in the refrigerator overnight and bake as directed!
What if my mashed potatoes turn out lumpy?
No worries! If your mashed potatoes are lumpy, it’s usually due to not mashing them thoroughly or using undercooked potatoes. To fix, simply return them to the pot, mash them again with a splash of cream or milk, and keep mixing until smooth and creamy.
Are there any dietary considerations for Spooky Skull Potatoes?
Very! This recipe is vegetarian-friendly and can be easily modified for dietary needs. For a dairy-free version, feel free to substitute heavy cream and butter with plant-based alternatives. Additionally, check for any allergies regarding olives or other decorative ingredients.
How can I customize the design of my Spooky Skull Potatoes?
The more the merrier! You can use food coloring to tint the potato mixture for a fun vibrant look. Another option is to use various shaped molds—like pumpkins or ghosts—for unique themes. Just let your creativity shine!
Spooky Skull Potatoes: Creamy Halloween Fun for Everyone
Ingredients
Equipment
Method
- Peel and chop the large russet potatoes into 2-inch chunks. Place them in a large pot and cover with salted cold water. Bring to a boil, then reduce heat and simmer for about 15-20 minutes until tender.
- Drain the potatoes and return them to the pot. Add heavy cream, melted unsalted butter, along with salt and pepper to taste. Mash until smooth and creamy, ensuring no lumps.
- Shape the creamy potato mixture into skull forms using a skull mold or your hands. Pack tightly to maintain shape and place on a parchment-lined baking sheet.
- Preheat the oven to 375°F (190°C). Bake the skull potatoes for 15-20 minutes until the tops are golden brown and crispy.
- Remove from the oven and add black olives as eyes for each skull. Garnish with fresh chives or green onions if desired and serve warm.