

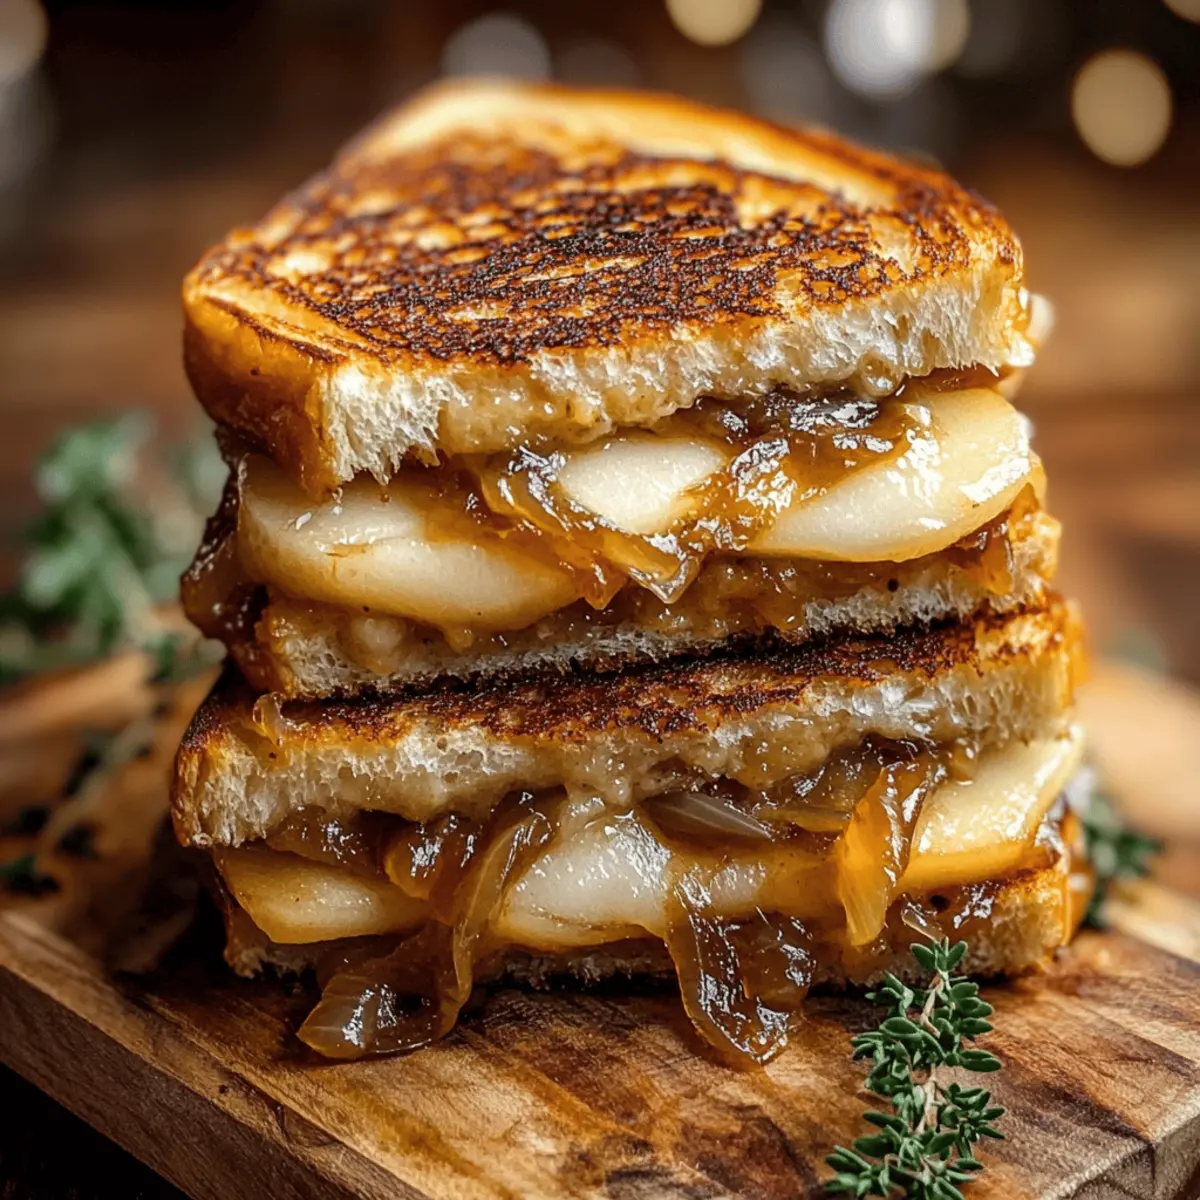
In a cozy kitchen, I once found myself on the brink of a culinary adventure when inspiration struck—a Pear & Apple Grilled Cheese with Caramelized Onions. The idea of combining sweet fruit with savory cheese had my taste buds dancing with anticipation. This quick meal not only brings comfort but also celebrates the simplicity of ingredients, perfect for anyone looking to step away from fast food or impress with minimal effort. In just 35 minutes, you’ll create a gourmet sandwich that’s crispy on the outside, gooey on the inside, and bursting with delightful flavors. Ready to transform your lunch or dinner into something truly special? Let’s dive in!

Why is this recipe so delightful?
Quick and Easy: In just 35 minutes, you can enjoy this gourmet grilled cheese, perfect for busy weeknights.
Savory Sweetness: The combination of caramelized onions, pears, and apples brings a harmonious blend of flavors your taste buds will love.
Comforting Texture: Picture a crispy exterior giving way to a gooey, rich cheddar center—pure heaven!
Versatile Pairing: This dish pairs beautifully with a refreshing side salad or a warm tomato soup, making it an all-around winner!
Simple Ingredients: Using ingredients you likely have at home, this recipe proves that delicious meals don’t have to be complicated.
Crowd Pleaser: Whether for a family dinner or a cozy lunch, this Pear & Apple Grilled Cheese will impress and satisfy everyone, just like our Grilled Steak Bowl or Mango Coconut Cheesecake!
Pear & Apple Grilled Cheese Ingredients
• This delightful recipe comes together with simple ingredients that will spark your taste buds!
For the Sandwich
- Sourdough Bread – Acts as the sturdy foundation; feel free to switch to whole wheat or gluten-free for a unique twist.
- Unsalted Butter – Essential for grilling to perfection; substitute with olive oil if you’re looking for a lighter option.
- Pear (1 medium, thinly sliced) – Infuses sweetness and lovely texture; any firm variety like Bartlett or Bosc will do.
- Apple (1 medium, thinly sliced) – Adds a tart note that balances the sweetness wonderfully; choose Granny Smith or Honeycrisp for the best results.
- Onion (1 medium, thinly sliced) – Elevates the flavor profile through caramelization; yellow or sweet onions are ideal choices.
- Shredded Sharp Cheddar Cheese (1 cup) – Provides a creamy, rich flavor that perfectly contrasts with the fruit; mozzarella or gouda can be great alternatives.
- Balsamic Vinegar (1 tablespoon) – Enhances caramelization and adds a touch of acidity; apple cider vinegar works as a lovely substitute.
- Salt and Black Pepper – Essential for seasoning; adjust to your taste preference.
Optional Additions
- Cinnamon – Sprinkle a bit on apple slices for an extra layer of flavor.
- Spinach or Arugula – Add for a nutritious boost and a pop of color to your sandwich.
This Pear & Apple Grilled Cheese with Caramelized Onions makes for a comforting and satisfying meal, whether it’s for a weekday lunch or a cozy dinner!
Step‑by‑Step Instructions for Pear & Apple Grilled Cheese With Caramelized Onions
Step 1: Caramelize the Onions
In a large skillet over medium heat, melt 1 tablespoon of unsalted butter. Add thinly sliced onions along with a pinch of salt, stirring occasionally. Cook for about 10 minutes until the onions are golden brown and fragrant. To enhance their flavor, stir in 1 tablespoon of balsamic vinegar and cook for another 2-3 minutes until the mixture becomes sticky and sweet. Once caramelized, set them aside.
Step 2: Prepare the Sandwich Layers
In the same skillet, melt the remaining tablespoon of butter over medium-low heat. Take two slices of sourdough bread and layer half of the shredded sharp cheddar cheese on each slice. On one slice, pile on the caramelized onions, followed by thinly sliced apple and pear. Finish by adding the remaining cheese on top and close the sandwich with the second slice of bread.
Step 3: Grill the Sandwiches
Carefully place the assembled Pear & Apple Grilled Cheese in the skillet. Grill for 4-5 minutes, pressing down gently with a spatula until the bottom is golden brown and crispy. Keep an eye on it to ensure it doesn’t burn. Once nicely browned, flip the sandwich and grill the other side for an additional 4-5 minutes, allowing the cheese to melt thoroughly.
Step 4: Serve the Sandwiches
After grilling, remove the sandwiches from the skillet and let them cool for a minute. This helps the cheese set slightly, making it easier to slice. Cut each sandwich in half diagonally, revealing the beautiful layers of fruit and melted cheese inside. Serve warm for a comforting and delightful meal, perfect for any time of day.
Storage Tips for Pear & Apple Grilled Cheese
Room Temperature: Enjoy your Pear & Apple Grilled Cheese immediately for the best taste! If left out, it can sit at room temperature for up to 2 hours.
Fridge: Leftovers should be stored in an airtight container and can be kept in the fridge for up to 3 days. Reheat gently to maintain crispness.
Freezer: You can freeze the grilled cheese sandwiches for up to a month. Wrap tightly in plastic wrap and then foil for best results.
Reheating: To reheat, use a toaster oven or skillet over medium heat, allowing the exterior to crisp up again while the cheese melts beautifully.
Expert Tips for Pear & Apple Grilled Cheese
• Caramelization Secret: Cook onions over medium heat for even caramelization—high heat burns them and creates bitterness.
• Choosing Fruits: Use firm pears and tart apples for the best texture and flavor balance in your Pear & Apple Grilled Cheese.
• Crispy Perfection: Ensure your skillet is preheated before grilling the sandwich to achieve that perfect crispy outer layer.
• Don’t Overstuff: While it’s tempting to add more fillings, keep it balanced to ensure everything melts beautifully without spilling out.
• Grilled Cheese Variations: Experiment with different cheese combinations like mozzarella or gouda for a unique twist in your grilled cheese experience!
Make Ahead Options
These Pear & Apple Grilled Cheese with Caramelized Onions are perfect for meal prep enthusiasts! You can caramelize the onions and store them in an airtight container in the refrigerator up to 3 days in advance. Additionally, slice the pears and apples ahead of time, but be sure to toss them with a little lemon juice to prevent browning. When you’re ready to enjoy this delightful sandwich, simply layer the prepped ingredients with cheese between slices of bread and grill as instructed. This approach allows you to have a comforting meal ready to go on busy weeknights, bringing gourmet quality to your table with minimal effort!
Pear & Apple Grilled Cheese Variations
Feel free to make this recipe your own by trying out some delicious twists that cater to your tastes!
- Cheese Mix: Combine sharp cheddar with mozzarella or gouda for a creamier texture.
- Add Greens: Toss in some fresh spinach or arugula for a pop of color and added nutrients.
- Spicy Kick: Add jalapeño slices or a sprinkle of red pepper flakes for a flavorful heat boost.
- Fruit Fusion: Swap in thinly sliced figs or peaches to add a unique sweetness to your sandwich.
- Herb Infusion: Sprinkle fresh thyme or rosemary on the caramelized onions for an herbaceous flavor.
- Pesto Spread: Spread a thin layer of pesto on the bread before assembling for a rich, herby taste.
- Lunch Transformation: Cut the sandwich into cubes for a delightful appetizer or use as a filling in a quesadilla.
- Pairings: Serve alongside a cup of tomato soup or a fresh salad for a balanced meal experience.
What to Serve with Pear & Apple Grilled Cheese with Caramelized Onions
Enhance your culinary experience by pairing your delightful sandwich with complementary sides and beverages.
- Crispy Side Salad: A fresh salad with mixed greens, cucumbers, and a light vinaigrette adds crunch and contrast to the richness of the grilled cheese.
- Roasted Tomato Soup: A classic pairing that adds warmth and comfort; the acidity balances the sweetness of the sandwich beautifully.
- Sweet Potato Fries: Crispy and slightly sweet, these fries provide a lovely textural contrast and a pop of color on the plate.
- Herbed Quinoa: Nutty and light, this grain dish infuses herbaceous notes that complement the flavorful sandwich without overwhelming it.
- Sparkling Cider: A bubbling drink enhances the meal while echoing the fruity elements in the grilled cheese, making every bite feel celebratory.
- Apple Pie: For a sweet ending, the warm spiciness of apple pie after the savory sandwich offers a comforting nod to classic flavors.
- Iced Herbal Tea: A refreshing choice; the natural sweetness and coolness cleanse the palate between bites, keeping the meal balanced.
- Cheese Platter: For a sophisticated touch, a selection of cheeses can encourage mingling and exploration, resonating with the sandwich’s personality.
Pear & Apple Grilled Cheese with Caramelized Onions Recipe FAQs
What type of bread works best for this recipe?
Absolutely! Sourdough bread is a fantastic choice for its sturdy structure and tangy flavor that pairs well with the sweet elements. However, you can also use whole wheat for added nutrition or gluten-free bread if you need a gluten-free option. Just ensure the bread is sturdy enough to hold the fillings without falling apart!
How should I store leftovers from the Pear & Apple Grilled Cheese?
Leftovers can be stored in an airtight container in the fridge for up to 3 days. When you’re ready to enjoy again, I recommend reheating them in a toaster oven or skillet. This way, you can maintain that delicious crispy exterior while warming the gooey cheese inside.
Can I freeze the Pear & Apple Grilled Cheese sandwiches?
Yes, you can freeze these delectable sandwiches! Wrap them tightly in plastic wrap and then in aluminum foil to protect against freezer burn. They will keep well for up to 3 months. When you want to enjoy one, simply thaw in the fridge overnight and reheat gently in a skillet or toaster oven.
What if my onions are burning while caramelizing?
If you find that your onions are browning too quickly, reduce the heat! It’s essential to cook them low and slow, so they caramelize nicely without turning bitter. If they do start to burn, you can add a splash of water to the skillet to help them along and adjust the heat.
Are there any dietary considerations for this recipe?
Yes! This recipe is vegetarian-friendly, but if you have a dairy allergy, you can substitute the cheese with dairy-free alternatives and use olive oil instead of butter for grilling. Additionally, those following a low-carb diet could try replacing the bread with slices of roasted vegetables or a low-carb wrap. Always check your ingredient labels to ensure they meet your dietary needs!
Can I add other ingredients to this grilled cheese?
Very! If you want to jazz it up further, consider adding leafy greens like spinach or arugula for extra nutrition. You might also sprinkle cinnamon on the apple slices before assembling, which adds a lovely flavor twist! The more the merrier in flavor combinations—experiment and make it your own!
Pear & Apple Grilled Cheese With Caramelized Onions Magic
Ingredients
Equipment
Method
- In a large skillet over medium heat, melt 1 tablespoon of unsalted butter. Add thinly sliced onions with a pinch of salt. Cook for about 10 minutes until golden brown. Stir in 1 tablespoon of balsamic vinegar and cook for another 2-3 minutes until sticky and sweet.
- In the same skillet, melt the remaining tablespoon of butter. Layer half of the shredded cheddar on two slices of sourdough bread. Add caramelized onions, sliced apple and pear on one slice, then top with remaining cheese and close the sandwich.
- Place the sandwich in the skillet and grill for 4-5 minutes, pressing down with a spatula until golden brown. Flip and grill the other side for another 4-5 minutes.
- Remove sandwiches from the skillet and let cool for a minute. Cut diagonally and serve warm.