

Introduction to Chocolate Peanut Butter Crunch Bars
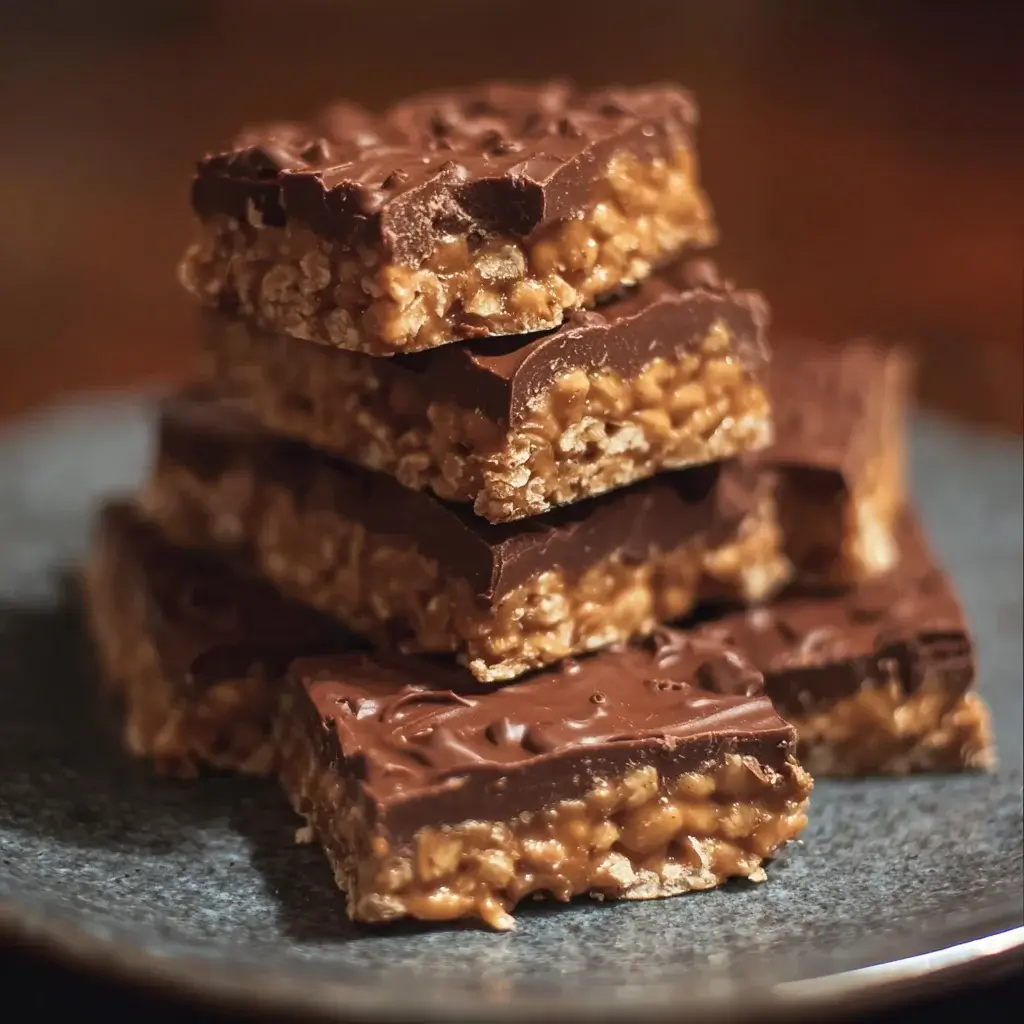
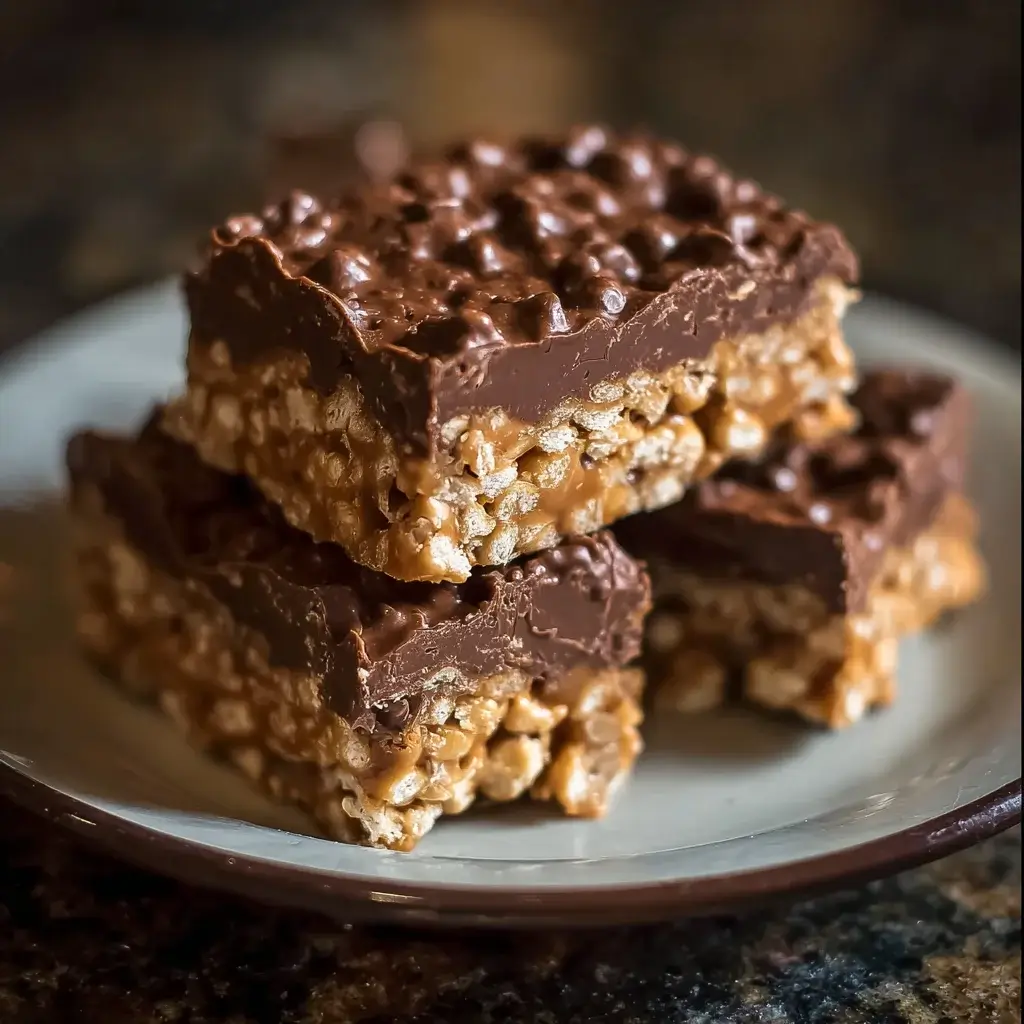
These Chocolate Peanut Butter Crunch Bars are the kind of treat you can make on a whim and enjoy all week long—if they last that long. Featuring a rich peanut butter base, a crispy, crunchy texture, and a thick layer of silky chocolate on top, they’re everything you love about a candy bar, minus the preservatives. With no baking required and only a handful of ingredients, this recipe is a go-to for when cravings strike or when you need a quick dessert that hits the spot without much effort.
Why You’ll Love This Chocolate Peanut Butter Crunch Bars
-
Fast and foolproof: No baking, no melting disasters, just mix and chill.
-
Crunch factor: Cereal or puffed rice gives them an irresistible texture.
-
Sweet and salty balance: Rich peanut butter and chocolate with just the right kick of salt.
-
Freezer-friendly: Make a batch and store extras for an emergency treat.
-
Great for all ages: Kids love them, adults sneak them.
Ingredients for Chocolate Peanut Butter Crunch Bars
Below are the ingredients you’ll need to create these delightful Chocolate Peanut Butter Crunch Bars:
- Rolled oats: These provide a hearty base and a chewy texture, making the bars filling and satisfying.
- Natural peanut butter: Creamy and rich, it adds that classic peanut flavor. You can also use almond butter or sunflower seed butter for a twist.
- Honey or maple syrup: Both serve as natural sweeteners, binding the ingredients together while adding a touch of sweetness.
- Chocolate chips: The star of the show! They melt slightly and create pockets of chocolatey goodness throughout the bars.
- Crispy rice cereal: This adds a delightful crunch, balancing the creaminess of the peanut butter and chocolate.
- Vanilla extract: A splash of this enhances the overall flavor, making each bite even more delicious.
- Salt: Just a pinch elevates the flavors, bringing out the sweetness and richness of the other ingredients.
For those who want to get creative, consider drizzling melted chocolate on top before refrigerating for an extra indulgent touch. You can find all the exact measurements at the bottom of the article, ready for printing!
How to Make Chocolate Peanut Butter Crunch Bars
Creating these Chocolate Peanut Butter Crunch Bars is a breeze! Follow these simple steps, and you’ll have a delicious snack ready in no time. Let’s get started!
Step 1: Mix the Base Ingredients
In a large mixing bowl, combine the rolled oats, natural peanut butter, honey (or maple syrup), vanilla extract, and salt. Stir until everything is smooth and well blended. This mixture is the heart of your bars, so make sure it’s mixed thoroughly!
Step 2: Add Crunchy Elements
Now, gently fold in the chocolate chips and crispy rice cereal. This is where the magic happens! The chocolate chips will melt slightly, creating pockets of gooey goodness, while the crispy rice cereal adds that satisfying crunch. Make sure everything is evenly distributed for the best flavor in every bite.
Step 3: Prepare the Baking Dish
Line an 8×8-inch baking dish with parchment paper. This makes it super easy to lift the bars out later. Leave a little overhang on the sides; it’s a game-changer when it’s time to cut your bars!
Step 4: Press the Mixture
Pour the mixture into the prepared baking dish. Use a spatula or your hands to press it down firmly. You want to create an even layer, so don’t be shy about applying some pressure. This step ensures your bars hold together nicely once set.
Step 5: Refrigerate to Set
Pop the dish into the refrigerator for at least 1 hour. This allows the bars to firm up and makes them easier to cut. While you wait, you can daydream about how delicious they’ll be!
Step 6: Cut and Store
Once set, lift the bars out of the dish using the parchment paper. Place them on a cutting board and slice them into squares or rectangles. Store any leftovers in an airtight container in the refrigerator for up to a week. Trust me, they won’t last that long!
Tips for Success
- Use natural peanut butter for a creamier texture and better flavor.
- Don’t skip the refrigeration step; it’s crucial for the bars to hold together.
- Press the mixture firmly into the dish to ensure a solid bar.
- Experiment with different add-ins like nuts or dried fruit for variety.
- Store in an airtight container to keep them fresh and delicious.
Equipment Needed
- Mixing bowl: A large bowl is essential. A sturdy pot can work in a pinch.
- Spatula: Use a rubber spatula for mixing. A wooden spoon is a great alternative.
- Baking dish: An 8×8-inch dish is ideal. Any similar-sized dish will do.
- Parchment paper: This helps with easy removal. Aluminum foil can be used if needed.
Variations
- Nut-Free Option: Substitute peanut butter with sunflower seed butter for a nut-free version that’s just as tasty.
- Protein Boost: Add a scoop of your favorite protein powder to the mixture for an extra nutritional punch.
- Fruit Infusion: Mix in dried fruits like cranberries or raisins for a chewy texture and added sweetness.
- Dark Chocolate Delight: Use dark chocolate chips instead of milk chocolate for a richer flavor.
- Spiced Up: Add a pinch of cinnamon or a dash of cayenne pepper for a unique twist that adds warmth and depth.
Serving Suggestions
- Pair these Chocolate Peanut Butter Crunch Bars with a glass of cold milk for a classic combo.
- Serve alongside fresh fruit like bananas or strawberries for a refreshing contrast.
- For a fun presentation, stack the bars on a colorful plate and drizzle with melted chocolate.
- Enjoy them as a post-workout snack to refuel your energy.
FAQs about Chocolate Peanut Butter Crunch Bars
Got questions about these delightful Chocolate Peanut Butter Crunch Bars? You’re not alone! Here are some common queries that might pop up as you whip up this tasty treat.
Can I use a different nut butter?
Absolutely! Almond butter or sunflower seed butter works great as alternatives. Each will give a unique flavor while keeping the bars delicious.
How long do these bars last?
When stored in an airtight container in the refrigerator, these bars can last up to a week. But trust me, they’ll likely be gone long before then!
Can I freeze these bars?
Yes! These no-bake bars freeze well. Just wrap them tightly in plastic wrap or foil, and they’ll be good for up to three months. Perfect for meal prep!
What can I add for extra flavor?
Consider adding a scoop of protein powder, some dried fruits, or even a sprinkle of cinnamon. These additions can elevate the taste and nutritional value!
Are these bars suitable for kids?
Definitely! They’re a healthy snack option that kids will love. Just keep an eye on any nut allergies if you’re using peanut butter.
Final Thoughts
Making these Chocolate Peanut Butter Crunch Bars is more than just whipping up a quick snack; it’s about creating moments of joy. Each bite is a delightful blend of flavors and textures that can brighten even the busiest of days. Whether you’re sharing them with friends or sneaking a piece for yourself, these bars bring a sense of satisfaction that’s hard to beat. Plus, the ease of preparation means you can enjoy this treat without the fuss. So, roll up your sleeves and dive into this delicious adventure—you won’t regret it!
Chocolate Peanut Butter Crunch Bars: Easy Recipe Here!
Ingredients
Method
- In a large mixing bowl, combine the rolled oats, peanut butter, honey (or maple syrup), vanilla extract, and salt. Stir until well mixed and smooth.
- Gently fold in the chocolate chips and crispy rice cereal until evenly distributed.
- Line an 8x8-inch baking dish with parchment paper, leaving some overhang for easy removal.
- Pour the mixture into the prepared baking dish and press it down firmly with a spatula or your hands to create an even layer.
- Refrigerate for at least 1 hour to allow the bars to set.
- Once set, lift the bars out of the dish using the parchment paper and cut into squares or rectangles.
- Store any leftovers in an airtight container in the refrigerator for up to one week.
Nutrition
Notes
- For a chocolate drizzle, melt an additional 1/4 cup of chocolate chips and drizzle over the top before refrigerating.
- Substitute almond butter or sunflower seed butter for a different flavor or to accommodate nut allergies.