There’s something magical about the aroma of grilled chicken wafting through the backyard.
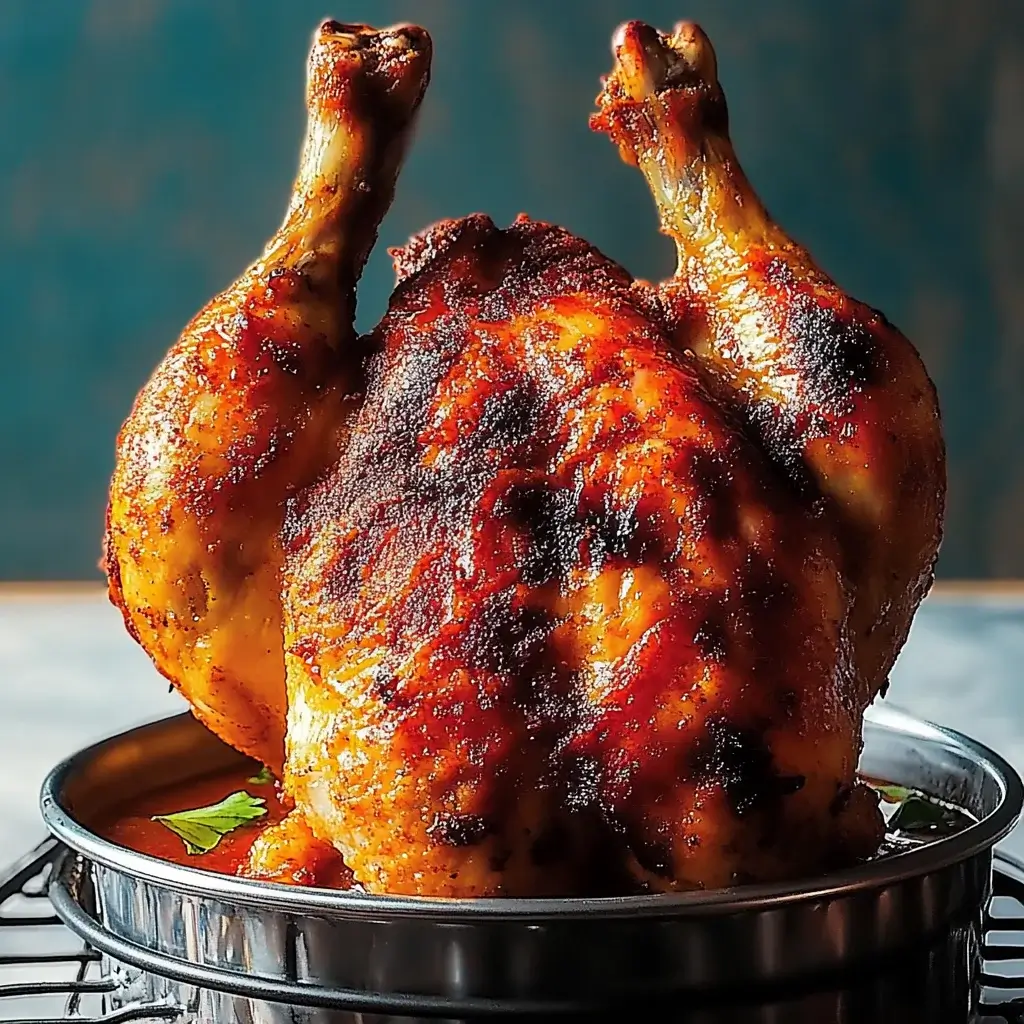
Crispy Beer Can Chicken is not just a recipe; it’s an experience that brings friends and family together.
This dish is perfect for those busy weeknights or weekend gatherings when you want to impress without spending hours in the kitchen.
With just a few simple ingredients and a can of your favorite beer, you can unlock juicy, flavorful chicken that’s crispy on the outside and tender on the inside.
Trust me, your taste buds will thank you!
Why You’ll Love This Crispy Beer Can Chicken
Crispy Beer Can Chicken is a game-changer for any home cook.
It’s incredibly easy to prepare, making it perfect for those hectic evenings when time is short.
The grilling process locks in moisture, ensuring every bite is bursting with flavor.
Plus, the crispy skin is a crowd-pleaser that will have everyone coming back for seconds.
This dish is not just a meal; it’s a celebration of good food and great company!
Ingredients for Crispy Beer Can Chicken
To create the perfect Crispy Beer Can Chicken, you’ll need a handful of simple ingredients that pack a punch of flavor.
Here’s what you’ll need:
Whole Chicken: A 3-4 lb bird is ideal for this recipe. Look for one that’s fresh and free-range for the best taste.
Beer: A 12 oz can of your favorite beer adds moisture and flavor. Feel free to experiment with different types, like lager or ale.
Olive Oil: This helps the spice rub stick and adds richness to the chicken.
Garlic Powder: A must-have for that savory kick. It enhances the overall flavor profile.
Onion Powder: Adds a subtle sweetness and depth to the seasoning.
Smoked Paprika: This gives the chicken a beautiful color and a hint of smokiness that’s irresistible.
Salt and Black Pepper: Essential for seasoning. They bring out the natural flavors of the chicken.
Dried Thyme: A classic herb that complements the chicken beautifully.
Cayenne Pepper: Optional, but if you like a little heat, this will elevate your dish.
Feel free to get creative! You can swap the beer for a can of lemon-lime soda or ginger ale for a citrusy twist.
And if you want to customize the flavor, try different spice blends like Italian seasoning or your favorite BBQ rub.
For exact measurements, check the bottom of the article where you can find them available for printing.
How to Make Crispy Beer Can Chicken
Creating the perfect Crispy Beer Can Chicken is easier than you might think.
Follow these simple steps, and you’ll be on your way to impressing your friends and family with a deliciously juicy meal.
Step 1: Preheat the Grill
Start by preheating your grill to medium-high heat, around 375°F.
This ensures that your chicken cooks evenly and gets that crispy skin we all love.
If you’re using a charcoal grill, let the coals burn down until they’re covered in white ash.
Step 2: Prepare the Chicken
Rinse the whole chicken under cold water and pat it dry with paper towels.
Don’t forget to check the cavity for any giblets and remove them.
A dry chicken will help the skin crisp up beautifully.
Step 3: Mix the Spice Rub
In a small bowl, combine olive oil, garlic powder, onion powder, smoked paprika, salt, black pepper, dried thyme, and cayenne pepper if you’re feeling adventurous.
This spice rub is where the magic happens, so mix it well to ensure all the flavors blend together.
Step 4: Season the Chicken
Rub the spice mixture all over the chicken, making sure to get under the skin too.
This step is crucial for infusing flavor throughout the meat.
Don’t be shy—get in there and massage it in!
Step 5: Insert the Beer Can
Open your can of beer and take a few sips (or pour out a little) to make space.
Carefully place the beer can inside the chicken’s cavity.
This not only keeps the chicken upright but also steams it from the inside, keeping it moist.
Step 6: Grill the Chicken
Stand the chicken upright on the grill grates, using the beer can for support.
Close the grill lid and let it cook for about 1 to 1.5 hours.
You’re looking for an internal temperature of 165°F in the thickest part of the thigh.
Resist the urge to peek too often; this will help maintain the heat.
Step 7: Rest and Serve
Once the chicken is done, carefully remove it from the grill.
Let it rest for about 10 minutes before removing the beer can.
This resting period allows the juices to redistribute, ensuring every bite is juicy and flavorful.
Now, carve it up and serve with your favorite sides!
Tips for Success
Always let the chicken come to room temperature before grilling for even cooking.
Use a meat thermometer to check for doneness; it’s the best way to avoid undercooking.
Experiment with different beers to find your favorite flavor combination.
For extra crispy skin, avoid opening the grill too often while cooking.
Let the chicken rest after grilling to keep it juicy.
Equipment Needed
Grill: A gas or charcoal grill works perfectly. If you don’t have one, an oven can be a backup option.
Beer Can: Any standard 12 oz can will do. You can also use a soda can for a non-alcoholic version.
Meat Thermometer: Essential for checking doneness. If you don’t have one, a sharp knife can help check the juices.
Mixing Bowl: For combining your spice rub. A small plate can work in a pinch.
Variations
Citrus Twist: Swap the beer for a can of lemon-lime soda or ginger ale for a refreshing citrus flavor.
Herb-Infused: Use fresh herbs like rosemary or oregano instead of dried thyme for a vibrant taste.
Spicy Kick: Add more cayenne pepper or a dash of hot sauce to the spice rub for an extra kick.
BBQ Style: Brush your favorite BBQ sauce on the chicken during the last 15 minutes of grilling for a sticky glaze.
Smoky Flavor: If you have a smoker, try using wood chips like hickory or applewood for a deeper smoky flavor.
Serving Suggestions
Classic Sides: Pair your chicken with coleslaw, corn on the cob, or baked beans for a true backyard feast.
Refreshing Salads: A light cucumber and tomato salad complements the richness of the chicken.
Drink Pairings: Serve with a cold beer or a crisp lemonade to enhance the flavors.
Presentation: Serve the chicken upright on a platter for a stunning centerpiece.
FAQs about Crispy Beer Can Chicken
Can I use a different type of beer for this recipe?
Absolutely! Feel free to experiment with different beers like lagers, ales, or even stouts. Each type will impart its unique flavor to the chicken, making it a fun culinary adventure.
What if I don’t have a grill?
No worries! You can also make Crispy Beer Can Chicken in the oven. Preheat your oven to 375°F and place the chicken on a baking sheet with the beer can inside. Bake for about 1 to 1.5 hours, checking the internal temperature.
How do I know when the chicken is done?
The best way to check is by using a meat thermometer. Insert it into the thickest part of the thigh; it should read 165°F. If you don’t have one, you can cut into the chicken to ensure the juices run clear.
Can I prepare the chicken ahead of time?
Yes! You can season the chicken with the spice rub a few hours in advance or even the night before. Just keep it covered in the fridge until you’re ready to grill. This allows the flavors to penetrate the meat even more.
What sides pair well with Crispy Beer Can Chicken?
Classic sides like coleslaw, corn on the cob, or a fresh salad work wonderfully. You can also serve it with baked beans for a hearty meal. Don’t forget a cold drink to wash it down!
Final Thoughts
Crispy Beer Can Chicken is more than just a meal; it’s a celebration of flavor and togetherness.
The joy of gathering around the grill, sharing stories, and savoring each juicy bite creates lasting memories.
This recipe is a testament to how simple ingredients can transform into something extraordinary.
Whether you’re a seasoned grill master or a weekend warrior, this dish is sure to impress.
So fire up that grill, crack open a cold one, and enjoy the deliciousness that awaits.
Your friends and family will be raving about this one for years to come!
Crispy Beer Can Chicken is a flavorful and juicy grilled chicken recipe that uses a can of beer to keep the meat moist and tender while infusing it with delicious flavors.
Ingredients
Scale
3–4 lb whole chicken
1 can (12 oz) of your favorite beer
2 tablespoons olive oil
1 tablespoon garlic powder
1 tablespoon onion powder
1 tablespoon smoked paprika
1 teaspoon salt
1 teaspoon black pepper
1 teaspoon dried thyme
1 teaspoon cayenne pepper (optional for heat)
Instructions
Preheat your grill to medium-high heat (about 375°F).
Rinse the chicken under cold water and pat it dry with paper towels. Remove any giblets from the cavity.
In a small bowl, mix together the olive oil, garlic powder, onion powder, smoked paprika, salt, black pepper, thyme, and cayenne pepper.
Rub the spice mixture all over the chicken, including under the skin for maximum flavor.
Open the can of beer and take a few sips (or pour out a little) to make space. Carefully place the beer can inside the chicken’s cavity.
Stand the chicken upright on the grill grates, using the beer can for support.
Close the grill lid and cook for about 1 to 1.5 hours, or until the internal temperature reaches 165°F in the thickest part of the thigh.
Carefully remove the chicken from the grill, allowing it to rest for 10 minutes before removing the beer can.
Carve and serve the chicken with your favorite sides.
Notes
For a citrus twist, replace the beer with a can of lemon-lime soda or ginger ale.
Experiment with different spice blends, such as Italian seasoning or BBQ rub, to customize the flavor profile.