Introduction to Dark Chocolate Blackberry Cupcakes
There’s something magical about the combination of dark chocolate and fresh blackberries.
These Dark Chocolate Blackberry Cupcakes are not just a treat; they’re a celebration of flavors that dance on your palate.
Whether you’re looking to impress at a gathering or simply want to indulge after a long day, this recipe is your go-to.
With just a handful of ingredients and a little bit of love, you can whip up a batch that will have everyone asking for seconds.
Let’s dive into this delightful baking adventure together!
Why You’ll Love This Dark Chocolate Blackberry Cupcakes
These Dark Chocolate Blackberry Cupcakes are a dream come true for any home cook.
They’re quick to make, taking just about 40 minutes from start to finish.
The rich, chocolatey goodness paired with the tartness of fresh blackberries creates a flavor explosion that’s hard to resist.
Plus, they’re perfect for any occasion, whether it’s a casual family dinner or a fancy gathering.
Trust me, your taste buds will thank you!
Ingredients for Dark Chocolate Blackberry Cupcakes
To create these delightful Dark Chocolate Blackberry Cupcakes, you’ll need a few key ingredients that come together to form a symphony of flavors.
All-purpose flour: The backbone of your cupcakes, providing structure and a soft crumb.
Unsweetened cocoa powder: This adds that rich chocolate flavor we all crave, making each bite decadent.
Granulated sugar: Sweetness is essential, balancing the bitterness of the cocoa and enhancing the overall taste.
Baking soda: A leavening agent that helps your cupcakes rise, giving them that fluffy texture.
Salt: Just a pinch enhances the flavors, making the chocolate taste even more intense.
Unsalted butter: Adds moisture and richness; make sure it’s softened for easy mixing.
Large eggs: They bind everything together and contribute to the cupcakes’ lightness.
Vanilla extract: A splash of vanilla elevates the flavor profile, adding warmth and depth.
Buttermilk: This ingredient keeps the cupcakes moist and tender, while also adding a slight tang.
Fresh blackberries: The star of the show! Their tartness complements the chocolate beautifully.
For the frosting:
Unsalted butter: Again, softened for a creamy texture that spreads easily.
Powdered sugar: This gives the frosting its sweetness and smooth consistency.
Unsweetened cocoa powder: To keep the chocolate theme going in your frosting.
Milk: A splash helps achieve the perfect frosting consistency.
Vanilla extract: Just like in the batter, it adds a lovely flavor to the frosting.
Fresh blackberries for garnish: These not only look stunning but also add a fresh burst of flavor.
For exact measurements, check the bottom of the article where you can find everything listed for easy printing. Happy baking!
How to Make Dark Chocolate Blackberry Cupcakes
Baking these Dark Chocolate Blackberry Cupcakes is a delightful journey.
With each step, you’ll see how simple ingredients transform into a mouthwatering treat.
Let’s get started!
Step 1: Preheat and Prepare
First things first, preheat your oven to 350°F (175°C).
This ensures your cupcakes bake evenly.
While the oven warms up, line a muffin tin with cupcake liners.
This little step makes cleanup a breeze!
Step 2: Mix Dry Ingredients
In a large bowl, whisk together the all-purpose flour, unsweetened cocoa powder, granulated sugar, baking soda, and salt.
This is where the magic begins!
Mixing these dry ingredients well ensures that the flavors are evenly distributed throughout your cupcakes.
Step 3: Combine Wet Ingredients
Now, it’s time to add the wet ingredients.
Add the softened butter, large eggs, vanilla extract, and buttermilk to the dry mixture.
Mix until everything is smooth and well blended.
This creates a rich, velvety batter that’s hard to resist!
Step 4: Fold in Blackberries
Gently fold in the fresh blackberries.
Be careful not to overmix; you want those juicy berries to stay intact.
This step adds a burst of flavor that perfectly complements the dark chocolate.
Step 5: Fill Cupcake Liners
Divide the batter evenly among the cupcake liners, filling each about 2/3 full.
This allows the cupcakes to rise beautifully without overflowing.
Trust me, you’ll want that perfect dome shape!
Step 6: Bake
Place the muffin tin in your preheated oven and bake for 18-20 minutes.
To check for doneness, insert a toothpick into the center of a cupcake.
If it comes out clean, they’re ready to shine!
Step 7: Cool the Cupcakes
Once baked, remove the cupcakes from the oven.
Let them cool in the pan for about 5 minutes.
Then, transfer them to a wire rack to cool completely.
This prevents sogginess and keeps them fluffy.
Step 8: Prepare the Frosting
While the cupcakes cool, let’s whip up that luscious frosting.
In a medium bowl, beat the softened butter until creamy.
Gradually add the powdered sugar and cocoa powder, mixing until combined.
This creates a rich, chocolatey topping that’s simply irresistible!
Step 9: Frost the Cupcakes
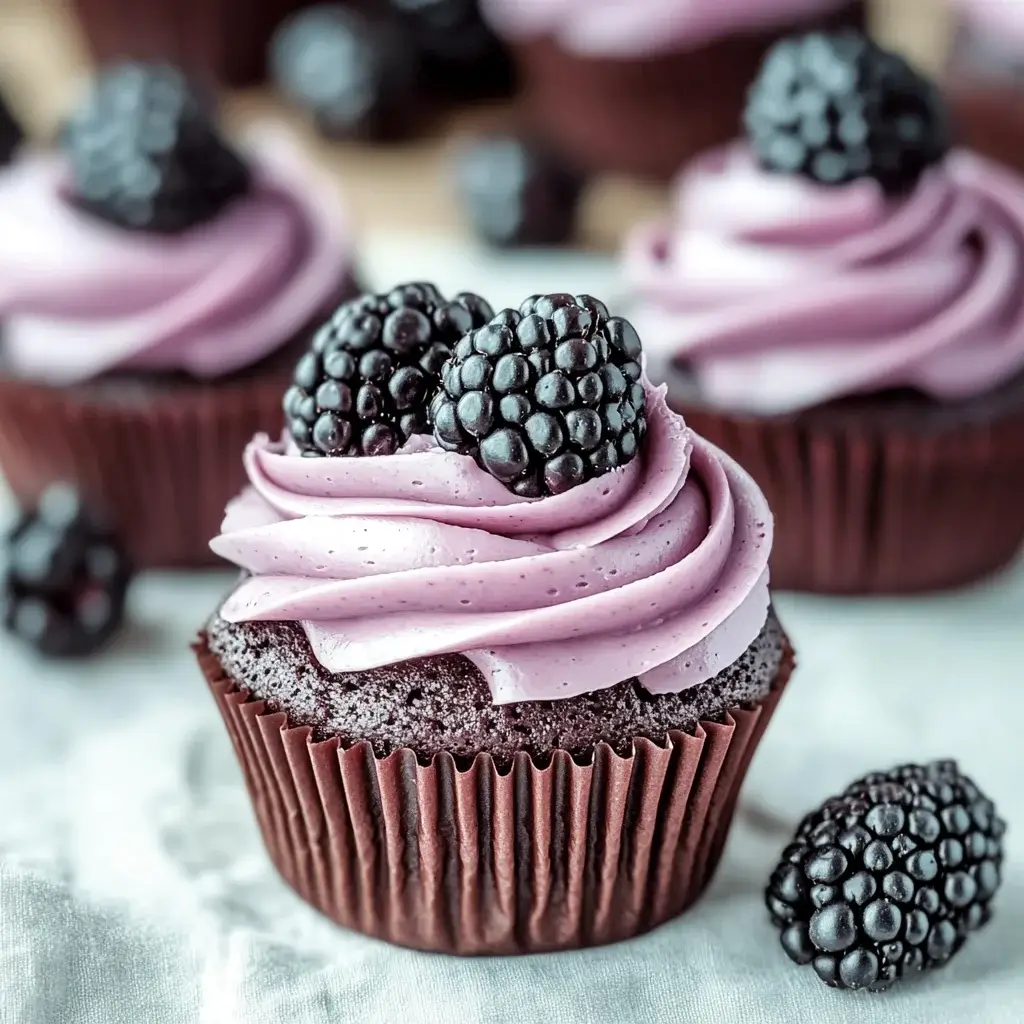
Once the cupcakes are completely cool, it’s time to frost them.
Spread the chocolate frosting generously on each cupcake.
Top each one with a fresh blackberry for that stunning finish.
Now, you’re ready to impress everyone with your baking skills!
Tips for Success
Use room temperature ingredients for a smoother batter.
Don’t overmix the batter; gentle folding keeps the cupcakes light.
Check for doneness a minute or two early to avoid overbaking.
Let the cupcakes cool completely before frosting for the best results.
Experiment with different berries for a fun twist on flavor!
Equipment Needed
Muffin tin: Essential for baking your cupcakes. A silicone mold works too!
Mixing bowls: Use a large bowl for dry ingredients and a medium one for wet. Any size will do!
Whisk: Perfect for mixing. A fork can work in a pinch.
Spatula: Great for folding in blackberries and frosting. A wooden spoon is a solid alternative.
Cooling rack: Helps cool cupcakes evenly. A plate can suffice if you don’t have one.
Variations
Gluten-free option: Substitute all-purpose flour with a gluten-free blend for a delicious alternative.
Vegan twist: Use flax eggs and plant-based butter to create a vegan version of these cupcakes.
Nutty addition: Fold in chopped walnuts or pecans for a delightful crunch and added flavor.
Different berries: Swap blackberries for raspberries or blueberries for a fruity twist.
Spiced cupcakes: Add a teaspoon of cinnamon or a pinch of cayenne for a warm, spicy kick.
Serving Suggestions
Pair these cupcakes with a scoop of vanilla ice cream for a delightful contrast.
Serve alongside a rich cup of coffee or a glass of cold milk to enhance the chocolate flavor.
For a stunning presentation, arrange cupcakes on a tiered stand and garnish with mint leaves.
FAQs about Dark Chocolate Blackberry Cupcakes
Can I use frozen blackberries instead of fresh?
Absolutely! Frozen blackberries work well, but make sure to thaw and drain them first. This prevents excess moisture in your batter.
How do I store leftover cupcakes?
Store your Dark Chocolate Blackberry Cupcakes in an airtight container at room temperature for up to three days. For longer storage, refrigerate them for up to a week.
Can I make the batter ahead of time?
While it’s best to bake the cupcakes fresh, you can prepare the batter and refrigerate it for up to 24 hours. Just give it a gentle stir before filling the liners.
What can I substitute for buttermilk?
If you don’t have buttermilk, mix one tablespoon of vinegar or lemon juice with a cup of milk. Let it sit for about 5 minutes, and you’ll have a perfect substitute!
Can I make these cupcakes gluten-free?
Yes! Simply swap the all-purpose flour with a gluten-free flour blend. Your Dark Chocolate Blackberry Cupcakes will still be delicious!
Final Thoughts
Baking these Dark Chocolate Blackberry Cupcakes is more than just a culinary task; it’s an experience filled with joy and satisfaction.
The aroma of chocolate mingling with fresh blackberries fills your kitchen, creating a warm, inviting atmosphere.
Each bite offers a delightful contrast of rich chocolate and tart berries, making them perfect for any occasion.
Whether you’re sharing them with friends or savoring one alone, these cupcakes bring a smile to your face.
So, roll up your sleeves, embrace the process, and enjoy the sweet rewards of your baking adventure!