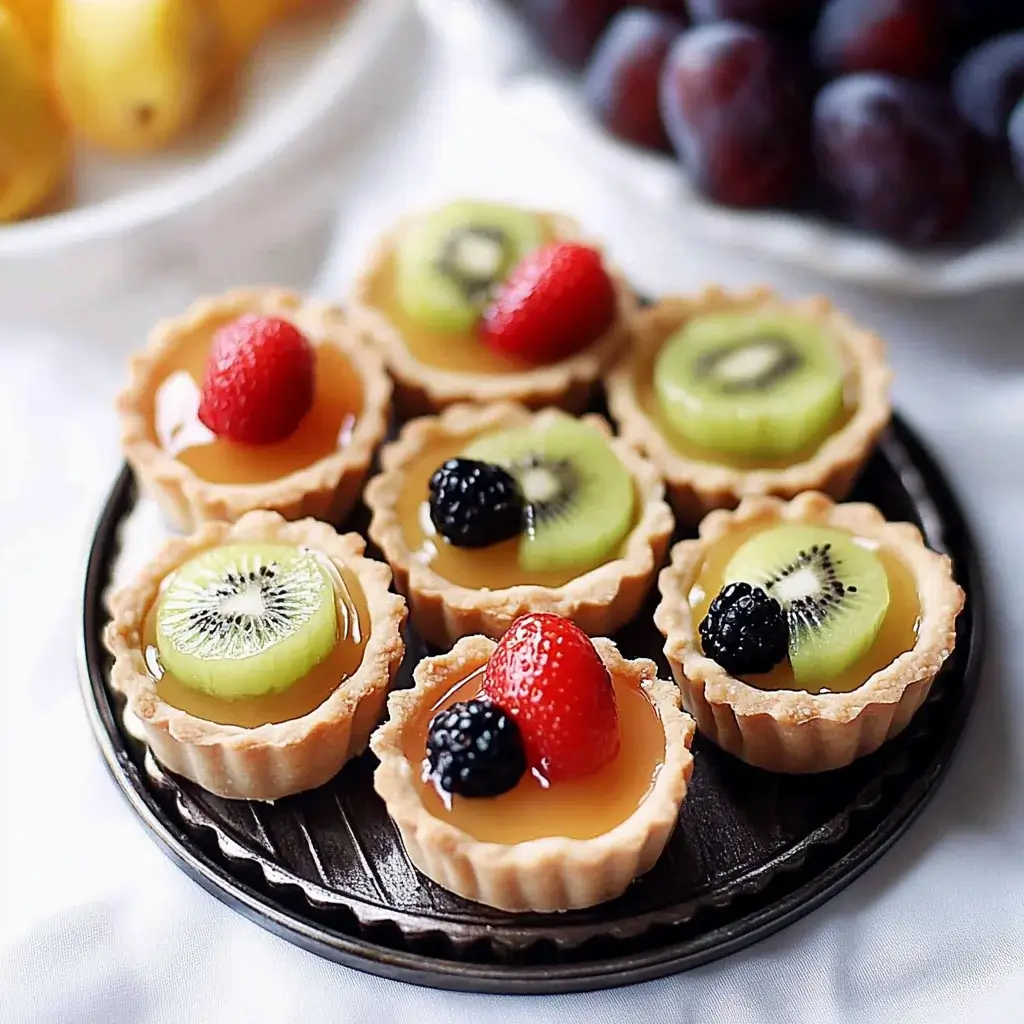
These Fruit Tartlets are a fresh and colorful way to celebrate dessert. Each tart features a buttery shortcrust shell filled with luscious pastry cream and topped with vibrant fresh fruits like berries, kiwi, and citrus. They’re elegant, sweet, and surprisingly simple to make—ideal for bridal showers, brunch buffets, or a casual afternoon treat. Think of them as mini works of edible art that taste as amazing as they look.
Why You’ll Love This Fruit Tartlets
Perfect balance of creamy, crisp, and fruity.
Visually stunning—great for gifting or events.
Make-ahead friendly with easy assembly.
Endlessly customizable with seasonal fruit.
Light, fresh, and not overly sweet.
Ingredients for Fruit Tartlets
Creating the perfect fruit tartlets starts with gathering the right ingredients. Here’s what you’ll need:
All-purpose flour: This is the backbone of your tartlet shells, providing structure and a tender crumb.
Unsalted butter: Softened butter adds richness and flavor to the dough, making it melt-in-your-mouth delicious.
Granulated sugar: A touch of sweetness balances the flavors and helps achieve that golden crust.
Egg yolk: This ingredient enriches the dough, giving it a lovely texture and color.
Vanilla extract: A splash of vanilla elevates the flavor, adding warmth and depth to your tartlets.
Salt: Just a pinch enhances all the other flavors, making your dessert truly pop.
Mixed fresh fruit: Choose your favorites like strawberries, blueberries, kiwi, and raspberries for a vibrant topping.
Pastry cream or vanilla pudding: This creamy filling is the heart of your tartlets, providing a luscious base for the fruit.
Apricot jam (optional): A light glaze adds shine and a hint of sweetness, making your tartlets even more appealing.
For those looking to mix things up, consider substituting the pastry cream with whipped cream or Greek yogurt for a lighter option. You can find the exact quantities for each ingredient at the bottom of the article, ready for printing!
How to Make Fruit Tartlets
Making fruit tartlets is a delightful journey that combines simple steps with delicious results. Follow along as I guide you through each stage, ensuring your tartlets turn out perfectly every time.
Step 1: Preheat the Oven
Start by preheating your oven to 350°F. This step is crucial because it ensures even baking. A hot oven helps the tartlet shells rise and develop that lovely golden color. Trust me, you don’t want to skip this part!
Step 2: Prepare the Dough
In a mixing bowl, combine the all-purpose flour, softened butter, granulated sugar, egg yolk, vanilla extract, and salt. Mix until a dough forms. You’re aiming for a soft, pliable texture that holds together without being sticky. If it feels too crumbly, a splash of cold water can help bring it together.
Step 3: Form the Tartlet Shells
Divide the dough into 12 equal portions. Take each portion and press it into the bottom and up the sides of a muffin tin. This creates your tartlet shells. Don’t forget to prick the bottoms with a fork to prevent bubbling during baking. It’s a small step that makes a big difference!
Step 4: Bake the Tartlet Shells
Place the muffin tin in the preheated oven and bake for 15-18 minutes. Keep an eye on them; you want them to be lightly golden. When they’re done, the edges should be firm, and the centers will have puffed slightly. Let them cool in the tin for a few minutes before transferring them to a wire rack.
Step 5: Cool and Fill
Once the tartlet shells are completely cool, it’s time to fill them. Spoon in your pastry cream or vanilla pudding, smoothing it out with a spatula. This creamy filling is what makes each bite heavenly, so don’t be shy about adding a generous amount!
Step 6: Top with Fresh Fruit
Now comes the fun part—topping your tartlets with fresh fruit! Arrange your mixed berries, kiwi, or whatever fruits you’ve chosen in a way that looks appealing. Think of it as creating a colorful masterpiece. The more vibrant, the better!
Step 7: Glaze and Chill
If you’re using apricot jam, heat it slightly in the microwave until it’s melted. Brush it over the fruit for a shiny finish. This step is optional but adds a lovely touch. Finally, chill the tartlets in the refrigerator for at least 30 minutes before serving. This allows the flavors to meld beautifully.
Tips for Success
Use cold butter for a flakier crust; it helps create that melt-in-your-mouth texture.
Don’t overmix the dough; mix just until combined to avoid tough tartlet shells.
Experiment with different fruits based on the season for a fresh twist.
Chill the filled tartlets for at least 30 minutes to enhance the flavors.
For a fun presentation, sprinkle some mint leaves on top before serving.
Equipment Needed
Muffin tin: Essential for shaping your tartlet shells; a mini tart pan works too.
Mixing bowl: Any large bowl will do for combining ingredients.
Spatula: Perfect for smoothing out the filling; a butter knife can work in a pinch.
Wire rack: Ideal for cooling; a plate can substitute if needed.
Variations
Chocolate Tartlet Shells: Add cocoa powder to the dough for a rich chocolate flavor that pairs beautifully with fruit.
Nutty Twist: Incorporate ground almonds or hazelnuts into the crust for added texture and flavor.
Gluten-Free Option: Substitute all-purpose flour with a gluten-free blend to accommodate dietary needs.
Vegan Version: Use coconut oil instead of butter and a flax egg in place of the egg yolk for a plant-based treat.
Seasonal Fruits: Experiment with fruits like peaches in summer or apples in fall for a seasonal twist.
Serving Suggestions
Pair your fruit tartlets with a scoop of vanilla ice cream for a delightful contrast.
Serve alongside a refreshing mint tea or a glass of sparkling lemonade to enhance the flavors.
For an elegant touch, dust the tartlets with powdered sugar before serving.
Arrange on a colorful platter for a stunning presentation at gatherings.
FAQs about Fruit Tartlets
Can I make the tartlet shells ahead of time?
Absolutely! You can prepare the tartlet shells a day in advance. Just store them in an airtight container at room temperature. This way, you can fill them with pastry cream and fresh fruit right before serving, ensuring they stay crisp.
What fruits work best for topping?
While you can use any fruit you like, berries such as strawberries, blueberries, and raspberries are popular choices. Kiwi and sliced peaches also add a beautiful touch. Just make sure the fruit is fresh and ripe for the best flavor!
Can I use store-bought pastry cream?
Of course! If you’re short on time, store-bought pastry cream or vanilla pudding works perfectly. Just make sure to choose a high-quality brand for the best taste.
How do I store leftover tartlets?
Store any leftover fruit tartlets in the refrigerator. They’re best enjoyed within a day or two, as the crust may soften over time. Just cover them with plastic wrap to keep them fresh.
Can I freeze fruit tartlets?
Freezing is not recommended for filled tartlets, as the fruit and cream can change texture. However, you can freeze the tartlet shells alone. Just thaw them before filling and topping with fresh fruit.
Final Thoughts
Creating fruit tartlets is more than just baking; it’s about crafting little moments of joy. Each bite is a celebration of flavors, from the buttery crust to the vibrant fruit topping. Whether you’re sharing them with family or enjoying a quiet evening treat, these tartlets bring a sense of accomplishment and delight. They’re versatile, easy to make, and perfect for any occasion. So, roll up your sleeves, gather your ingredients, and let the magic of fruit tartlets brighten your day. Trust me, once you make them, you’ll find every reason to whip up another batch!
Delicious and easy-to-make fruit tartlets filled with pastry cream and topped with fresh fruit.
Ingredients
Scale
1 ½ cups all-purpose flour
½ cup unsalted butter, softened
¼ cup granulated sugar
1 large egg yolk
1 teaspoon vanilla extract
¼ teaspoon salt
2 cups mixed fresh fruit (such as strawberries, blueberries, kiwi, and raspberries)
1 cup pastry cream or vanilla pudding
1 tablespoon apricot jam (optional, for glaze)
Instructions
Preheat the oven to 350°F.
In a mixing bowl, combine the flour, softened butter, sugar, egg yolk, vanilla extract, and salt. Mix until a dough forms.
Divide the dough into 12 equal portions and press each portion into the bottom and up the sides of a muffin tin to form tartlet shells. Prick the bottoms with a fork to prevent bubbling.
Bake the tartlet shells for 15-18 minutes, or until lightly golden. Remove from the oven and let cool completely in the tin.
Once cooled, carefully remove the tartlet shells from the muffin tin. Fill each shell with pastry cream or vanilla pudding, smoothing it out with a spatula.
Top each tartlet with a variety of fresh fruit, arranging them as desired.
If using apricot jam, heat it slightly in a microwave until melted and brush it over the fruit for a shiny finish.
Chill the tartlets in the refrigerator for at least 30 minutes before serving to allow the flavors to meld.
Notes
For a chocolate twist, add cocoa powder to the dough for chocolate tartlet shells.
You can also substitute the pastry cream with whipped cream or Greek yogurt for a lighter option.