

As the leaves turn crisp and the air fills with a hint of spice, Halloween rolls in, breathing life into our kitchens with sugary delight. This year, I’m swapping out the usual sweets for something a bit more magical: Halloween Oreo Balls! These adorable, no-bake treats are perfect for spooktacular gatherings, school parties, or a cozy movie night at home. Not only are they ridiculously easy to whip up, but they’re also a fabulous way to unleash creativity—think candy eyes and colorful sprinkles that will have kids (and adults!) smiling from ear to ear. Trust me, these Halloween Oreo Balls are bound to become a tradition as you indulge in fun and festive family moments. Ready to get your hands a little messy and delightfully sweet? Let’s dive into this simple yet incredible recipe!
Why are Halloween Oreo Balls a Must-Make?
Irresistible Fun: These treats are not just delicious; they are a canvas for creativity! Endless Variations: Customize the colors and toppings to match any Halloween theme or personal preference. No-Bake Ease: Perfect for even the busiest schedules, you can whip them up in no time! Kid-Friendly Activity: Great for involving little chefs in the kitchen—messy hands equal happy memories! Plus, if you’re looking to extend the fun, try pairing them with festive drinks at your Halloween gathering. Get ready to enchant your guests with these delightful treats; they’re sure to become a favorite!
Halloween Oreo Balls Ingredients
• Here’s everything you need to create these delightful, no-bake treats!
For the Oreo Mixture
- Oreo Cookies – Crushed to form the tasty base; feel free to use gluten-free Oreos for allergy-friendly options.
- Cream Cheese – Softened for a creamy, cohesive texture; opt for full-fat for better flavor and consistency.
For the Chocolate Coating
- Candy Melts/Chocolate Chips – Choose colorful melts for coating; avoid regular chocolate chips as they won’t melt smoothly.
- Gel Food Coloring (optional) – Adds vibrant hues to your chocolate coating, making it extra festive.
For Decoration
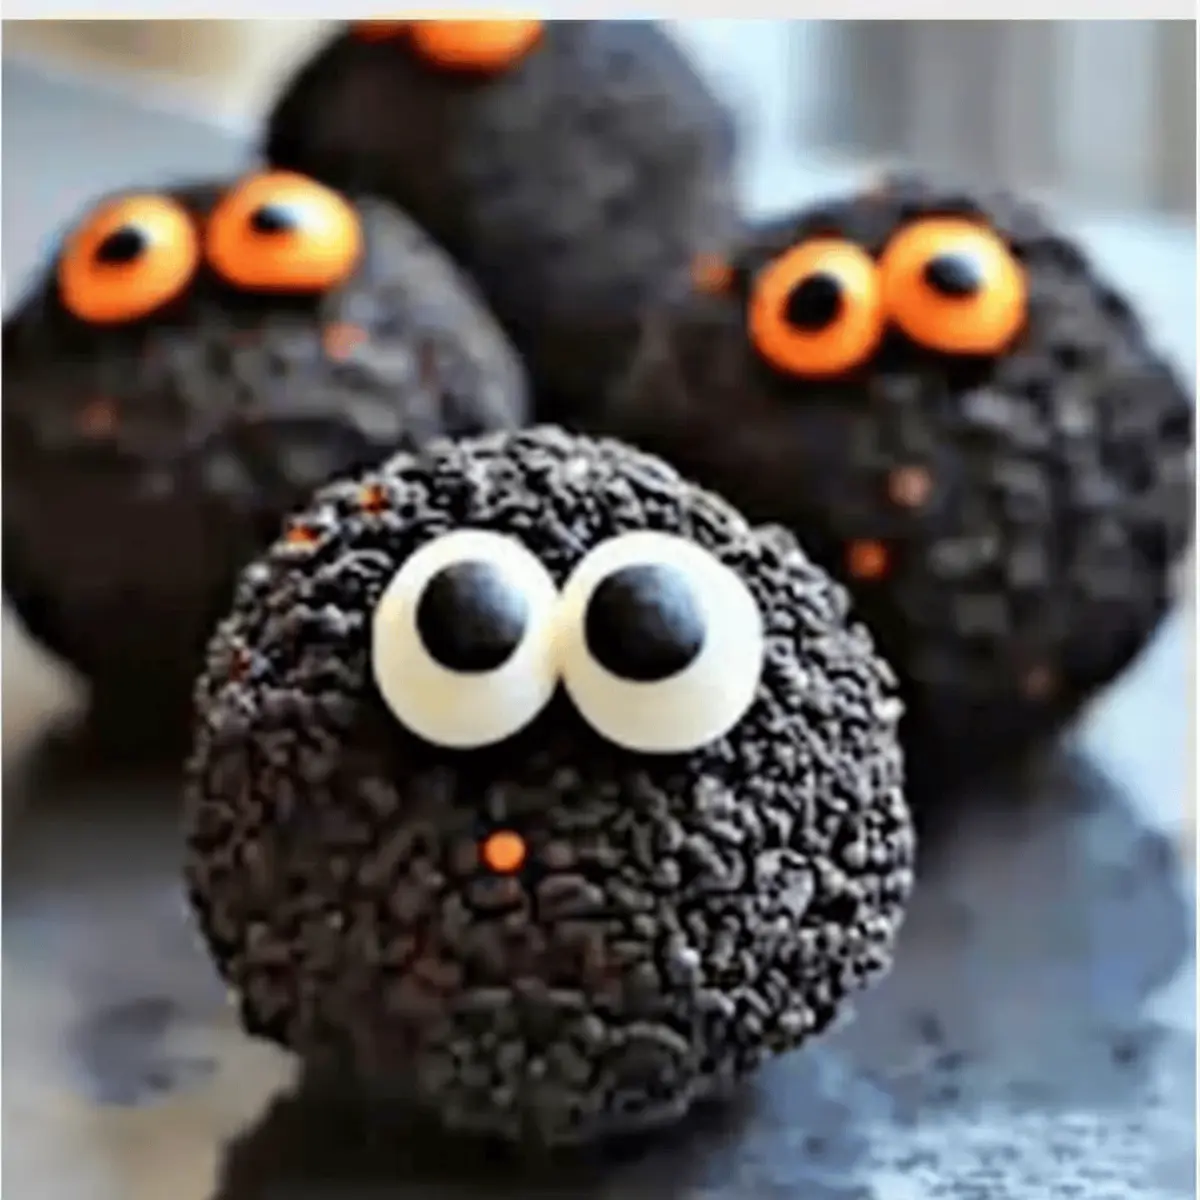
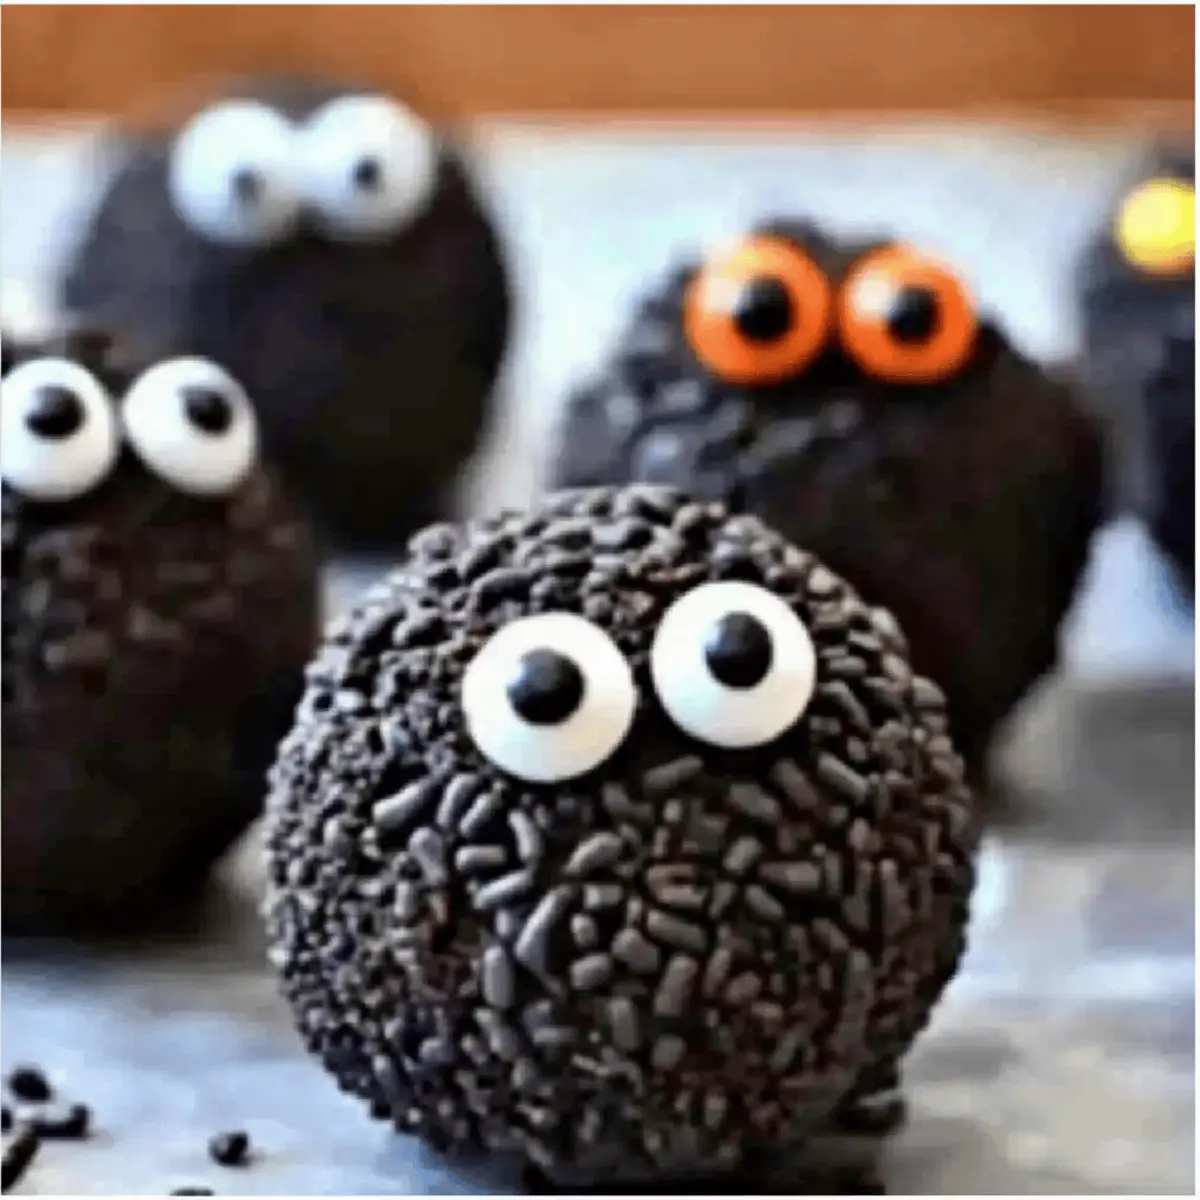
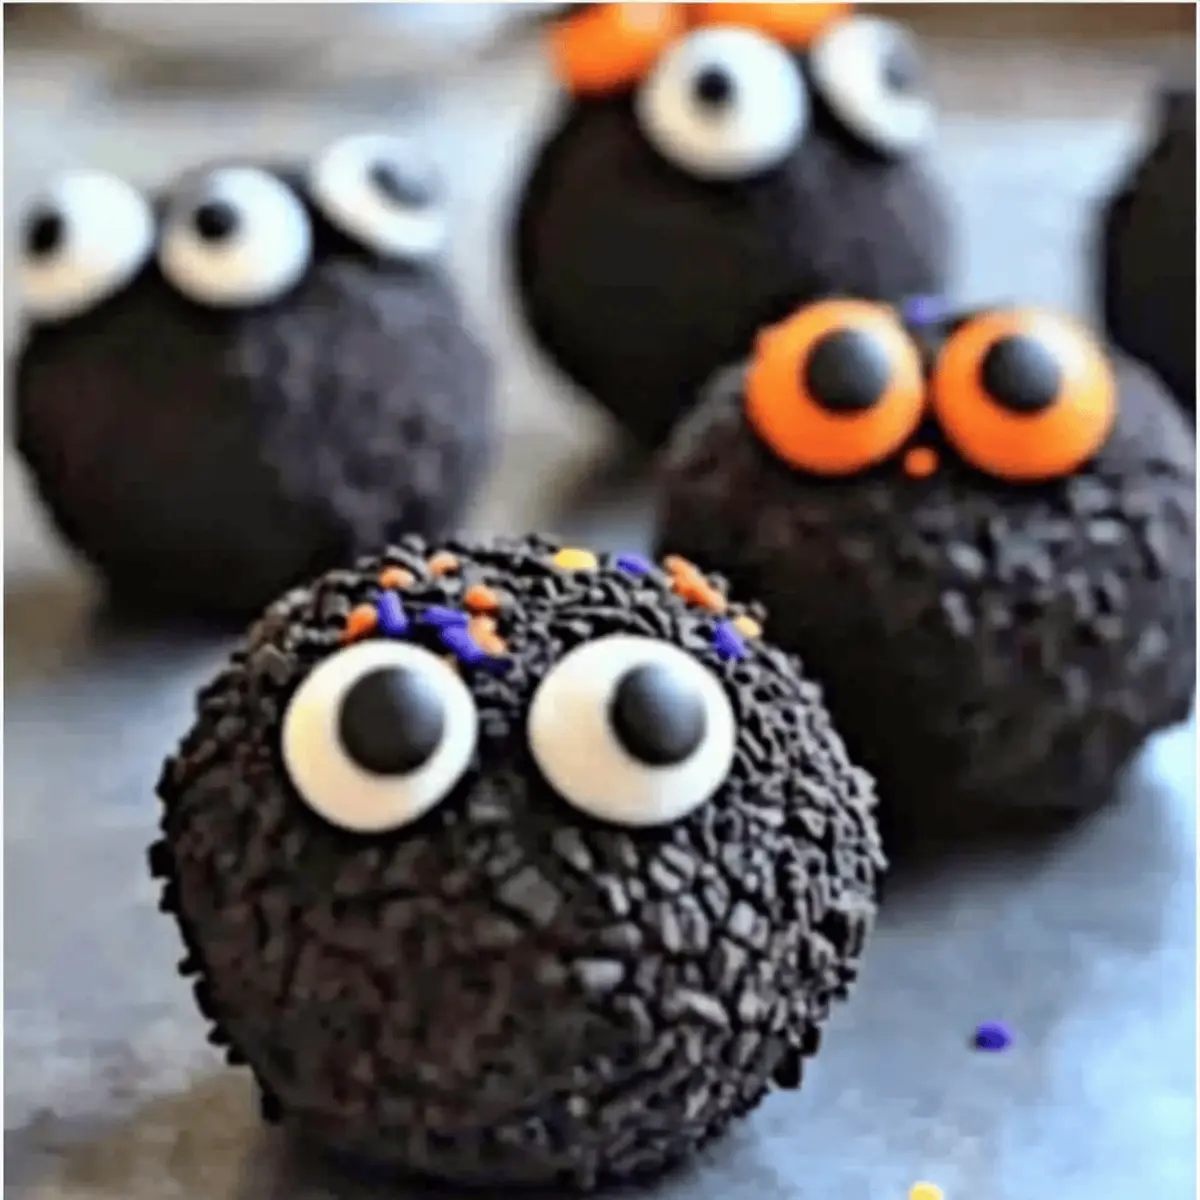
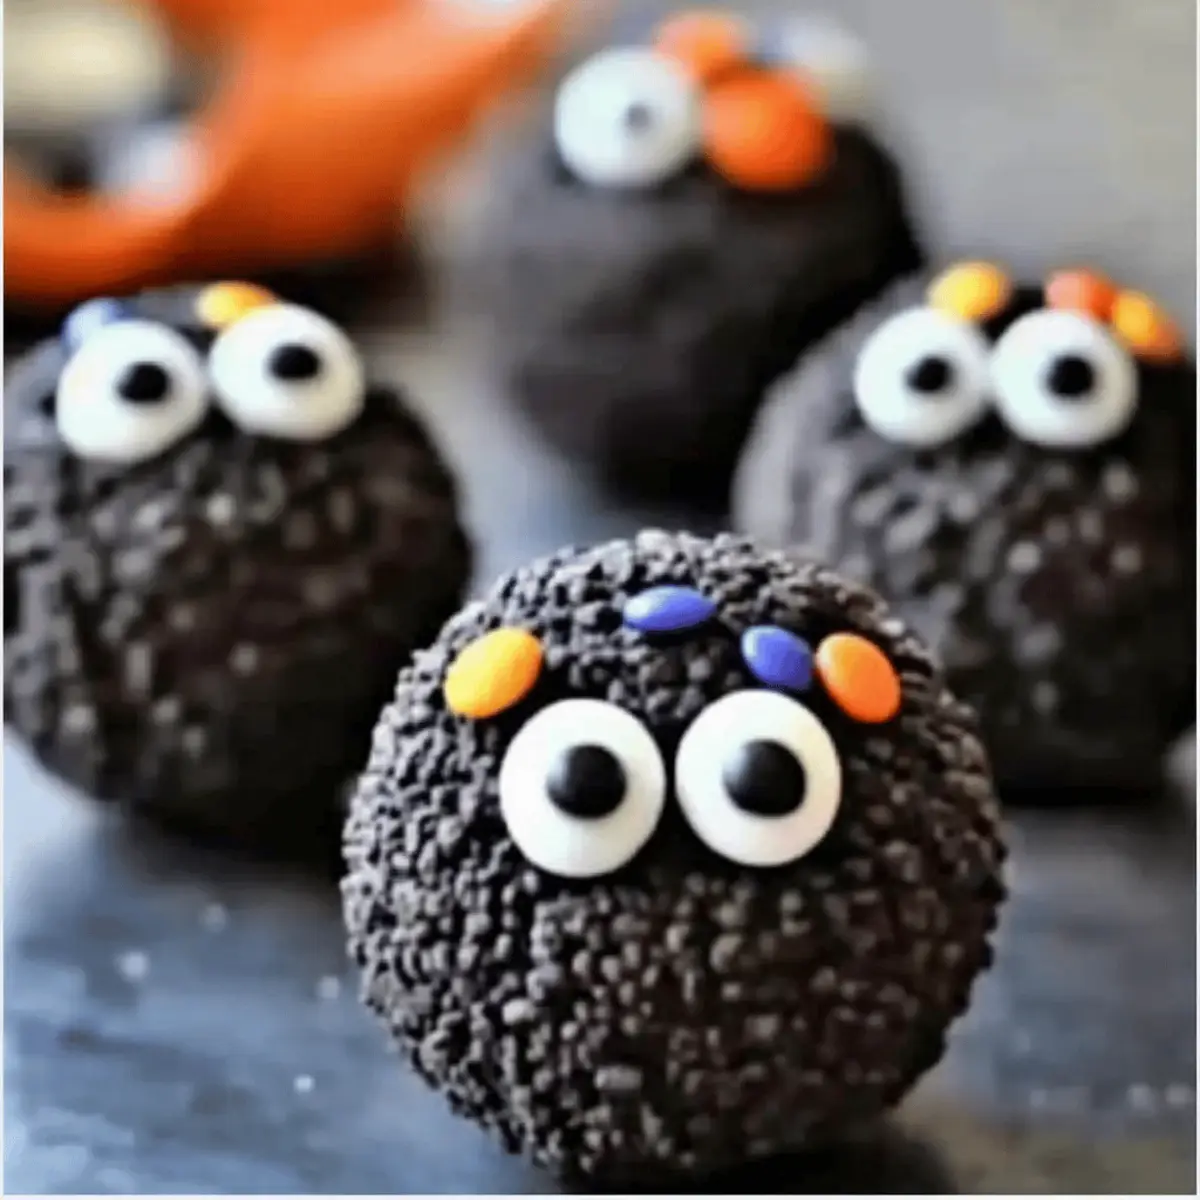
- Candy Eyes – Perfect for turning your Oreo balls into whimsical creatures; kids love decorating with these!
- Sprinkles/Mini Chocolate Chips – Add a fun touch to your creations; customize for themed parties or personal flair.
For Preparation
- Parchment Paper – Essential for lining your baking sheet, preventing your treats from sticking and making cleanup a breeze.
Now you’re all set to get started on these delightful Halloween Oreo Balls!
Step‑by‑Step Instructions for Halloween Oreo Balls
Step 1: Crush Oreos
Begin by placing the Oreo cookies into a food processor, pulsing until they turn into fine crumbs. If you don’t have a processor, seal the Oreos in a zip-top bag and crush them with a rolling pin. You want a powdery consistency that will mix well with the cream cheese. This should take about 1-2 minutes.
Step 2: Mix
In a large mixing bowl, combine the finely crushed Oreo crumbs with the softened cream cheese. Stir with a spatula or spoon until the mixture becomes a smooth, cohesive dough that holds together well. This blending takes about 3 to 5 minutes. Make sure there are no visible cream cheese lumps, as the mixture should be uniform in texture for the best Halloween Oreo Balls.
Step 3: Shape
Using your hands, scoop a tablespoon of the Oreo mixture and roll it into a ball about 1 inch in diameter. Place each ball on a parchment-lined baking sheet, ensuring they have a little space between them to avoid sticking. You should aim to make about 24 balls from the mixture. This step will take roughly 10-15 minutes.
Step 4: Chill
Once all the balls are formed, place the baking sheet in the freezer for at least 20 minutes. Chilling the balls will firm them up and make them easier to dip in chocolate later. After 20 minutes, check that they feel firm to the touch; this will ensure they hold their shape during the dipping process.
Step 5: Melt Coating
While the Oreo balls are chilling, melt your candy melts or chocolate chips. In a microwave-safe bowl, heat the candy melts for 30-second intervals, stirring in between, until completely smooth and melted—this should take about 1-2 minutes. If using chocolate chips, be attentive to avoid burning, as they can seize up if overheated.
Step 6: Dip
Once your candy melts are ready, take the Oreo balls out of the freezer. Using a fork or toothpick, dip each ball into the melted chocolate, ensuring it’s completely coated. Allow any excess chocolate to drip back into the bowl before placing the dipped ball back on the parchment-lined baking sheet. Work quickly to maintain the firmness of the balls.
Step 7: Decorate
Before the coating sets, sprinkle the tops of the melted chocolate with candy eyes, sprinkles, or mini chocolate chips. This is where the fun begins! Be creative with your decorations to give your Halloween Oreo Balls a whimsical appearance. You have about 10 minutes to do this before the chocolate hardens.
Step 8: Set
Allow the decorated Halloween Oreo Balls to sit at room temperature until the chocolate coating has completely hardened. For faster results, you can place the baking sheet back into the refrigerator for about 15-20 minutes. Once set, transfer them to an airtight container, storing them in the fridge until you’re ready to serve.
Halloween Oreo Balls Variations & Substitutions
Feel free to let your creativity run wild and personalize these delightful treats with some simple swaps and additions!
-
Gluten-Free: Use gluten-free Oreos to make these treats accessible for guests with dietary restrictions.
-
Nut-Free Delight: Swap cream cheese for a nut cream cheese alternative to create an allergen-free version.
-
Vegan Version: Replace cream cheese with vegan cream cheese and use dairy-free chocolate melts for a completely plant-based treat.
-
Flavor Twist: Instead of classic Oreos, try using mint or peanut butter Oreos for a delightful flavor surprise.
-
Festive Colors: Add a few drops of gel food coloring to the melted chocolate for a fun twist that matches your Halloween theme!
-
Texture Boost: For a little crunch, mix in some crushed nuts, or use cookie butter instead of cream cheese for a creamy treat with extra flavor.
-
Sweet Heat: If you’re feeling adventurous, add a pinch of cayenne pepper to the melted chocolate for a spicy kick that contrasts beautifully with the sweetness.
-
Chocolate Drizzle: After dipping, drizzle white chocolate or contrasting colors over the top for a gourmet touch before adding sprinkles; this adds a beautiful and elegant finish.
For even more inspiration, consider serving these delightful Halloween Oreo Balls alongside a refreshing spooktacular drink, or even pairing them with other no-bake desserts to create a fun dessert table that will enchant your guests!
How to Store and Freeze Halloween Oreo Balls
Fridge: Store your decorated Halloween Oreo Balls in an airtight container for up to 1 week. Keeping them chilled helps maintain their delightful texture and flavor.
Freezer: For long-term storage, freeze undipped Oreo balls in a single layer on a baking sheet for up to 2 months. Once firm, transfer to a freezer-safe container.
Thawing: When you’re ready to enjoy, thaw the frozen balls in the fridge overnight, then dip in melted chocolate before serving for a fresh taste.
Reheating: There’s no need to reheat these treats; simply enjoy them chilled or at room temperature for the best experience!
What to Serve with Halloween Oreo Balls?
As you prepare these delightful treats, consider the perfect accompaniments that will elevate your spooky gatherings to an extraordinary feast.
-
Festive Fruit Platter: A vibrant array of seasonal fruits like oranges, apples, and bananas adds freshness and balances the sweetness of the Oreo balls.
-
Spooky Punch: Create an enticing mocktail with sparkling cider, cranberry juice, and floating gummy worms for a fun, festive drink that kids will adore.
-
Creamy Hot Cocoa: Serve warm cups of rich hot chocolate, topped with whipped cream and marshmallows, to warm the spirit of your Halloween celebration.
-
Crunchy Veggie Dip: Pairing with colorful vegetables and a tasty dip brings a crunchy contrast that complements the smooth sweetness of the Oreo balls.
-
Ghostly Cupcakes: Whip up some simple cupcakes with ghostly frosting—using whipped cream or meringue—to create a whimsical dessert tableau alongside your Oreo balls.
-
Chocolate-Covered Pretzels: The sweet and salty combination of chocolate-covered pretzels makes a fun snack that enhances the overall festive experience.
-
Candy Corn Treats: Add a bowl of candy corn or Halloween-themed candies for a nostalgic touch, inviting guests to indulge in seasonal classics.
-
Milk Shooters: Tiny glasses of milk balance the sweetness of the treats perfectly, offering a delightful contrast with each bite of chocolatey goodness.
Make Ahead Options
These Halloween Oreo Balls are perfect for meal prep enthusiasts! You can prepare the Oreo mixture up to 24 hours in advance by mixing the crushed Oreos and softened cream cheese and storing it in an airtight container in the fridge—this will allow the flavors to meld beautifully. Additionally, you can shape the balls and freeze them for up to 2 months; just remember to chill them for at least 20 minutes once you’re ready to dip. When it’s time to coat and decorate the balls, simply melt your chocolate, dip, and add your favorite toppings. They’ll be just as delicious and festive, saving you precious time when hosting your Halloween gathering!
Expert Tips for Halloween Oreo Balls
-
Crushing Oreos: Aim for fine crumbs to ensure a smooth mixture. If too chunky, your Oreo balls won’t hold together well.
-
Chill Time Matters: Ensure to chill the balls for at least 20 minutes before dipping to keep them firm during coating—a common mistake is skipping this step!
-
Smooth Dipping: Use a fork or toothpick for clean dipping, and tap off excess chocolate for a nicer finish. Proper coating is key for great-looking Halloween Oreo Balls.
-
Immediate Decorating: Sprinkle toppings right after dipping; this helps them stick and prevents the chocolate from setting too quickly.
-
Storage Tips: Refrigerate decorated balls in an airtight container to maintain freshness and texture; this helps avoid sogginess from moisture.
Halloween Oreo Balls Recipe FAQs
How do I select the best Oreos for this recipe?
Absolutely! When choosing Oreos, look for packages without visible damage, as this ensures they’re fresh and ready for crushing. If you have dietary considerations, try gluten-free Oreos, which work wonderfully in this recipe.
What’s the best way to store Halloween Oreo Balls?
Very! Store your decorated Halloween Oreo Balls in an airtight container in the refrigerator for up to 1 week. This helps maintain their delicious texture and flavor. Layer them between sheets of parchment paper to prevent sticking.
Can I freeze Halloween Oreo Balls?
The more the merrier! Freeze undipped Oreo balls in a single layer on a baking sheet for up to 2 months. Once firm, transfer them to a freezer-safe container. When you’re ready to indulge, just thaw them in the fridge overnight and dip as you normally would.
What should I do if the chocolate coating is too thick?
If your chocolate coating seems too thick, it might have been overheated or mismeasured. To fix this, gently reheat it in the microwave in 10-15 second intervals, stirring well after each time until smooth. You can also add a teaspoon of coconut oil or vegetable oil to thin it out without compromising flavor.
Are these Halloween Oreo Balls safe for kids with allergies?
Great question! These treats contain cream cheese and sugar, so they’re unsuitable for kids with dairy allergies. Always read ingredient labels carefully to ensure that no cross-contamination occurs with allergens. Consider using dairy-free cream cheese as a suitable substitute if needed.
How do I make the chocolate coating more colorful for Halloween?
To add vibrant colors to your coating, simply mix gel food coloring into your melted candy melts before dipping the Oreo balls. Start with a small amount, as a little goes a long way, and stir well to ensure even color throughout. This makes your Halloween Oreo Balls not just tasty, but visually appealing as well!
Delicious Halloween Oreo Balls for Fun No-Bake Treats
Ingredients
Equipment
Method
- Crush the Oreo cookies in a food processor until they become fine crumbs.
- Combine the crushed Oreo crumbs with softened cream cheese in a large mixing bowl and mix until smooth.
- Scoop a tablespoon of the mixture and roll it into a ball about 1 inch in diameter, placing them on a parchment-lined baking sheet.
- Chill the baking sheet in the freezer for at least 20 minutes to firm up the balls.
- Melt the candy melts or chocolate chips in a microwave-safe bowl, stirring until smooth.
- Dip each Oreo ball into the melted chocolate, allowing excess chocolate to drip off before placing back on the parchment.
- Before the coating sets, decorate with candy eyes, sprinkles, or mini chocolate chips.
- Allow the decorated balls to sit until the chocolate has hardened. For quicker results, refrigerate for about 15-20 minutes.