

Introduction to No-Bake Red Velvet Cheesecake
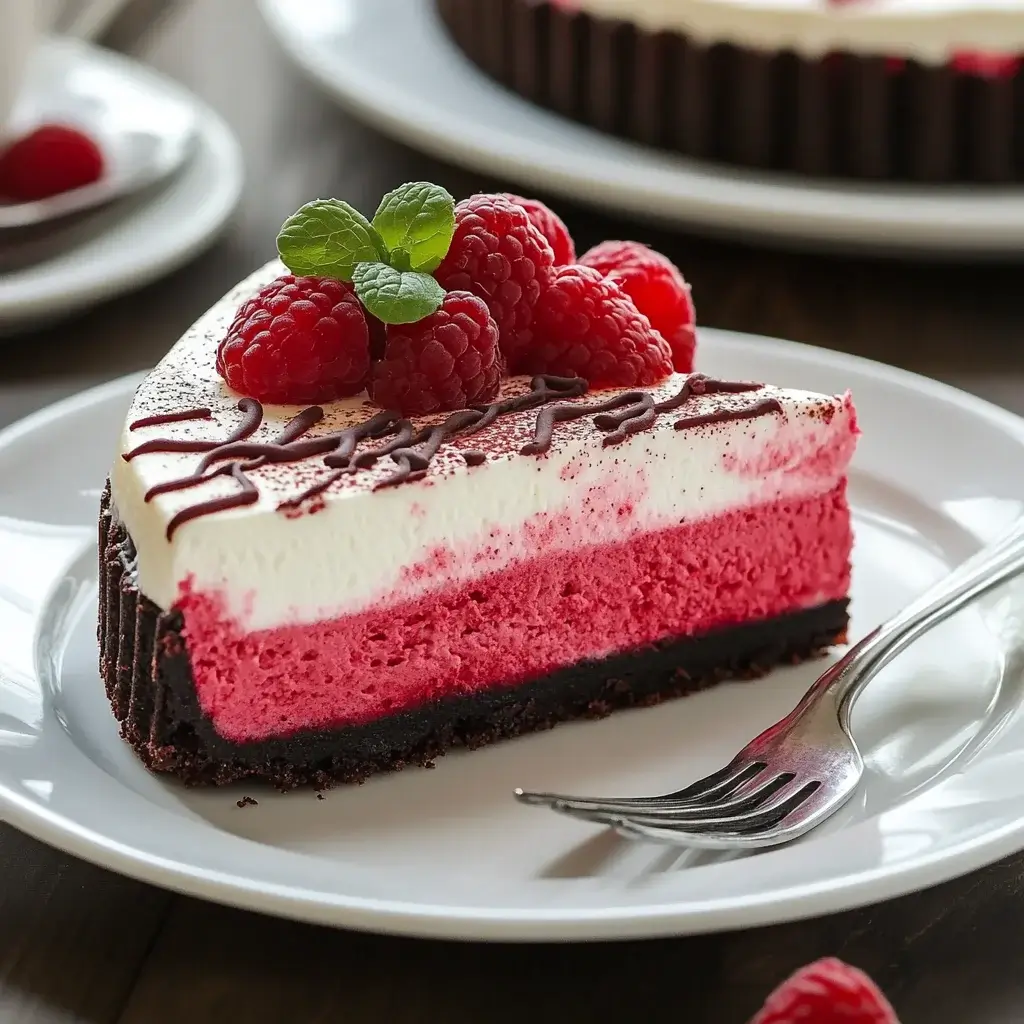
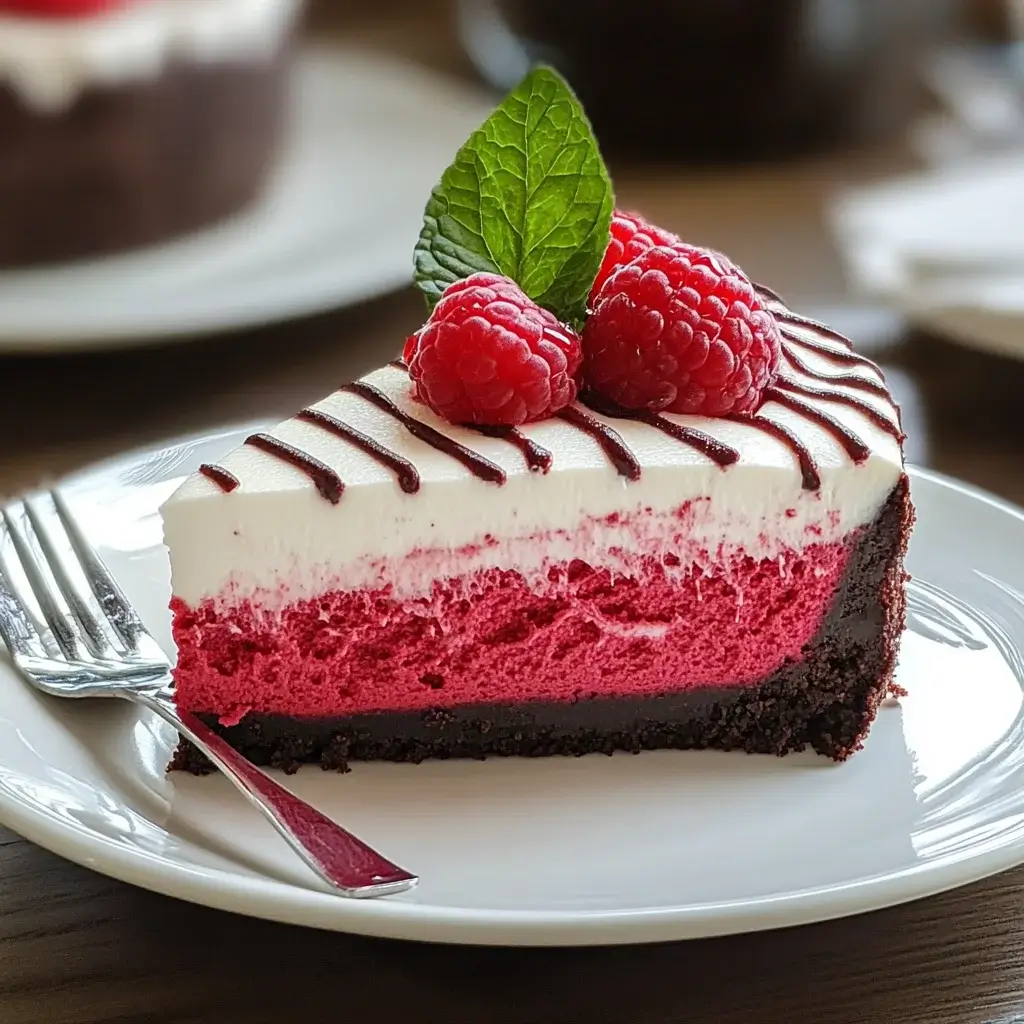
This No-Bake Red Velvet Cheesecake is a luscious dessert that requires no oven time but delivers rich, creamy indulgence. Featuring a crumbly red velvet crust and smooth, velvety cream cheese filling with a hint of cocoa, it’s perfect for last-minute entertaining or anytime you want a stunning, fuss-free dessert.
Why You’ll Love This No-Bake Red Velvet Cheesecake
-
No oven required—easy to make.
-
Classic red velvet flavor with creamy cheesecake texture.
-
Perfect for parties and special occasions.
-
Can be made ahead for convenience.
-
A visually impressive dessert that tastes divine.
Ingredients for No-Bake Red Velvet Cheesecake
Here’s your flavor foundation—grab these and let’s get cooking.
- Crushed graham crackers: These form the base of your crust, providing a sweet and crunchy texture.
- Unsweetened cocoa powder: This adds a rich chocolate flavor, enhancing the overall taste of the cheesecake.
- Granulated sugar: A touch of sweetness to balance the flavors in the crust and filling.
- Unsalted butter: This binds the crust together and adds richness.
- Cream cheese: The star of the show! It gives the cheesecake its creamy texture and tangy flavor.
- Powdered sugar: For sweetness and to help achieve that smooth consistency in the filling.
- Vanilla extract: A classic flavor enhancer that brings warmth to the cheesecake.
- Heavy whipping cream: This is whipped to create lightness in the filling, making it airy and delightful.
- Red food coloring: Essential for that iconic red velvet look; it’s all about presentation!
- Chocolate chips (optional): For a fun garnish that adds a little extra chocolatey goodness.
- Fresh raspberries (optional): These not only look beautiful but also add a fresh, tart contrast to the rich cheesecake.
You can find the exact quantities for each ingredient at the bottom of the article, ready for printing.
Feel free to get creative with substitutions or additions based on your taste preferences!
How to Make No-Bake Red Velvet Cheesecake
Step 1: Prepare the Crust
Start by grabbing a medium bowl.
Combine the crushed graham crackers, unsweetened cocoa powder, granulated sugar, and melted butter.
Mix everything until it resembles wet sand.
Now, take a 9-inch springform pan and press the mixture firmly into the bottom.
Make sure it’s even; this will be your delicious base.
Once done, pop it in the refrigerator for about 15 minutes to set.
This step is crucial for a sturdy crust that holds up when you slice into your cheesecake.
Step 2: Make the Cream Cheese Mixture
In a large mixing bowl, beat the softened cream cheese with an electric mixer.
You want it to be smooth and creamy, so take your time.
Gradually add the powdered sugar and vanilla extract, mixing until fully incorporated.
The sweetness should balance the tanginess of the cream cheese.
This mixture is the heart of your No-Bake Red Velvet Cheesecake, so make sure it’s well blended.
Set it aside while you whip the cream.
Step 3: Whip the Cream
In a separate bowl, pour in the heavy whipping cream.
Using a hand mixer, whip it until stiff peaks form.
This means when you lift the beaters, the cream should hold its shape.
Be careful not to over-whip; you want it fluffy, not grainy.
This whipped cream will add lightness to your cheesecake filling.
Once ready, gently fold it into the cream cheese mixture for a dreamy texture.
Step 4: Combine and Color
Now, it’s time to bring everything together.
Gently fold the whipped cream into the cream cheese mixture.
Be careful to keep the airiness intact; this is what makes it light and fluffy.
Next, add the red food coloring.
Mix until the color is evenly distributed, creating that iconic red velvet hue.
This step is where the magic happens, transforming your cheesecake into a visual delight.
Step 5: Assemble the Cheesecake
Pour the luscious cheesecake filling over the chilled crust.
Use a spatula to smooth the top, making it look inviting.
Cover the cheesecake with plastic wrap and refrigerate for at least 4 hours.
If you can wait overnight, do it!
This allows the flavors to meld beautifully.
When you’re ready to serve, remove the sides of the springform pan and slice into wedges.
Tips for Success
- Make sure your cream cheese is at room temperature for easy mixing.
- Don’t skip chilling the crust; it helps maintain structure.
- Use a rubber spatula to fold in the whipped cream gently.
- For a richer flavor, consider adding a splash of almond extract.
- Let the cheesecake sit at room temperature for 10 minutes before slicing for cleaner cuts.
Equipment Needed
- 9-inch springform pan: Essential for easy removal; a regular pie dish works too.
- Mixing bowls: Use at least two; any size will do.
- Electric mixer: A hand mixer is perfect; a whisk can work if you’re up for a workout.
- Rubber spatula: Great for folding; a wooden spoon can substitute.
- Measuring cups and spoons: Necessary for accuracy; eyeballing can lead to surprises!
Variations
- Chocolate Swirl: Add melted chocolate to the cream cheese mixture for a rich chocolate flavor.
- Nutty Crunch: Mix in crushed nuts like pecans or walnuts into the crust for added texture.
- Fruit Fusion: Incorporate pureed strawberries or raspberries into the filling for a fruity twist.
- Gluten-Free Option: Substitute graham crackers with gluten-free cookies or almond flour for the crust.
- Vegan Version: Use vegan cream cheese and coconut cream to create a dairy-free cheesecake.
Serving Suggestions
- Pair with a dollop of whipped cream for extra creaminess.
- Serve alongside fresh berries for a pop of color and tartness.
- Drizzle with chocolate sauce for a decadent touch.
- Enjoy with a cup of coffee or a glass of dessert wine.
- Garnish with mint leaves for a refreshing finish.
FAQs about No-Bake Red Velvet Cheesecake
Can I make this cheesecake ahead of time?
Absolutely! This No-Bake Red Velvet Cheesecake is perfect for making ahead. Just prepare it a day in advance and let it chill overnight. The flavors will deepen, making it even more delicious!
How long does the cheesecake last in the fridge?
Stored properly in an airtight container, your cheesecake can last up to 5 days in the fridge. Just be sure to keep it covered to maintain its freshness.
Can I freeze No-Bake Red Velvet Cheesecake?
Yes, you can freeze it! Wrap individual slices in plastic wrap and then place them in a freezer-safe container. It can last up to 2 months. Just thaw in the fridge before serving.
What can I use instead of cream cheese?
If you’re looking for a lighter option, Greek yogurt can be a great substitute. It will still give you that creamy texture while cutting down on calories.
Is it possible to make this cheesecake without food coloring?
Definitely! If you prefer a more natural look, you can skip the food coloring. The cheesecake will still taste amazing, just without that classic red hue.
Final Thoughts
Creating a No-Bake Red Velvet Cheesecake is more than just following a recipe; it’s about crafting a moment of joy.
The vibrant color and creamy texture bring smiles to faces, making it a perfect centerpiece for any gathering.
Whether you’re celebrating a special occasion or simply indulging on a quiet evening, this dessert never disappoints.
It’s a delightful way to share love and creativity with friends and family.
So, roll up your sleeves, gather your ingredients, and let this cheesecake be the star of your next dessert table.
You won’t regret it!
No-Bake Red Velvet Cheesecake: A Delicious, Easy Dessert!
Ingredients
Method
- In a medium bowl, combine the crushed graham crackers, cocoa powder, granulated sugar, and melted butter. Mix until well combined. Press the mixture into the bottom of a 9-inch springform pan to form the crust. Chill in the refrigerator for 15 minutes to set.
- In a large mixing bowl, beat the softened cream cheese with an electric mixer until smooth and creamy. Gradually add the powdered sugar and vanilla extract, mixing until fully incorporated.
- In a separate bowl, whip the heavy cream until stiff peaks form. Gently fold the whipped cream into the cream cheese mixture until combined.
- Add the red food coloring to the cream cheese mixture and mix until the color is evenly distributed.
- Pour the cheesecake filling over the chilled crust and smooth the top with a spatula. Cover the cheesecake with plastic wrap and refrigerate for at least 4 hours, or overnight for best results.
- Before serving, garnish with chocolate chips and fresh raspberries if desired. Carefully remove the sides of the springform pan and slice the cheesecake into wedges.
Nutrition
Notes
- For a lighter version, substitute half of the cream cheese with Greek yogurt.
- You can experiment with different food coloring to create a unique look.
- Consider adding a layer of chocolate ganache on top for extra richness.