

Introduction to Oreo Cheesecake Cookie Cups
There’s something magical about combining two beloved treats into one delightful bite. That’s exactly what these Oreo Cheesecake Cookie Cups offer!
Whether you’re looking to impress friends at a gathering or simply want a sweet escape after a long day, these little wonders are your answer.
They’re quick to whip up, and the flavors are a crowd-pleaser.
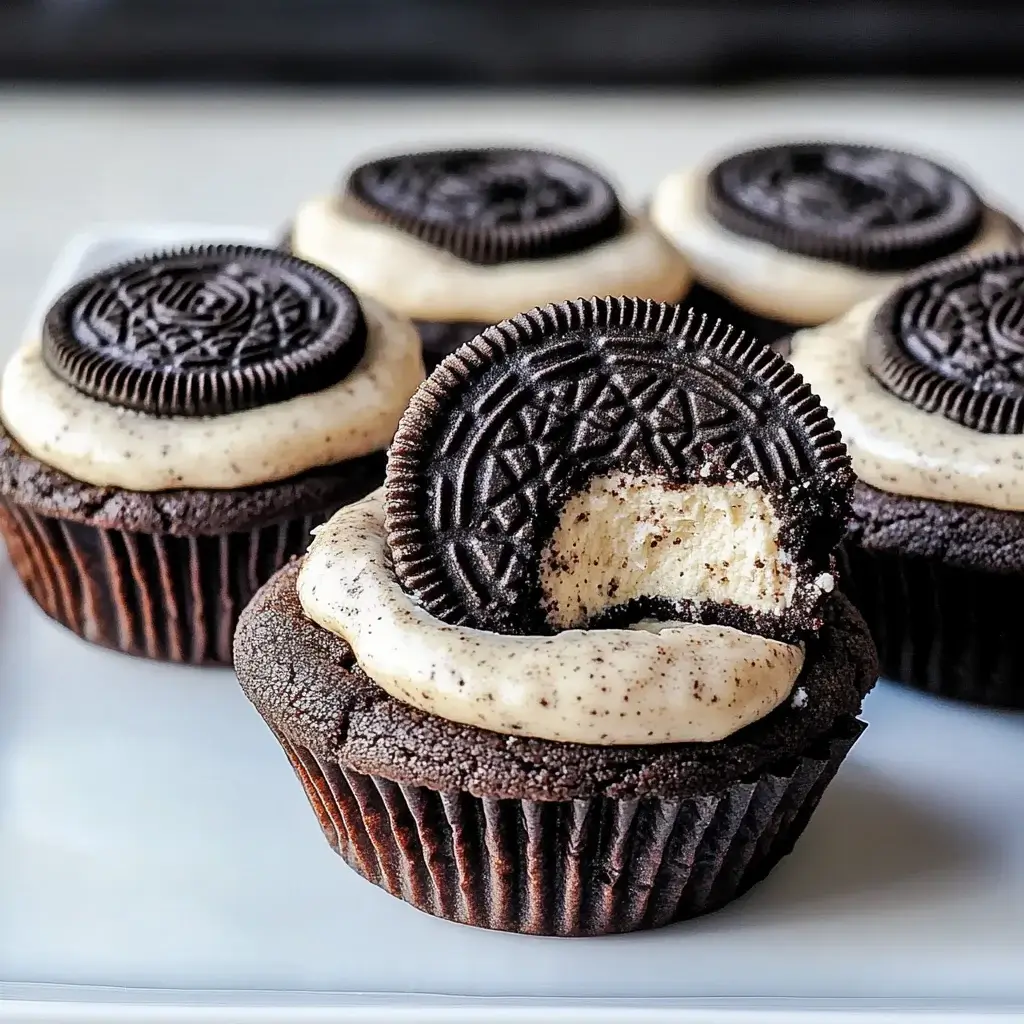
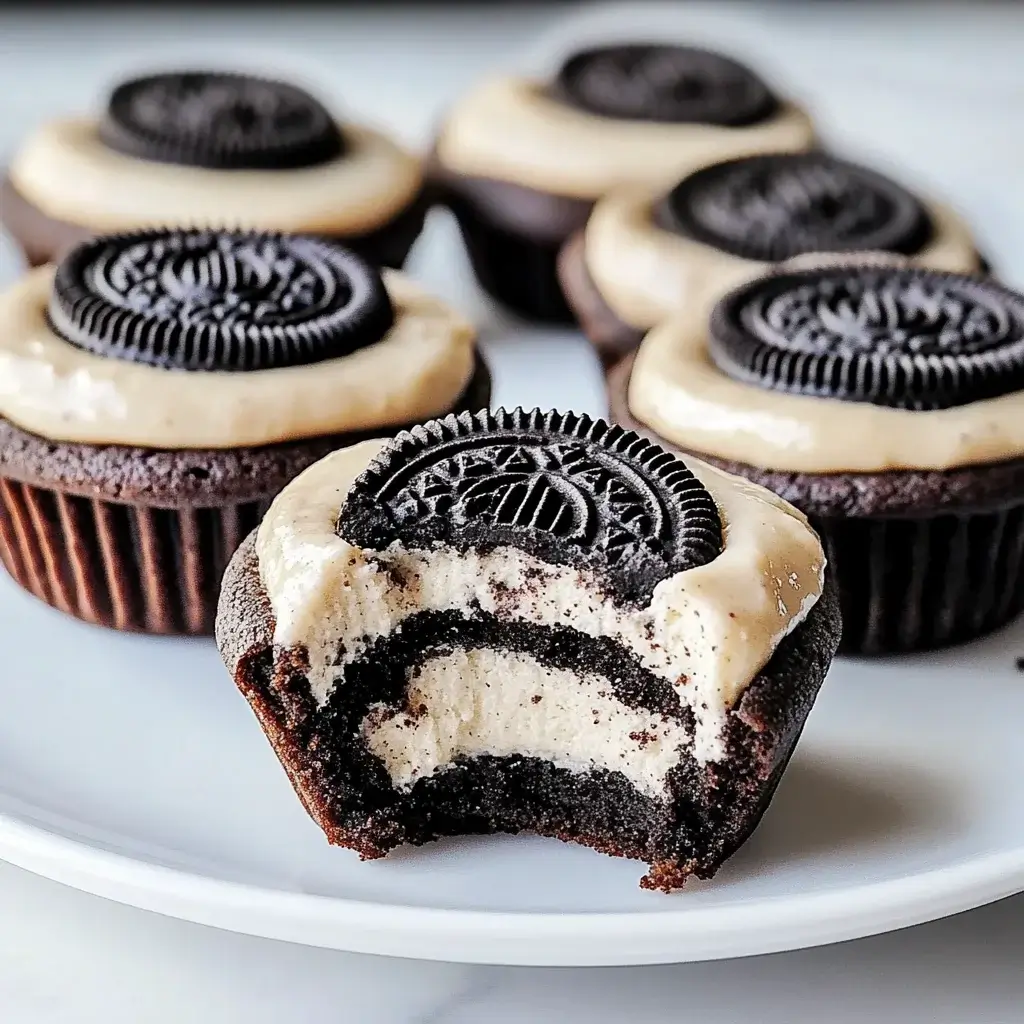
Imagine the creamy cheesecake filling nestled in a soft, cookie crust, topped with a mini Oreo.
It’s a dessert that brings joy, nostalgia, and a touch of indulgence to any occasion.
Why You’ll Love This Oreo Cheesecake Cookie Cups
These Oreo Cheesecake Cookie Cups are a game-changer for any dessert lover.
They’re incredibly easy to make, requiring just a handful of ingredients and minimal prep time.
In less than an hour, you can create a treat that’s both impressive and delicious.
The combination of rich cheesecake and crunchy Oreo is simply irresistible.
Plus, they’re perfect for sharing—or keeping all to yourself!
Who could resist that?
Ingredients for Oreo Cheesecake Cookie Cups
Creating these Oreo Cheesecake Cookie Cups is a breeze with just a few simple ingredients.
Here’s what you’ll need:
- All-purpose flour: The backbone of your cookie base, providing structure and texture.
- Baking soda: This little leavening agent helps your cookie cups rise and become fluffy.
- Salt: A pinch enhances the flavors, balancing the sweetness of the cookies.
- Unsalted butter: Softened butter adds richness and moisture to the cookie dough.
- Granulated sugar: This sweetener gives your cookie cups their delightful sweetness.
- Brown sugar: Packed with molasses, it adds a deeper flavor and chewiness.
- Large egg: Acts as a binder, helping to hold everything together.
- Vanilla extract: A splash of this adds warmth and enhances the overall flavor.
- Oreo cookie crumbs: The star of the show! These provide that iconic Oreo flavor and texture.
- Cream cheese: The creamy base for your cheesecake filling, giving it that rich, tangy taste.
- Powdered sugar: This sweetener helps to create a smooth and creamy cheesecake filling.
- Whipped topping: Lightens the cheesecake filling, making it airy and delightful.
- Mini Oreo cookies: Perfect for garnishing, adding a cute touch to your finished cookie cups.
For those looking to switch things up, consider adding a tablespoon of cocoa powder to the cheesecake filling for a chocolatey twist.
You can also swap the whipped topping for homemade whipped cream if you prefer a fresher taste.
Exact measurements for each ingredient can be found at the bottom of the article, ready for printing!
How to Make Oreo Cheesecake Cookie Cups
Step 1: Preheat and Prepare
Start by preheating your oven to 350°F. This ensures your cookie cups bake evenly.
While the oven warms up, grab a muffin tin. You can grease it lightly or line it with cupcake liners for easy removal later.
This little prep step makes all the difference when it comes to serving!
Step 2: Mix Dry Ingredients
In a medium bowl, whisk together the all-purpose flour, baking soda, and salt.
This combination is crucial for the structure of your cookie cups.
Make sure there are no lumps, as this will help create a smooth batter later on.
Step 3: Cream Butter and Sugars
In a large bowl, beat the softened butter, granulated sugar, and brown sugar together until creamy.
This step is where the magic begins!
You want a light and fluffy mixture, which will give your cookie cups that perfect texture.
Add in the egg and vanilla extract, mixing until everything is well combined.
The aroma will make your kitchen feel like a bakery!
Step 4: Combine Wet and Dry Ingredients
Gradually add the dry ingredients to the wet mixture, mixing until just combined.
Be careful not to overmix; a few flour streaks are okay.
Now, fold in the Oreo cookie crumbs gently.
This is where the iconic flavor comes into play, making your cookie cups truly special.
Step 5: Bake the Cookie Cups
Scoop about 1 tablespoon of the cookie dough into each muffin cup, pressing it down slightly to form a base.
This helps create a sturdy foundation for your cheesecake filling.
Bake for 10-12 minutes or until the edges are lightly golden.
Once done, remove them from the oven and let them cool completely in the pan.
Step 6: Prepare the Cheesecake Filling
While the cookie cups are cooling, it’s time to prepare the cheesecake filling.
In a mixing bowl, beat the softened cream cheese until smooth.
Gradually add the powdered sugar and vanilla extract, mixing until well combined.
Finally, gently fold in the whipped topping until no streaks remain.
This filling is the creamy heart of your cookie cups!
Step 7: Fill the Cookie Cups
Once the cookie cups are cool, it’s time to fill them.
Spoon the cheesecake mixture into each cup, smoothing the top with a spatula.
Make sure to fill them generously; you want each bite to be a delightful surprise!
Step 8: Chill and Garnish
Chill the cookie cups in the refrigerator for at least 1 hour before serving.
This helps the cheesecake filling set perfectly.
Before serving, top each cup with a mini Oreo cookie for that extra touch of fun.
Your Oreo Cheesecake Cookie Cups are now ready to impress!
Tips for Success
- Make sure your butter and cream cheese are at room temperature for easy mixing.
- Don’t overmix the batter; it can lead to tough cookie cups.
- Use a cookie scoop for even portions and consistent sizes.
- Let the cookie cups cool completely before adding the cheesecake filling.
- Chill the filled cups for at least an hour to achieve the best texture.
Equipment Needed
- Muffin tin: Essential for shaping your cookie cups. A silicone muffin pan works great for easy removal.
- Mixing bowls: Use a large bowl for wet ingredients and a medium one for dry. Any size will do!
- Electric mixer: A hand mixer speeds up the creaming process, but a whisk works too.
- Spatula: Perfect for filling and smoothing the cheesecake mixture.
- Cookie scoop: Helps with portioning the dough evenly; a tablespoon works just as well.
Variations
- Chocolate Lovers: Add a tablespoon of cocoa powder to the cookie dough for a rich chocolate flavor.
- Nutty Twist: Incorporate chopped nuts like walnuts or pecans into the cookie base for added crunch.
- Fruit Infusion: Mix in some crushed strawberries or raspberries into the cheesecake filling for a fruity kick.
- Gluten-Free Option: Substitute all-purpose flour with a gluten-free flour blend to make these cookie cups gluten-free.
- Vegan Version: Use vegan butter, a flax egg, and dairy-free cream cheese for a plant-based treat.
Serving Suggestions
- Pair these cookie cups with a scoop of vanilla ice cream for an indulgent dessert experience.
- Serve alongside a rich cup of coffee or a chilled glass of milk to complement the flavors.
- For a festive touch, arrange them on a decorative platter with fresh berries.
- Drizzle with chocolate or caramel sauce for an extra layer of sweetness.
FAQs about Oreo Cheesecake Cookie Cups
Can I make these Oreo Cheesecake Cookie Cups ahead of time?
Absolutely! You can prepare the cookie cups and cheesecake filling a day in advance. Just assemble and chill them before serving. They taste even better after a night in the fridge!
What can I use instead of cream cheese?
If you’re looking for a lighter option, you can substitute cream cheese with Greek yogurt or a dairy-free cream cheese alternative. Both will give you a creamy texture without compromising flavor.
How do I store leftover cookie cups?
Store any leftovers in an airtight container in the refrigerator. They’ll stay fresh for up to three days, but trust me, they won’t last that long!
Can I freeze these cookie cups?
Yes, you can freeze the cookie cups! Just make sure they are fully cooled and stored in a freezer-safe container. Thaw them in the fridge before serving for the best texture.
What’s the best way to serve these cookie cups?
Serve them chilled, topped with a mini Oreo for that extra flair. They’re perfect for parties, potlucks, or just a cozy night in!
Final Thoughts
Baking these Oreo Cheesecake Cookie Cups is more than just a recipe; it’s an experience filled with joy and nostalgia.
Each bite transports you back to simpler times, where dessert was a celebration.
The creamy cheesecake paired with the crunch of Oreo creates a delightful contrast that’s hard to resist.
Whether you’re sharing them with friends or savoring them solo, these cookie cups bring smiles all around.
So, roll up your sleeves, gather your ingredients, and let the magic unfold in your kitchen.
Trust me, your taste buds will thank you!
Oreo Cheesecake Cookie Cups that Delight Every Bite!
Ingredients
Method
- Preheat your oven to 350°F. Grease a muffin tin or line it with cupcake liners.
- In a medium bowl, whisk together the flour, baking soda, and salt. Set aside.
- In a large bowl, beat the softened butter, granulated sugar, and brown sugar together until creamy. Add the egg and vanilla extract, mixing until well combined.
- Gradually add the dry ingredients to the wet ingredients, mixing until just combined. Fold in the Oreo cookie crumbs.
- Scoop about 1 tablespoon of the cookie dough into each muffin cup, pressing it down slightly to form a base. Bake for 10-12 minutes or until the edges are lightly golden. Remove from the oven and let cool completely in the pan.
- While the cookie cups are cooling, prepare the cheesecake filling. In a mixing bowl, beat the softened cream cheese until smooth. Gradually add the powdered sugar and vanilla extract, mixing until well combined. Gently fold in the whipped topping until no streaks remain.
- Once the cookie cups are cool, fill each cup with the cheesecake mixture, smoothing the top with a spatula.
- Chill the cookie cups in the refrigerator for at least 1 hour before serving. Top each cup with a mini Oreo cookie for garnish.
Nutrition
Notes
- For a richer flavor, try adding a tablespoon of cocoa powder to the cheesecake filling.
- You can also substitute the whipped topping with homemade whipped cream for a fresher taste.