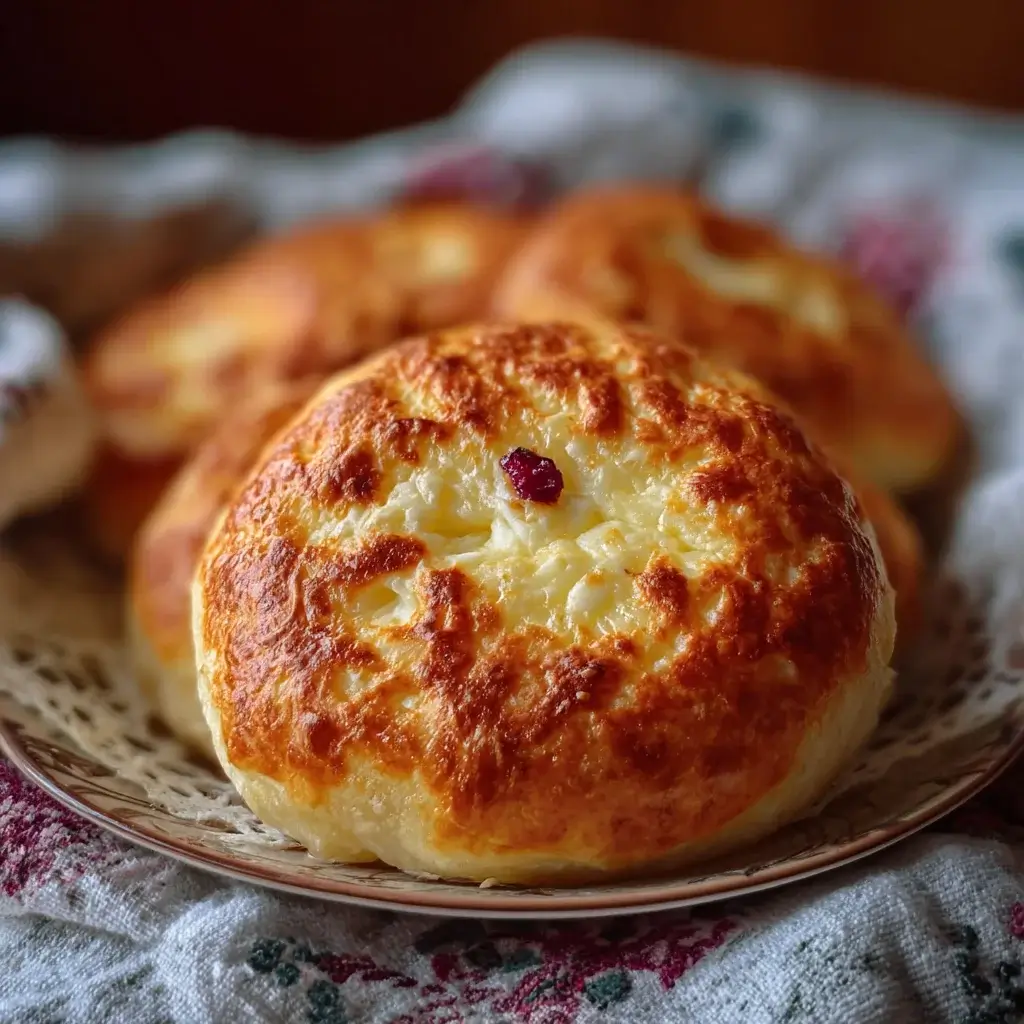
There’s something magical about the aroma of freshly baked pastries wafting through the kitchen. Vatrushka: Russian cheese pastry is one of those delightful treats that can instantly transport you to a cozy café in Moscow. This recipe is perfect for those busy days when you want to impress your loved ones without spending hours in the kitchen. With its creamy cheese filling and soft, pillowy dough, Vatrushka is not just a snack; it’s a warm hug on a plate. Trust me, once you try it, you’ll be hooked!
Why You’ll Love This Vatrushka: Russian Cheese Pastry
This Vatrushka: Russian cheese pastry is a game-changer for any home cook. It’s incredibly easy to whip up, making it perfect for both novice bakers and seasoned pros. The delightful combination of creamy cheese and soft dough creates a taste that’s simply irresistible. Plus, it’s a quick recipe that can be ready in under two hours, allowing you to enjoy a delicious treat without the fuss. Your taste buds will thank you!
Ingredients for Vatrushka: Russian Cheese Pastry
Gathering the right ingredients is the first step to creating your Vatrushka: Russian cheese pastry. Each component plays a vital role in achieving that perfect balance of flavor and texture. Here’s what you’ll need:
All-purpose flour: The backbone of your dough, providing structure and chewiness.
Granulated sugar: Adds sweetness to both the dough and the cheese filling, enhancing the overall flavor.
Salt: A pinch of salt elevates the taste, balancing the sweetness.
Active dry yeast: This little powerhouse helps the dough rise, creating that fluffy texture we all love.
Warm milk: Activates the yeast and adds moisture to the dough, making it tender.
Unsalted butter: Adds richness and flavor to the dough, ensuring it’s soft and delicious.
Egg: Acts as a binding agent, giving the dough its structure and a lovely golden color.
Vanilla extract: A splash of vanilla adds a warm, inviting aroma and flavor to the pastry.
Ricotta cheese: The star of the filling, offering a creamy texture and mild flavor.
Cream cheese: Adds richness and a slight tang to the filling, making it irresistible.
Granulated sugar (for filling): Sweetens the cheese mixture, balancing the flavors.
Egg yolk: Enriches the filling and helps it set during baking.
Vanilla extract (for filling): Enhances the flavor of the cheese filling, making it even more delightful.
For those looking to mix things up, consider adding a tablespoon of lemon zest to the cheese filling for a refreshing twist. If you prefer a lighter option, you can substitute the ricotta and cream cheese with cottage cheese. All ingredient quantities are listed at the bottom of the article for easy reference and printing!
How to Make Vatrushka: Russian Cheese Pastry
Step 1: Prepare the Dough
Start by combining the dry ingredients in a large mixing bowl. Mix the all-purpose flour, granulated sugar, and salt until well blended. In a separate small bowl, dissolve the active dry yeast in warm milk. Let it sit for about five minutes until it becomes frothy. This step is crucial as it activates the yeast, ensuring your dough rises beautifully. Once frothy, you’re ready to move on to the next step!
Step 2: Mix Wet Ingredients
Now, it’s time to bring the wet ingredients together. In the bowl with the frothy yeast mixture, add the melted unsalted butter, one large egg, and a teaspoon of vanilla extract. Stir everything together until well combined. This mixture will add moisture and flavor to your dough, making it rich and delicious. The warm butter and egg will help create that soft texture we all crave in a pastry.
Step 3: Form the Dough
Gradually add the wet mixture to the dry ingredients. Use a wooden spoon or your hands to mix until a dough begins to form. Once combined, transfer the dough to a floured surface. Knead it for about five to seven minutes until it’s smooth and elastic. This step is essential for developing gluten, which gives the dough its structure. You’ll know it’s ready when it springs back when poked!
Step 4: Let the Dough Rise
Place your kneaded dough in a greased bowl, covering it with a clean kitchen towel. Let it rise in a warm place for about one hour, or until it doubles in size. This rising time is crucial; it allows the yeast to work its magic, creating that light and airy texture. If your kitchen is cool, consider placing the bowl near a warm oven or in a sunny spot to speed up the process.
Step 5: Prepare the Filling
While the dough is rising, let’s whip up the cheese filling. In a mixing bowl, combine the ricotta cheese, softened cream cheese, granulated sugar, egg yolk, and a splash of vanilla extract. Mix until smooth and creamy. This filling is the heart of your Vatrushka: Russian cheese pastry, offering a delightful contrast to the soft dough. Feel free to taste it; you might want to add a bit more sugar or vanilla!
Step 6: Shape the Pastries
Once the dough has risen, punch it down gently to release the air. Divide it into eight equal pieces. Roll each piece into a ball, then flatten it into a disc about four inches in diameter. Use your fingers to create a small well in the center of each disc. This is where the creamy cheese filling will go, so make sure it’s deep enough to hold a generous scoop!
Step 7: Fill and Bake
Now comes the fun part! Spoon the cheese filling into the wells of each pastry. Be generous, but don’t overfill, as the filling may spill out while baking. Preheat your oven to 375°F (190°C) and place the filled pastries on a parchment-lined baking sheet. Bake for 20 to 25 minutes, or until they’re golden brown. The aroma will fill your kitchen, and you’ll know they’re ready to be enjoyed!
Tips for Success
Ensure your milk is warm, not hot, to activate the yeast properly.
Don’t skip the rising time; it’s key for fluffy pastries.
Use a kitchen scale for precise measurements, especially for flour.
Experiment with fillings—try adding fruits or spices for a twist.
Let the pastries cool slightly before serving for the best texture.
Equipment Needed
Mixing bowls: A large bowl for the dough and a smaller one for the filling.
Wooden spoon: Perfect for mixing; a spatula works too.
Floured surface: A clean countertop or cutting board for kneading.
Parchment paper: For lining the baking sheet; aluminum foil is a good alternative.
Oven: Essential for baking; a toaster oven can work in a pinch.
Variations of Vatrushka: Russian Cheese Pastry
Fruit-Infused Filling: Add fresh berries or diced apples to the cheese mixture for a fruity twist that brightens the flavor.
Lemon Zest: Incorporate a tablespoon of lemon zest into the filling for a refreshing citrus kick.
Herbed Cheese: Mix in fresh herbs like dill or chives with the cheese filling for a savory version that pairs well with soups.
Gluten-Free Option: Substitute all-purpose flour with a gluten-free blend to accommodate dietary restrictions.
Vegan Variation: Use plant-based cream cheese and a flax egg (1 tablespoon ground flaxseed mixed with 2.5 tablespoons water) for a vegan-friendly pastry.
Serving Suggestions for Vatrushka: Russian Cheese Pastry
Pair with Tea: Enjoy your Vatrushka with a cup of strong black tea for a delightful afternoon treat.
Fresh Berries: Serve alongside fresh berries for a burst of color and flavor.
Dust with Powdered Sugar: A light dusting of powdered sugar adds a sweet finishing touch.
Presentation: Arrange on a rustic wooden board for a charming display.
FAQs about Vatrushka: Russian Cheese Pastry
What is Vatrushka?
Vatrushka is a traditional Russian cheese pastry filled with a creamy cheese mixture. It’s a delightful treat that can be enjoyed as a snack or dessert, perfect for sharing with family and friends.
Can I make Vatrushka ahead of time?
Absolutely! You can prepare the dough and filling in advance. Just store them separately in the fridge. When you’re ready to bake, let the dough come to room temperature before shaping and filling.
What can I substitute for ricotta cheese?
If you’re looking for alternatives, cottage cheese works well for a lighter filling. You can also use cream cheese alone for a richer taste. Just remember to adjust the sweetness to your liking!
How do I store leftover Vatrushka?
Store any leftover Vatrushka in an airtight container at room temperature for up to two days. For longer storage, refrigerate them, and reheat in the oven for a few minutes to regain that fresh-baked taste.
Can I freeze Vatrushka?
Yes, you can freeze Vatrushka! After baking, let them cool completely, then place them in a freezer-safe container. They can be frozen for up to three months. Just thaw and reheat when you’re ready to enjoy!
Final Thoughts
Making Vatrushka: Russian cheese pastry is more than just baking; it’s an experience that fills your home with warmth and joy. Each bite offers a delightful blend of creamy cheese and soft dough, creating a comforting treat that brings people together. Whether you’re sharing them with family or enjoying a quiet moment with a cup of tea, these pastries are sure to create lasting memories. So roll up your sleeves, embrace the process, and let the magic of Vatrushka brighten your day. Trust me, once you taste them, you’ll want to make them again and again!
Vatrushka is a traditional Russian cheese pastry filled with a creamy cheese mixture, perfect for a delightful snack or dessert.
Ingredients
Scale
2 cups all-purpose flour
1/2 cup granulated sugar
1/2 teaspoon salt
1 tablespoon active dry yeast
1/2 cup warm milk (110°F)
1/4 cup unsalted butter, melted
1 large egg
1 teaspoon vanilla extract
1 cup ricotta cheese
1/2 cup cream cheese, softened
1/4 cup granulated sugar
1 large egg yolk
1 teaspoon vanilla extract
Instructions
In a large mixing bowl, combine the flour, sugar, and salt. In a separate small bowl, dissolve the yeast in warm milk and let it sit for about 5 minutes until frothy.
Add the melted butter, egg, and vanilla extract to the yeast mixture. Stir to combine.
Gradually add the wet ingredients to the dry ingredients, mixing until a dough forms. Knead the dough on a floured surface for about 5-7 minutes until smooth and elastic.
Place the dough in a greased bowl, cover with a clean kitchen towel, and let it rise in a warm place for about 1 hour, or until doubled in size.
While the dough is rising, prepare the filling by mixing the ricotta cheese, cream cheese, sugar, egg yolk, and vanilla extract in a bowl until smooth.
Preheat the oven to 375°F (190°C).
Once the dough has risen, punch it down and divide it into 8 equal pieces. Roll each piece into a ball and then flatten it into a disc about 4 inches in diameter.
Place the discs on a parchment-lined baking sheet. Use your fingers to create a small well in the center of each disc.
Spoon the cheese filling into the wells of each pastry.
Bake in the preheated oven for 20-25 minutes, or until the pastries are golden brown.
Allow to cool slightly before serving.
Notes
For a fruity twist, add a tablespoon of lemon zest to the cheese filling or top the pastries with fresh berries before baking.
Substitute the ricotta and cream cheese with cottage cheese for a lighter filling option.