

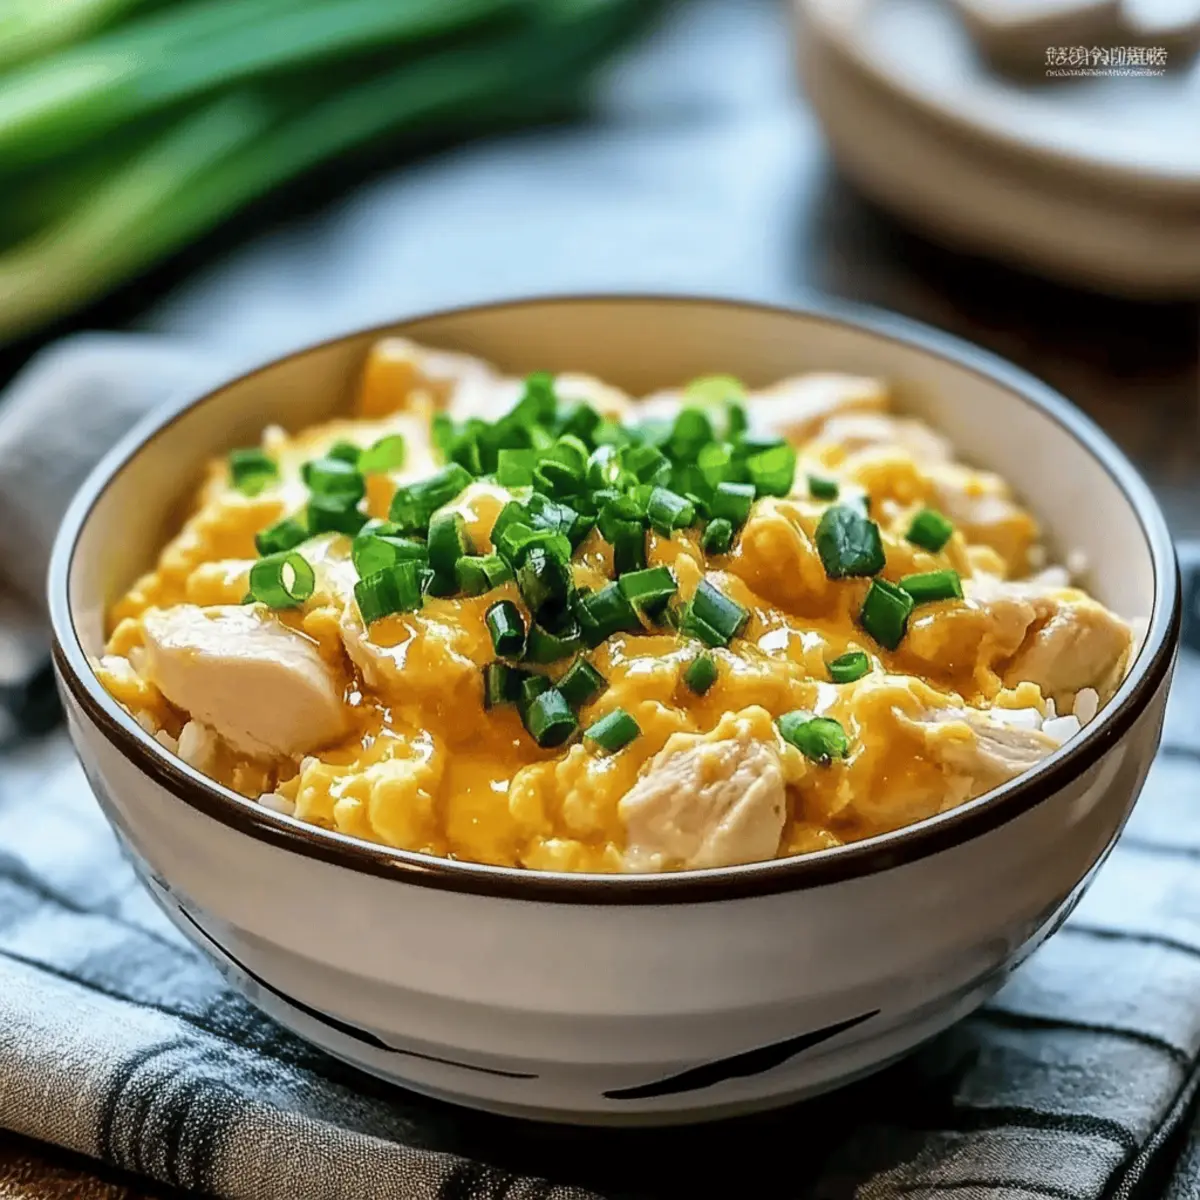
As the sun dips below the horizon, the aroma of a simmering meal wafts through my kitchen, instantly transforming my space into a sanctuary. Today, I’m thrilled to share my 15-Minute Oyakodon, a cozy chicken & egg rice bowl that’s become my go-to for those busy weeknights when I want something nutritious yet comforting. This delightful one-pan dish not only makes a delicious and satisfying meal but also promises quick prep with minimal cleanup—a true triumph when time is of the essence. Whether you’re a seasoned home chef or a culinary novice, Oyakodon is fully customizable, ensuring that it meets every palate’s delight. So, ready to discover the joy of whipping up this heartwarming dish? Let’s dive into the recipe together!
Why is Oyakodon a Must-Try?
Simplicity at Its Best: This 15-minute recipe is perfect for anyone, even those just starting their culinary journey.
Flavor Explosion: The combination of tender chicken, fluffy eggs, and a savory broth creates an irresistible savory taste you’ll adore.
Versatile Enjoyment: Customize your bowl with your choice of toppings, from sautéed veggies to a splash of spice!
No Cleanup Hassle: With just one pan needed, you can enjoy delicious comfort food without the pile of dishes.
Crowd-Pleaser: Ideal for weeknight dinners or entertaining friends, Oyakodon will impress everyone at your table.
Feel free to try your hand at similar dishes like Corn Chicken Rice or Cheesy Chicken Rice for more cozy meal options!
Cozy Chicken & Egg Rice Bowl Ingredients
Get ready to whip up a delicious and fast meal!
For the Chicken Mixture
- Skinless Boneless Chicken Thighs – Tender and flavorful; can substitute with chicken breast if preferred.
- Medium Onion – Enhances sweetness in the dish; shallots work well as a substitute.
- Chicken Stock or Dashi – Forms the savory base; chicken broth serves as a good alternative.
- Soy Sauce – Adds delightful umami; tamari can be used for a gluten-free option.
- Mirin – Contributes essential sweetness; a mix of sugar and rice vinegar works in a pinch.
- Sugar – Balances out the flavors; opt for brown sugar for a richer taste.
For the Egg Mixture
- Large Eggs – Provide protein and create a fluffy texture; use farm-fresh eggs for best results.
For Serving
- Cooked Rice – Serves as the comforting base; traditional short-grain rice is recommended.
- Green Onion – Fresh garnish to add a pop of color and flavor.
- Sesame Oil – Adds a rich, nutty flavor; use sparingly for an extra touch.
- Nori – Optional seaweed garnish for that authentic touch.
- Togarashi – A dash adds a kick of heat; customize your cozy chicken & egg rice bowl to taste!
Step‑by‑Step Instructions for Cozy Chicken & Egg Rice Bowl
Step 1: Marinate Chicken
Begin by combining the skinless boneless chicken thighs, soy sauce, mirin, and sugar in a mixing bowl. Let the chicken marinate for about 5 to 10 minutes, allowing the flavors to seep in. This step is essential for building depth in your cozy chicken & egg rice bowl. Meanwhile, gather your other ingredients so you’re ready for the next steps.
Step 2: Whisk Eggs
In a separate bowl, crack the large eggs and whisk them lightly, breaking the yolks but leaving some whites visible for a fluffy texture. Set this bowl aside as you prepare your skillet for cooking. The eggs will provide a rich contrast to the savory chicken and broth in your dish.
Step 3: Simmer Broth
Heat a large skillet over medium heat and pour in the chicken stock or dashi. Bring it to a gentle simmer, watching for small bubbles to form, indicating it’s ready for the next ingredients. This flavorful base is crucial in creating the comforting essence of the cozy chicken & egg rice bowl.
Step 4: Cook Onions
Add the sliced medium onion to the simmering broth and cook for about 1 minute. Stir until the onions become fragrant and translucent, enhancing the savory aroma that fills your kitchen. This step adds a wonderful sweetness that balances the dish beautifully.
Step 5: Add Chicken
Carefully stir in the marinated chicken, ensuring it is evenly distributed throughout the onion mixture. Cook for 1 to 2 minutes, or until the chicken is fully cooked and tender, with no pink remaining. The aroma of the dish will intensify, signaling that it’s coming together perfectly.
Step 6: Pour Eggs
Gently pour the whisked eggs over the chicken and onion mixture. Allow the eggs to cook for a moment until the edges start to set, then lightly scramble the mixture using a spatula. Remove the skillet from heat while the eggs remain soft and silky, ensuring a delightful texture for your cozy chicken & egg rice bowl.
Step 7: Serve
Scoop generous portions of the chicken and egg mixture over warm cooked rice, creating a cozy and inviting presentation. Garnish with finely chopped green onions, a drizzle of sesame oil, and optional toppings like nori or togarashi for a burst of flavor. Your cozy chicken & egg rice bowl is now ready to be enjoyed!
Expert Tips for Cozy Chicken & Egg Rice Bowl
-
Egg Whisking Technique: Whisk the eggs just until mixed, leaving some whites visible for a fluffier texture. This will elevate your cozy chicken & egg rice bowl.
-
Rice Cooking Tips: Use slightly less water than usual to help the rice absorb the savory broth flavor, enhancing the overall taste of the dish.
-
Marination Time: Don’t skip the marinating step! Allowing the chicken to soak in the soy sauce and mirin for 5-10 minutes is key to deepening the flavors.
-
Serving Temperature: For the best experience, serve your rice and chicken mixture hot. This keeps the dish comforting and delightful, just like a warm hug.
-
Customize Wisely: When adding extra veggies or proteins, keep the cooking time in mind. Quick-cooking options ensure everything heats through evenly without overcooking the eggs.
Make Ahead Options
These delightful Cozy Chicken & Egg Rice Bowls are perfect for meal prep enthusiasts looking to save time during busy weeknights! You can marinate the chicken thighs in the soy sauce, mirin, and sugar mixture up to 24 hours in advance—this enhances the flavor significantly. Additionally, you can cook the rice ahead of time, refrigerating it for up to 3 days, to ensure it’s ready when you are. When it’s time to enjoy your meal, simply reheat the rice while simmering the chicken and onions, then pour in the whisked eggs and finish cooking as directed. Trust me, you’ll have the comforting taste of freshly made Oyakodon without the fuss!
Cozy Chicken & Egg Rice Bowl Variations
Customize your Oyakodon with these delightful twists that will elevate your dining experience!
-
Gluten-Free: Substitute soy sauce with tamari to keep your dish gluten-free while maintaining delectable flavor.
-
Veggie Boost: Add sautéed mushrooms or fresh spinach to the mix for extra nutrition and a lovely pop of color—your taste buds will thank you!
-
Pork Variation: Swap chicken for thinly sliced pork for a richer and more savory taste that adds a different dimension to this classic dish.
-
Heat Level: Sprinkle in some Sriracha or chili flakes for a spicy kick that warms you from the inside out. The right amount can balance the dish beautifully!
-
Quinoa Twist: Serve your Oyakodon over quinoa instead of rice for a heartier, nutrient-dense base. It pairs wonderfully with the chicken and eggs!
-
Sweet & Savory: Mix in some quick-cooking veggies like bell peppers or zucchini along with a dash of honey for a sweet-savory contrast; it adds another layer of depth.
-
Nori Upgrade: For an authentic touch, crumble extra nori over the top just before serving; it provides an elegant finish and a hint of umami.
-
Salad Side: Pair your cozy chicken & egg rice bowl with a simple side salad; try a pickled cucumber salad for an excellent, refreshing crunch that complements the warm bowl.
Feel free to explore variations that suit your preferences! Enjoy a comforting bowl while discovering delicious alternatives like Buffalo Chicken Bowls or Honey Ginger Chicken, which promise to please!
How to Store and Freeze Cozy Chicken & Egg Rice Bowl
Fridge: Store leftovers in an airtight container for up to 2 days to maintain freshness and flavor.
Freezer: For longer storage, freeze portions in airtight containers for up to 1 month. Ensure the mixture is cool before sealing.
Reheating: To enjoy your cozy chicken & egg rice bowl, reheat gently on the stovetop over low heat, adding a splash of broth or water if needed to prevent drying out.
Best Practices: When stored properly, you can savor the comforting essence of this dish even after cooking!
What to Serve with 15-Minute Oyakodon
Embrace the heartwarming flavors of Oyakodon with delightful sides that perfectly complement this cozy chicken & egg rice bowl.
-
Steamed Broccoli: A vibrant, crisp side that adds freshness and a nutrition boost, balancing the richness of the dish.
-
Japanese Pickles (Tsukemono): These tangy, crunchy pickles offer a refreshing contrast, enhancing the savory flavor profile of your rice bowl.
-
Miso Soup: A classic accompaniment, the light and savory miso soup warms the palate and adds an extra layer of comfort to your meal.
-
Cucumber Salad: Cool, crisp cucumbers tossed in a sesame dressing provide a refreshing crunch, bringing balance and flavor harmony.
-
Tempura Vegetables: Lightly battered and fried, these crispy delights add texture and a burst of savory goodness that pairs beautifully with Oyakodon.
-
Gyoza (Dumplings): Silky and savory, these delicious dumplings elevate your dinner experience, making every bite feel like a special occasion.
-
Chilled Sake: This smooth drink complements Japanese cuisine beautifully, offering a delicate balance of flavors that enhance the comfort of your meal.
-
Mochi Ice Cream: For dessert, this sweet treat offers a delightful chewiness and creamy filling, rounding off your meal with a fun, indulgent touch.
Cozy Chicken & Egg Rice Bowl Recipe FAQs
What type of chicken is best for Oyakodon?
I recommend using skinless boneless chicken thighs for the best tenderness and flavor in your cozy chicken & egg rice bowl. If you’re looking for a lighter option, chicken breast works well too, just be mindful that it may cook a little faster, so keep an eye on it!
How do I store leftovers of Oyakodon?
Absolutely! Store any leftover cozy chicken & egg rice bowl in an airtight container in the fridge for up to 2 days. This helps keep it fresh and delicious. If you’re concerned about the egg texture, make sure to enjoy the leftovers gently reheat them!
Can I freeze Oyakodon?
Yes, you can freeze it! Portion your cozy chicken & egg rice bowl into airtight containers and freeze for up to 1 month. Ensure the dish has cooled before sealing to prevent any moisture buildup. When you’re ready to enjoy, simply thaw overnight in the fridge and reheat gently on the stove.
How can I prevent the eggs from overcooking?
Very important! To keep your eggs soft and silky, watch the cooking time closely. Once you pour the whisked eggs over the chicken, allow them to cook until just set around the edges, then gently scramble. If you’re reheating leftovers, do so on low heat to avoid further cooking the eggs.
Are there any allergen considerations with Oyakodon?
Great question! This cozy chicken & egg rice bowl contains soy sauce, which can pose a risk to those with soy allergies. For gluten-free options, substitute soy sauce with tamari. Always double-check your ingredients for any additional allergens that may be important to you or your guests.
Can I customize the toppings for my Oyakodon?
Absolutely! One of the joys of making Oyakodon is the ability to customize it! Add sautéed mushrooms, spinach, or even a sprinkle of chili flakes for a touch of heat. The more the merrier when it comes to toppings on your cozy chicken & egg rice bowl!
Cozy Chicken & Egg Rice Bowl
Ingredients
Equipment
Method
- Combine the chicken thighs, soy sauce, mirin, and sugar in a mixing bowl and marinate for 5-10 minutes.
- Whisk the eggs in a separate bowl, breaking the yolks but leaving some whites visible.
- Heat a large skillet over medium heat and pour in the chicken stock or dashi, bringing it to a gentle simmer.
- Add sliced onion to the simmering broth and cook for about 1 minute until fragrant.
- Stir in the marinated chicken and cook for 1-2 minutes until fully cooked.
- Gently pour the whisked eggs over the chicken and onion mixture, lightly scrambling as edges set.
- Scoop the mixture over warm cooked rice and garnish with green onions, sesame oil, and optional toppings.