

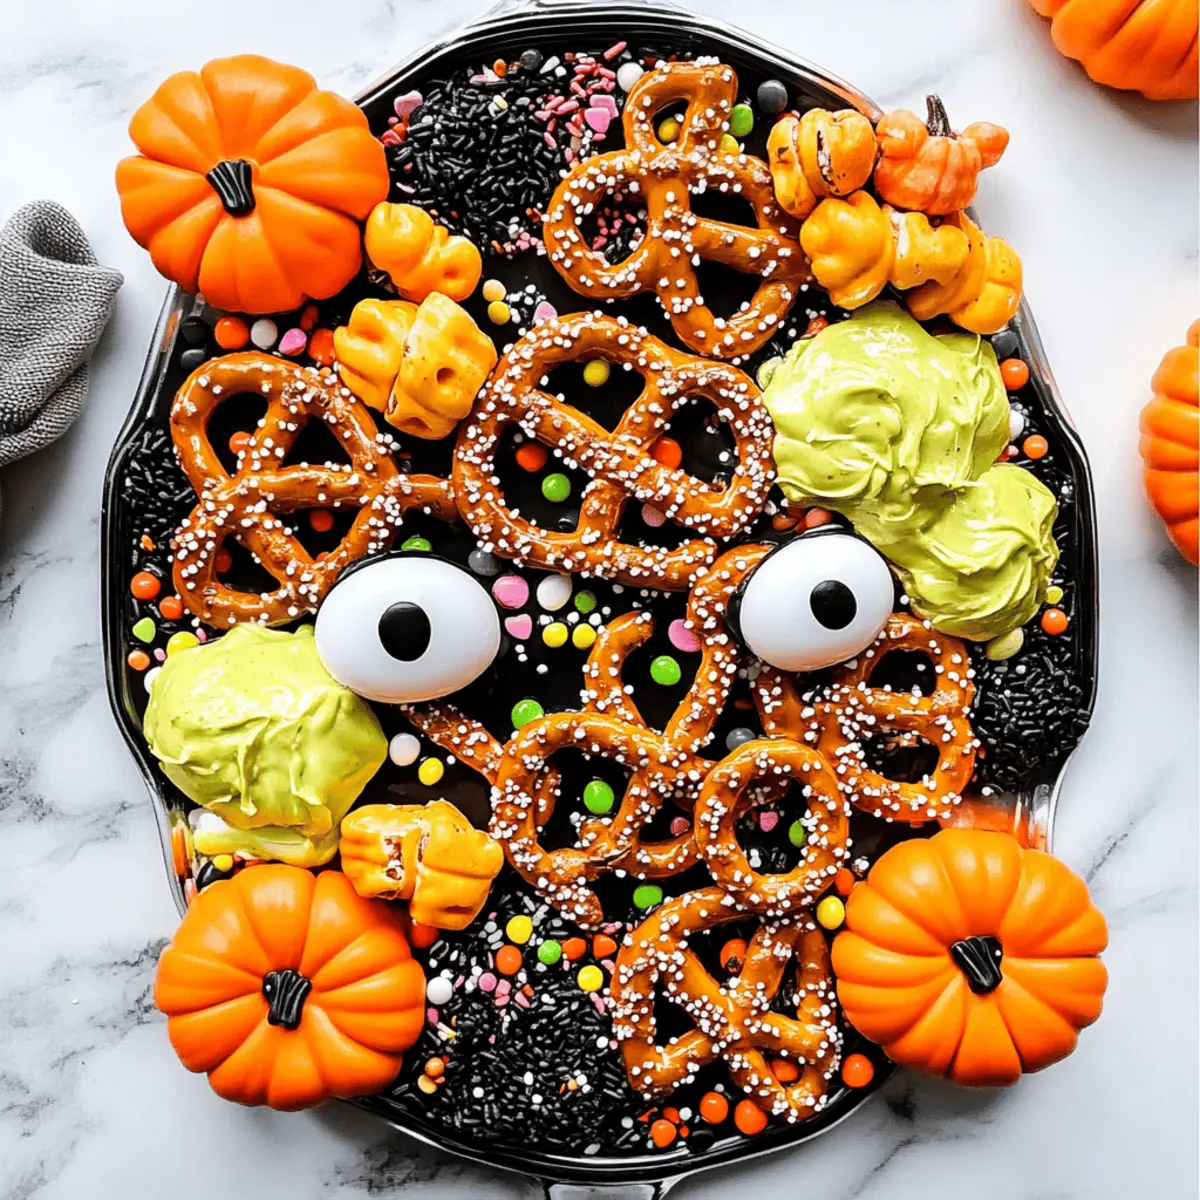
As I sifted through a cornucopia of vibrant sprinkles and melted candy melts, a nostalgic memory washed over me—crafting spooky snacks during Halloween with my family, laughter echoing through the kitchen. These Easy No-Bake Halloween Pretzels bring that childhood joy right back, merging sweet and salty flavors into colorful, crunchy treats that can be whipped up in just 20 minutes. Ideal for festive parties and perfect for little hands to help with, they’re a customizable crowd-pleaser that even offers a gluten-free option. Each pretzel boasts a playful personality, adorned with sprinkles and candy eyes that are sure to spark smiles. Are you ready to transform your kitchen into a Halloween wonderland? Let’s dive into this fun and delicious project together!
Why Are Halloween Pretzels So Fun?
Quick and Easy: These Halloween Pretzels come together in just 20 minutes, making them an ideal treat for busy schedules.
Kid-Friendly Fun: Involve the little ones in decorating; it’s a great way to spark their creativity while having quality family time.
Customizable Delight: With a variety of toppings and colors, each pretzel can be a unique masterpiece! You can even explore a gluten-free version to accommodate dietary needs.
Crowd-Pleasing Appeal: Whether for school snacks or Halloween parties, these treats are sure to impress and delight guests of all ages.
No Baking Required: This recipe allows you to skip the oven and still create something amazing, perfect for novice bakers or anyone looking to avoid the heat!
Halloween Pretzel Ingredients
For the Pretzels
- Mini Pretzels – A crunchy base to hold all the sweet toppings; opt for gluten-free pretzels if needed.
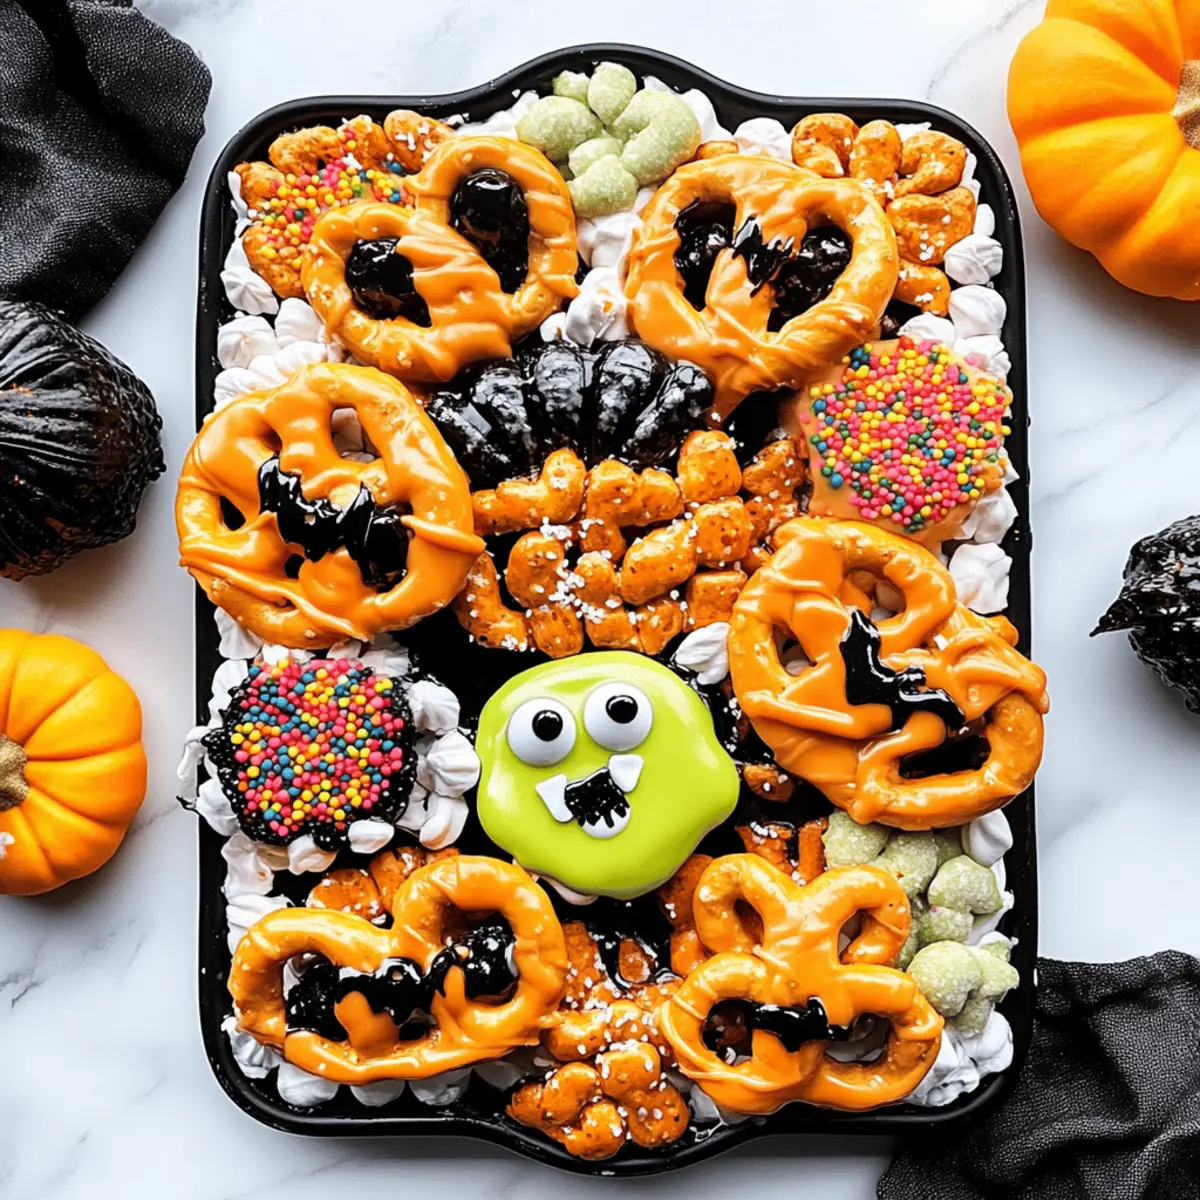
- Candy Melts (white, orange, black) – These melt into a vibrant coating; swap with melted chocolate chips mixed with coconut oil for a shiny finish.
For Decorating
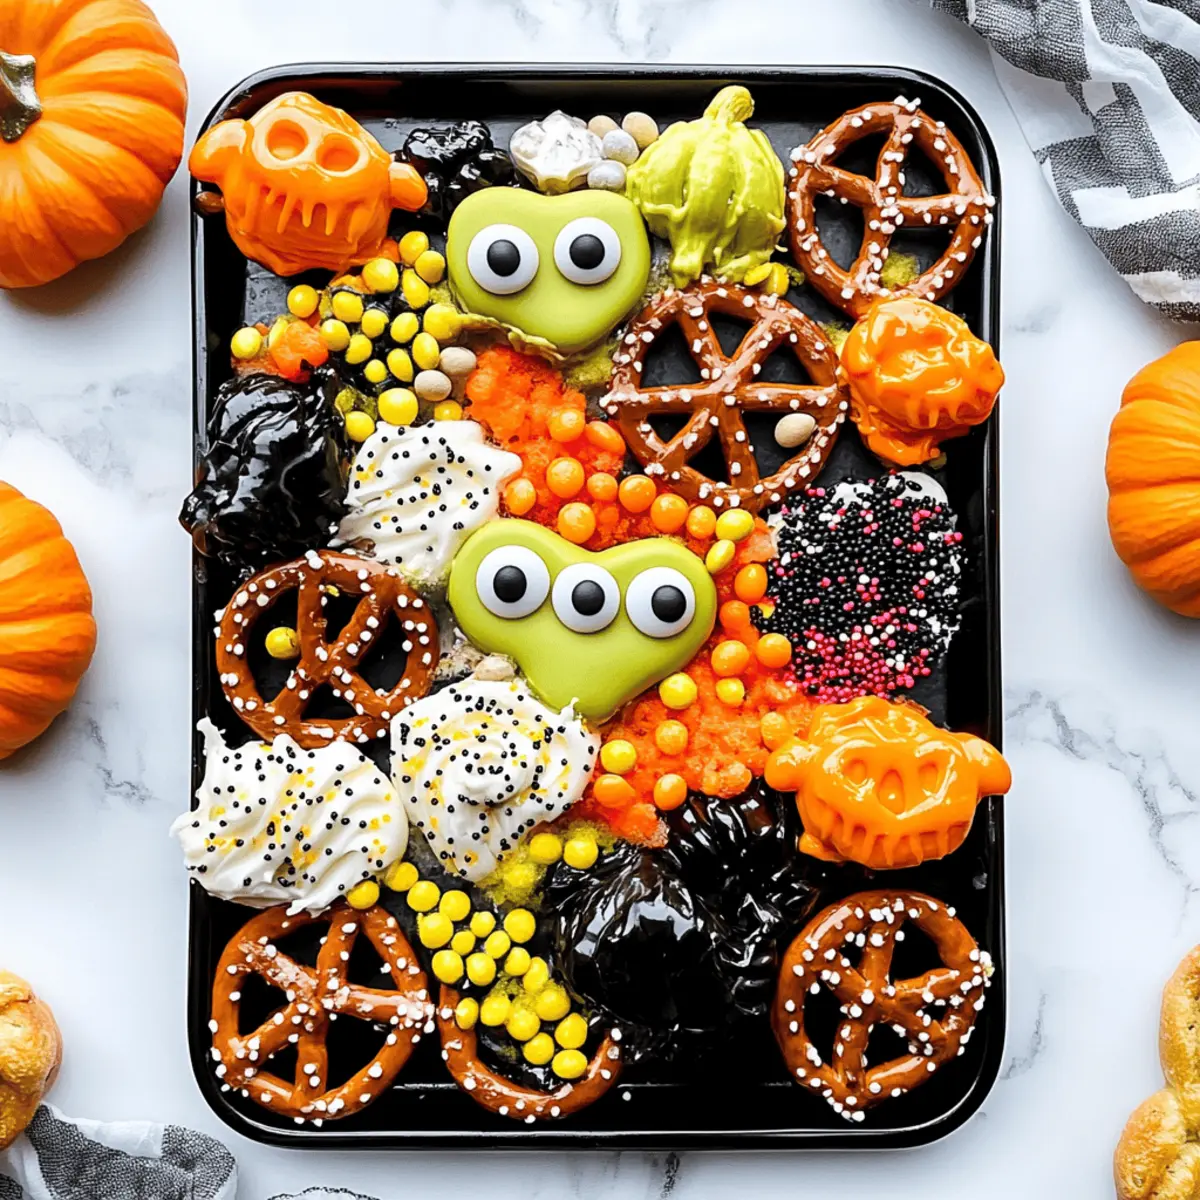
- Halloween Sprinkles – Add a festive touch and color; feel free to use any sprinkles that match your Halloween theme.
- Candy Eyes – Give your pretzels a spooky character for playful creations; they are essential for adding that fun element.
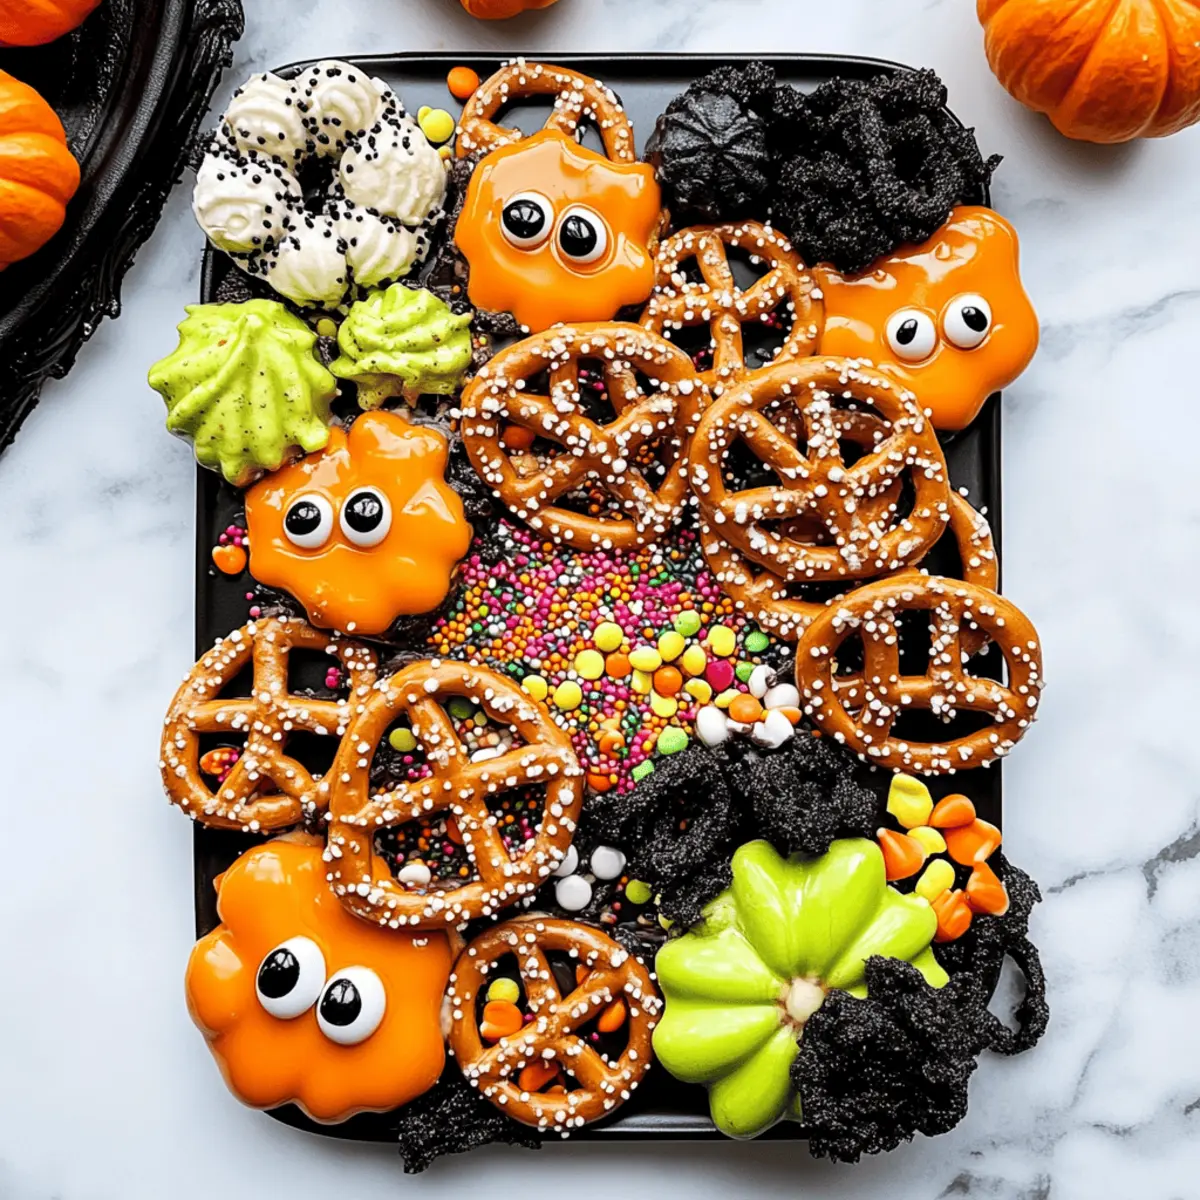
- Crushed Oreos (optional) – Sprinkle on top for extra flavor and decorative flair; this adds a delicious crunch to the sweet treat.
These irresistible Halloween Pretzels are an exciting project that promises to bring joy to your kitchen!
Step‑by‑Step Instructions for Halloween Pretzels
Step 1: Prepare Your Workspace
Start by lining a baking sheet with parchment paper. This will create a non-stick surface for your Halloween Pretzels. Make sure your workspace is tidy and has all your ingredients within reach. Gather your mini pretzels, candy melts, and any desired toppings. Having everything organized will ensure a smooth and enjoyable decorating process.
Step 2: Melt the Candy Melts
Place your candy melts in a microwave-safe bowl and heat them in 30-second intervals, stirring in between. Continue until the candy is fully melted and smooth, approximately 1-2 minutes total. Ensure there are no lumps, as a silky texture is key for covering the pretzels. If you prefer, a double boiler can be used to melt the candy for more control.
Step 3: Dip the Pretzels
Grab your mini pretzels one at a time and dip them into the melted candy, ensuring they are fully coated. Use a fork or a toothpick for easier handling and to let excess candy drip off. Place the dipped pretzels on your prepared baking sheet, allowing them to retain their charming shape. Aim for a good coating to maximize the sweet and salty flavor blend of your Halloween Pretzels.
Step 4: Decorate Immediately
While the melted candy is still warm and pliable, sprinkle your Halloween sprinkles and place candy eyes on top of each pretzel. Work quickly, as the candy will start to set in a few minutes. Feel free to get creative with your toppings, using crushed Oreos or any whimsical decors that will make your Halloween Pretzels come alive.
Step 5: Allow to Set
Once all pretzels are decorated, let them sit at room temperature until the candy coating hardens completely. This should take about 15 minutes. You’ll know they’re ready when they feel firm to the touch and no longer tacky. If you’re short on time, you can place the baking sheet in the fridge for a quicker set.
Step 6: Store or Serve
Once the Halloween Pretzels have hardened, they are ready to enjoy or be stored! Keep them in an airtight container at room temperature for up to a week. These delightful treats are perfect for gifting, adding to treat bags, or serving at parties. Share your festive creations and watch the smiles light up!
Make Ahead Options
These Halloween Pretzels are a fantastic candidate for meal prep, saving you time amidst the Halloween hustle and bustle! You can melt the candy melts and dip the pretzels up to 3 days in advance, just make sure to store them in a single layer in an airtight container to keep them from sticking together. When it’s time to serve, simply sprinkle your choice of toppings and let them set at room temperature for about 15 minutes. This way, you can enjoy fresh-tasting treats without the last-minute rush, and they’ll remain just as delicious and festive for your spooky gatherings!
Halloween Pretzels: Creative Twists
Inviting creativity into your kitchen is a recipe for joy! Let’s explore some delightful variations to elevate your Halloween Pretzels.
-
Gluten-Free Option: Swap regular mini pretzels for gluten-free pretzels without sacrificing taste. It’s an inclusive twist that everyone can enjoy!
-
Flavorful Melts: Use flavored candy melts like caramel or butterscotch instead of classic flavors for a unique taste experience. These can add a new dimension of sweetness!
-
Nutty Crunch: Sprinkle chopped nuts or crushed candy bars on top of the melted candy for added texture. The crunch complements the soft sweetness beautifully.
-
Colorful Themes: Experiment with different chocolate colors to match your favorite Halloween themes, whether it’s spooky black and orange or whimsical pastels. Each pretzel can tell a story!
-
Add a Spicy Kick: For adventurous palates, sprinkle a pinch of cayenne pepper or chili powder atop the candy melts. The heat contrasts delightfully with the sweetness.
-
Layered Treats: Create mini pretzel bark by layering pretzels on a baking sheet and drizzling melted candy all over before adding toppings. Break them into pieces for sharing!
-
Freeze for Fun: Make a frozen version by dipping pretzels in melted chocolate, then freeze for a chilly treat that’s perfect for fall evenings. They’re like little chocolate-covered ice cream bites!
-
Dipping Delight: Combine your melted candy melts with a splash of flavored extracts like pumpkin spice or vanilla to enhance the aroma and taste, inviting even more festive cheer.
Feel free to explore these suggestions as you craft your Halloween Pretzels, making them uniquely yours! You might also enjoy checking out our Perfectly Spooky Treats or discovering more about No-Bake Recipes for easy culinary fun!
Expert Tips for Halloween Pretzels
-
Get Creative: Use a variety of candy melt colors to match your Halloween theme—think purple and green for an extra spooky touch!
-
Avoid Excess Candy: When dipping, let excess coating drip back into the bowl to prevent a too-thick layer that can overwhelm the pretzel’s flavor.
-
Timing is Key: Decorate your Halloween Pretzels while the candy is still warm; once it sets, toppings won’t stick properly.
-
Sprinkle Smart: Don’t be shy with the sprinkles! A generous handful can give your pretzels a festive look and delicious crunch.
-
Kid Participation: Encourage kids to get involved by allowing them to pick their own toppings—this turns a fun recipe into a memorable family activity!
-
Gluten-Free Option: Remember, gluten-free pretzels make this recipe accessible for everyone—just ensure your candy melts and toppings are also gluten-free.
How to Store and Freeze Halloween Pretzels
Room Temperature: Store your Halloween Pretzels in an airtight container at room temperature for up to 7 days. This will keep them crunchy and flavorful!
Fridge: For longer freshness, you can place the container in the refrigerator, though be aware this may change the texture slightly. They should last for about 10 days this way.
Freezer: Want to make them ahead? Freeze your Halloween Pretzels in an airtight container for up to 2 months. To enjoy, thaw at room temperature for about an hour before serving.
Reheating: There’s no need to reheat—simply enjoy them as they are or along with festive drinks for a delightful treat!
What to Serve with Easy No-Bake Halloween Pretzels
Add a festive flair to your gathering with delightful sides and treats that round out your Halloween celebration.
-
Spooky Fruit Platter: Create a colorful arrangement of fruits like orange slices, bananas, and grapes. They provide a refreshing contrast to the sweet pretzels.
-
Creepy Cheese Board: Include a variety of cheeses, crackers, and olives. This savory selection complements the sweet and salty notes of the pretzels beautifully.
-
Witches’ Brew Punch: A spooky, tangy punch made with black grape juice and lemon-lime soda is the perfect drink to serve alongside your Halloween Pretzels.
-
Monster Marshmallow Pops: Dip marshmallows into melted chocolate and decorate them like ghoulish characters. Their chewy texture adds a fun alternative to your snacking.
-
Pumpkin Pie Bites: Mini pumpkin pie bites offer a delicious fall flavor that resonates with the season while being a hit at any party.
-
Chilling Hot Cocoa: Serve warm or iced hot cocoa topped with whipped cream and sprinkled cocoa. This cozy drink pairs well with the crunchy texture of the pretzels.
-
Gummy Worm Cups: Fill small cups with gummy worms and gummy insects. These cute and creepy treats echo the Halloween theme while bringing some fun to the platter.
-
Caramel Apple Slices: Sliced apples drizzled with caramel sauce present a sweet, crisp contrast to the pretzels’ vibrant candy melts.
Bring out your creativity with these pairings and watch your Halloween gathering transform into a delightful feast of flavors!
Halloween Pretzels Recipe FAQs
What type of pretzels should I use for Halloween Pretzels?
I recommend using mini pretzels for the perfect crunchy base. If you’re looking for a gluten-free option, simply swap in gluten-free pretzels—these work wonderfully without compromising flavor!
How long will my Halloween Pretzels last?
Store your Halloween Pretzels in an airtight container at room temperature for up to 7 days. If you’d like them to last a little longer, the fridge can extend their freshness to about 10 days. Just keep in mind that refrigeration may slightly alter the texture.
Can I freeze Halloween Pretzels?
Absolutely! To freeze your Halloween Pretzels, place them in an airtight container, separating layers with parchment paper to prevent sticking. They can be frozen for up to 2 months. When you’re ready to enjoy them, simply thaw at room temperature for about an hour. They’ll be as delicious as the day you made them!
What should I do if the candy coating is too thick?
If you find that the candy coating is too thick, don’t worry! Just let the excess drip off after dipping the pretzels into the melted candy. You can also try melting your candy at a lower heat; sometimes slower melting can result in a smoother consistency.
Are there any dietary considerations I should keep in mind?
Yes! Be sure to check the labels on your candy melts and sprinkles for allergens. Many candies are gluten-free, but always double-check! If you’re making these treats for a gathering, consider labeling them to help guests with dietary restrictions feel at ease.
Can I use flavored candy melts instead?
Certainly! You can get creative by substituting flavored candy melts like caramel or butterscotch for delicious variety. Just follow the same melting and dipping process, and watch your Halloween Pretzels transform with delightful new flavors!
Melt-in-Your-Mouth Halloween Pretzels Kids Will Love
Ingredients
Equipment
Method
- Start by lining a baking sheet with parchment paper. Gather your mini pretzels, candy melts, and desired toppings.
- Place your candy melts in a microwave-safe bowl and heat in 30-second intervals until fully melted, about 1-2 minutes.
- Dip each mini pretzel into the melted candy, ensuring they're fully coated, then place them on the prepared baking sheet.
- While the candy is warm, decorate with sprinkles and candy eyes, working quickly before it sets.
- Let the pretzels sit at room temperature until the candy coating hardens, about 15 minutes.
- Once hardened, store in an airtight container at room temperature for up to a week.