

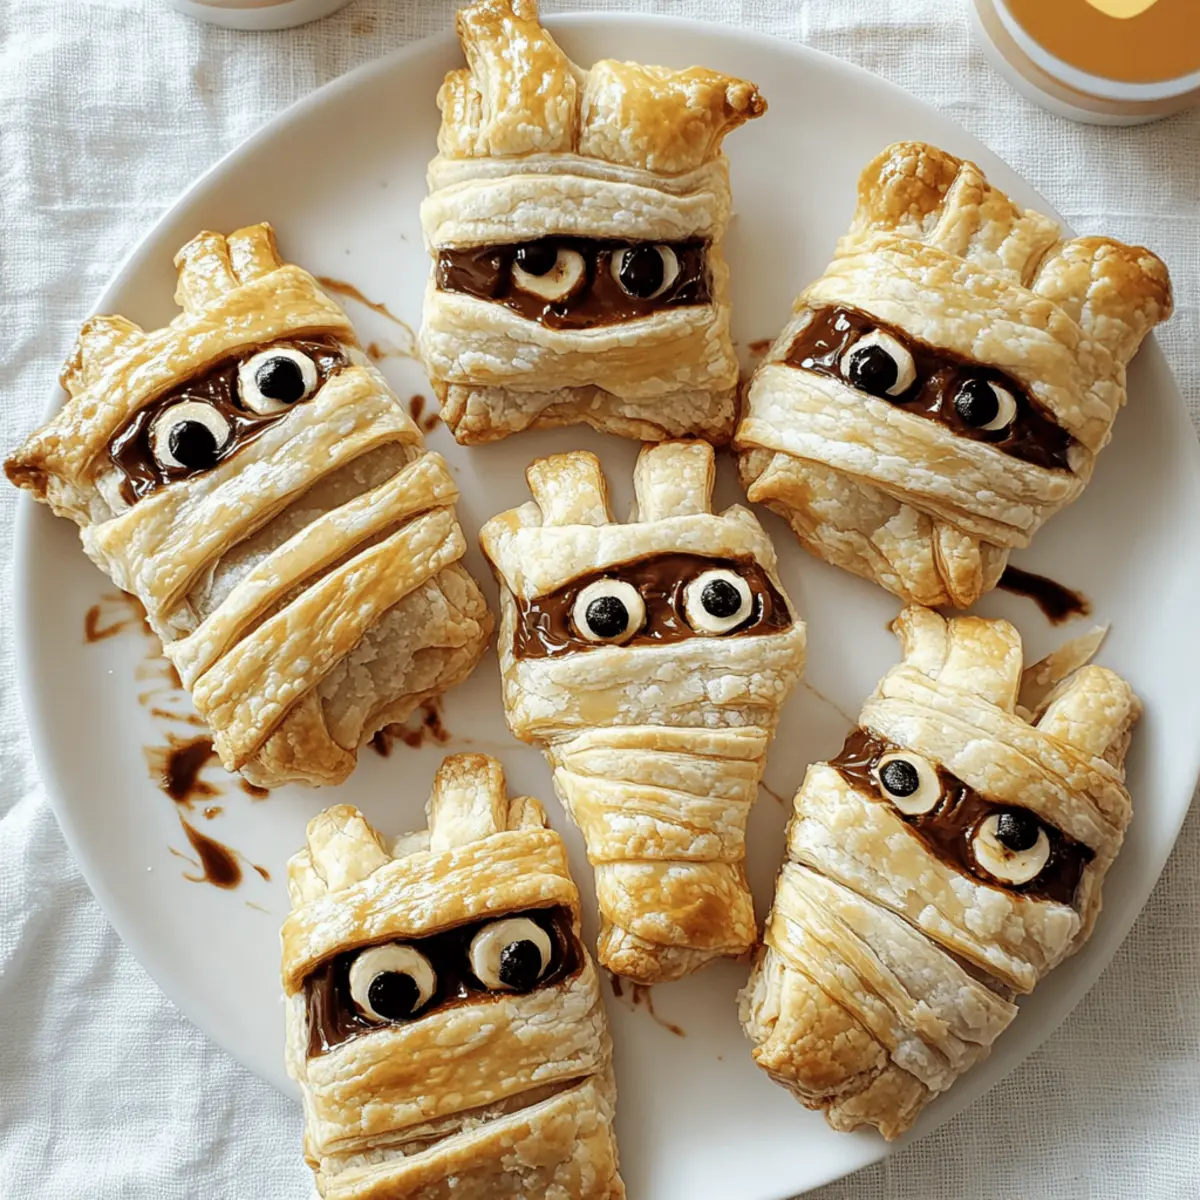
As I scoured the pantry for a festive Halloween treat, I stumbled upon the perfect union of simplicity and spookiness: Nutella Mummy Hand Pies! These adorable, flaky pastries are a delight not just to the eyes but also to the taste buds. With just four ingredients, you can whip up this quick recipe that highlights the creamy decadence of vegan Nutella paired with the natural sweetness of bananas. Perfect for both kids and adults, they bake up in about 15 minutes—making them an effortless crowd-pleaser for any Halloween gathering. Whether you’re looking to impress friends or simply indulge in some seasonal fun, these hand pies will surely bring a smile. Ready to uncover the secrets behind this fun and easy treat? Let’s dive in!
Why Make Nutella Mummy Hand Pies?
Simplicity at its finest: With just four ingredients and minimal prep, you can create festive treats in no time.
Deliciously Decadent: The rich vegan Nutella combined with sweet bananas offers a flavor explosion that everyone will love.
Versatile Options: Feel free to swap fillings with your favorite fruits or try a savory variation for a unique twist.
Crowd-Pleasing Appeal: These spooky hand pies are sure to be the star of your Halloween gathering, pleasing both kids and adults alike.
Quick and Easy: Spend only 10 minutes preparing and 15 minutes baking to deliver delightful bites that disappear in an instant! If you want to enhance your feast, consider pairing these treats with a scoop of dairy-free ice cream as a serving suggestion.
Nutella Mummy Hand Pie Ingredients
Whether you’re baking for a Halloween party or indulging your sweet tooth, having the right ingredients is essential for perfecting these delightful treats!
For the Pastry
- Puff Pastry – Ensure it’s vegan and gluten-free to keep these Nutella Mummy Hand Pies accessible for everyone.
For the Filling
- Vegan Nutella – The star of the show, providing rich chocolate flavor; feel free to substitute with any vegan chocolate spread.
- Bananas – Adds natural sweetness and a satisfying texture; you can use soft fruits like apples or berries for a delicious twist.
For the Finish
- Dairy-Free Milk – Brush this over the pastry to achieve a lovely golden crust—any plant-based milk will do!
- Sugar (Optional) – A sprinkle enhances browning and adds a touch of sweetness; granulated or caster sugar works perfectly.
For Decoration (Optional)
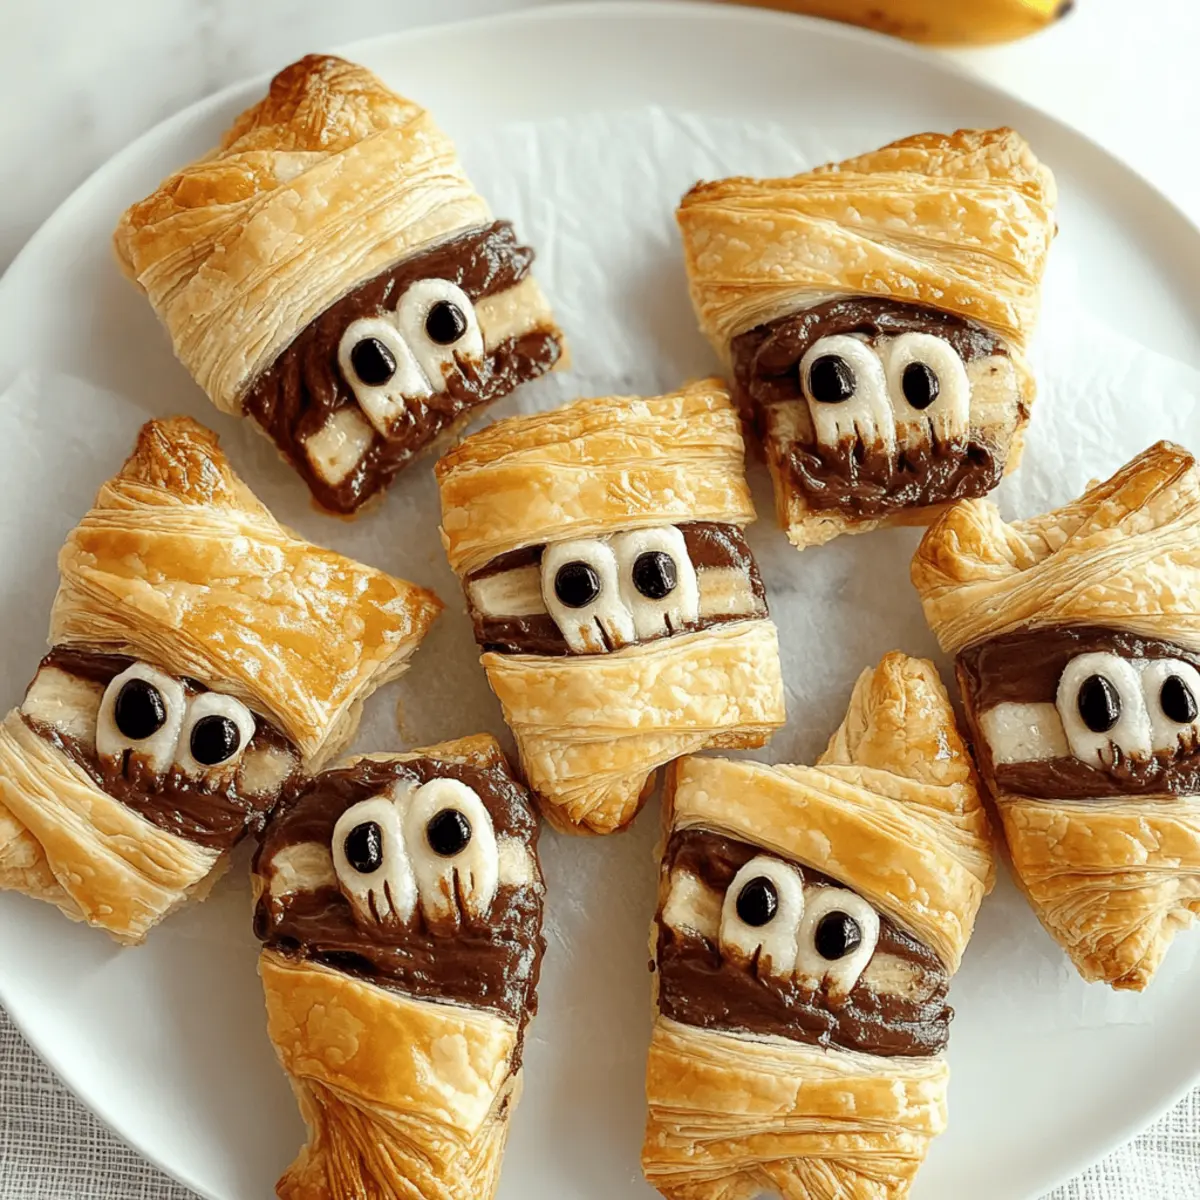
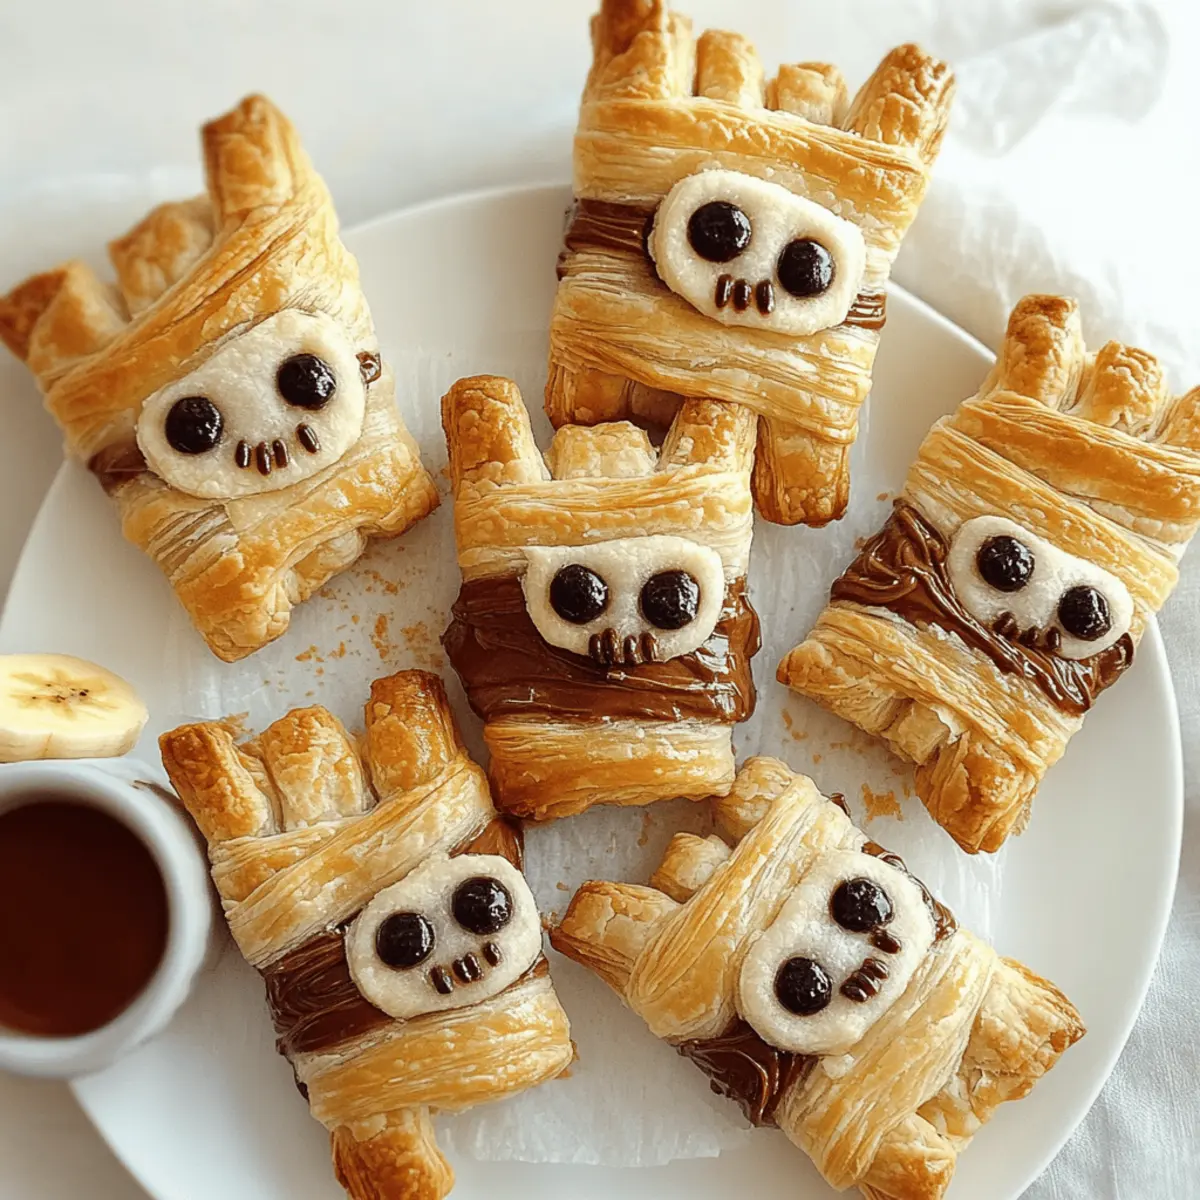
- Googly Eyes – Perfect for adding a spooky effect, or try melted chocolate for a fun DIY eye option!
- Dairy-Free White Chocolate Buttons & Icing Sugar – Use for decorating and dusting; while not essential, they definitely amp up the presentation!
Gather these ingredients, and let’s create some magical Nutella Mummy Hand Pies that will leave everyone wanting more!
Step‑by‑Step Instructions for Nutella Mummy Hand Pies
Step 1: Preheat and Prepare
Preheat your oven to 180°C (fan) and line two baking trays with greaseproof paper. This will ensure your Nutella Mummy Hand Pies bake evenly without sticking. While the oven heats up, gather your puff pastry and keep it ready for assembly, allowing you to move swiftly once you’re all set.
Step 2: Roll and Cut the Pastry
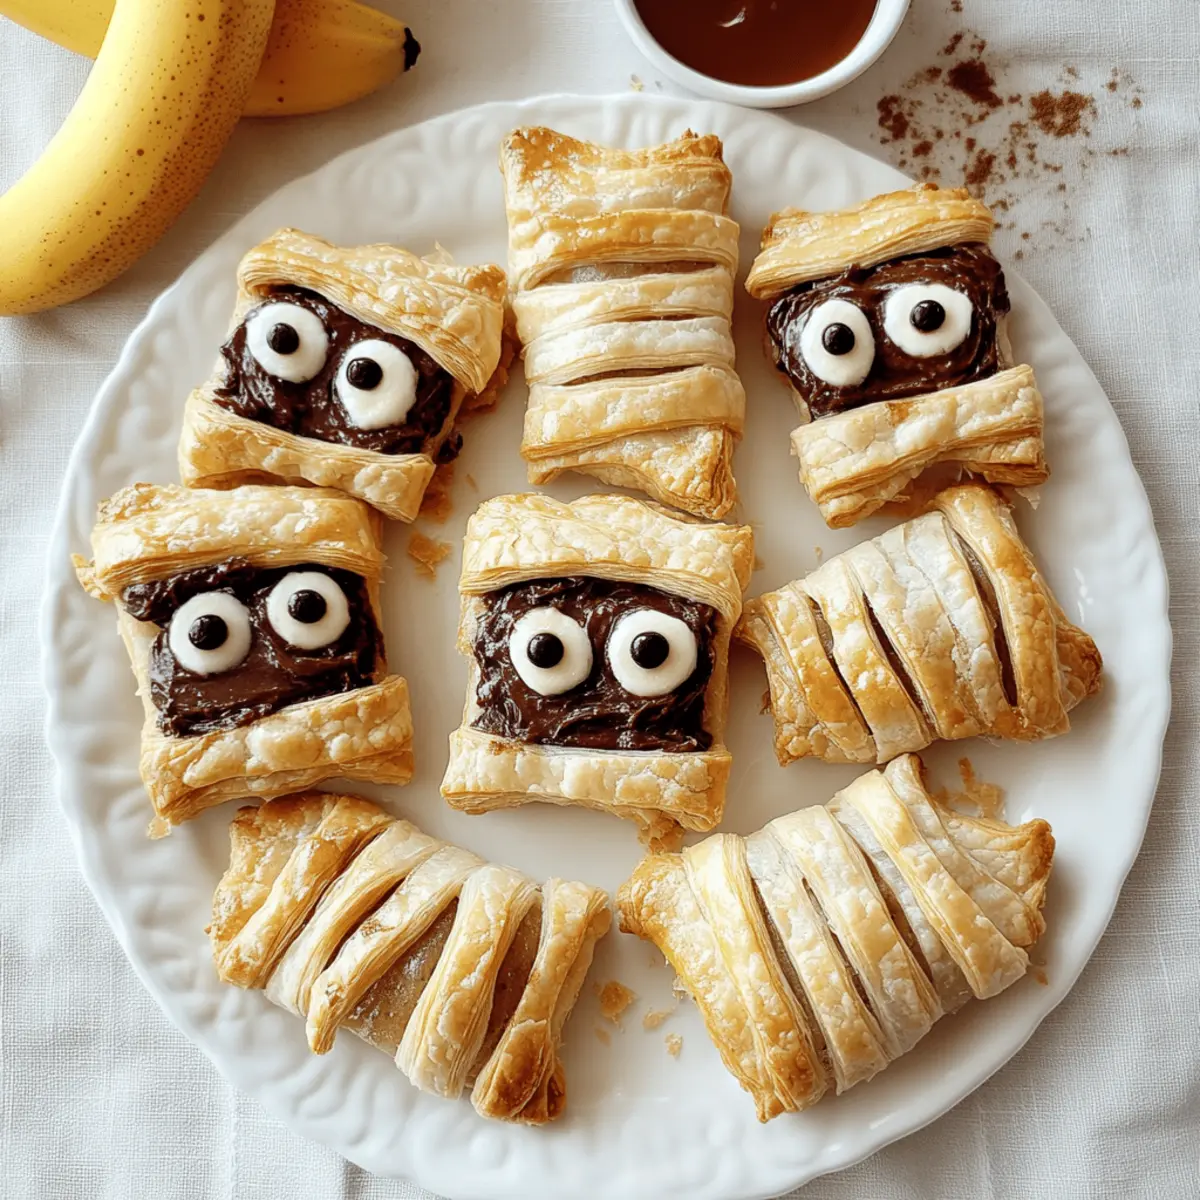
Unroll the puff pastry sheets on a clean surface and gently flatten them out for an even texture. Using a sharp knife, cut the pastry into rectangles of approximately 4×2.5 inches, reserving some strips for the mummy effect. Ensure the shapes are neat for a polished look, which will make your Nutella Mummy Hand Pies as adorable as they are delicious.
Step 3: Chill the Pastry
Place the cut pastry rectangles in the refrigerator for about 5 minutes. Chilling the pastry will help it become firmer and easier to handle, ensuring your Nutella Mummy Hand Pies maintain their shape during baking. Use this time to prepare any decorations if you desire additional spooky accents on your treats.
Step 4: Fill with Nutella and Bananas
Once chilled, remove the pastry rectangles from the fridge and pipe or spread a generous layer of vegan Nutella onto the center of each rectangle. Top the Nutella with banana slices for that delightful blend of flavors. Be careful not to overfill, as this can lead to messy edges while baking—just enough to create a delicious surprise inside!
Step 5: Seal the Edges
Brush a small amount of dairy-free milk around the edges of the filled pastry rectangles to help seal them. Lay the reserved pastry strips across the filling in a zig-zag pattern, resembling mummy bandages, and press them down gently to secure their place. This step creates the classic mummy appearance while keeping all the delicious filling inside.
Step 6: Prep for Baking
Before baking, brush the top of each assembled Nutella Mummy Hand Pie with a little more dairy-free milk for a golden crust. If you like, sprinkle some optional sugar over the top to enhance browning and add a touch of sweetness. This step not only adds flavor but also gives your pastries an irresistible crunch when baked.
Step 7: Bake to Perfection
Carefully place the trays in the preheated oven and bake for 15-18 minutes. Keep an eye on them as they bake; you want the pastry to puff up beautifully and turn golden brown. The aroma of your Nutella Mummy Hand Pies will fill your kitchen, making it hard to wait for these spooky treats to cool!
Step 8: Cool and Decorate
Once baked to perfection, remove your Nutella Mummy Hand Pies from the oven and allow them to cool slightly on the trays. This cooling time is crucial before adding any decorations like googly eyes or melted chocolate, preventing melting and ensuring a delightful presentation. Your festive treats are now ready to steal the show!
Nutella Mummy Hand Pies Variations
Feel free to unleash your creativity and customize these delightful hand pies according to your taste preferences!
-
Fruit-Filled: Swap bananas for strawberries or apples for a fresh twist. The flavors will complement the Nutella beautifully!
-
Nutty Version: Instead of Nutella, try almond butter or a chocolate hazelnut spread for a different nutty flavor. Each offers a unique richness that’s scrumptious.
-
Savory Mummies: Replace the sweet filling with a vegan cheese spread and sautéed spinach or mushrooms for a fun savory alternative. Who says mummies can’t be deliciously savory too?
-
Spicy Touch: Add a pinch of cinnamon or cayenne pepper to your filling for a surprising kick. This can elevate the chocolate experience with warmth and depth.
-
Gluten-Free Delight: If you’re gluten-sensitive, use gluten-free puff pastry to make these hand pies accessible to everyone!
-
Chocolate-Dipped: Dunk finished pies in melted vegan chocolate for an extra layer of decadence. It’s like double trouble, and who wouldn’t love that?
-
Caramel Drizzle: Drizzle a little dairy-free caramel sauce on top before serving for an indulgent treat that’s sure to wow your guests—sweetness overload!
-
Fun with Toppings: Experiment with different toppings! Dust with powdered sugar or add sprinkles for a festive look, perfect for Halloween celebrations.
Feel free to take a look at the storage tips if you plan to make a batch ahead or need ideas for serving suggestions that could make these hand pies even more delightful!
Expert Tips for Nutella Mummy Hand Pies
• Don’t Overfill: Avoid leaks by using just enough filling. Too much can make sealing difficult and create messy baked pies.
• Chill the Pastry: Keep your pastry chilled before baking. This helps achieve a flaky texture and prevents excessive spreading during baking.
• Trim Neatly: Use a sharp knife or pizza cutter for clean edges. Neat cuts not only look better but also help in even baking of your Nutella Mummy Hand Pies.
• Golden Finish: Brush the tops with dairy-free milk before baking for a shiny, golden crust. Consider adding sugar for extra sweetness and crispiness.
• Mind the Temperature: Let your Nutella Mummy Hand Pies cool slightly before adding decorations like chocolate or eyes. This prevents melting and keeps them visually appealing.
Make Ahead Options
These Nutella Mummy Hand Pies are perfect for meal prep, allowing you to enjoy homemade treats without the last-minute rush! You can assemble the hand pies up to 24 hours in advance; just cover them with plastic wrap and store them in the refrigerator to maintain their freshness. When you’re ready to bake, simply preheat your oven and follow the instructions for baking from chilled—this will ensure they retain their flaky texture and gooey filling. If you want to prep even further ahead, you can freeze the assembled hand pies for up to 3 months; just bake them straight from the freezer, adding a couple of extra minutes to the baking time. With these make-ahead options, you can easily serve delightful Nutella Mummy Hand Pies whenever the spooky cravings strike!
How to Store and Freeze Nutella Mummy Hand Pies
Fridge: Keep your Nutella Mummy Hand Pies in an airtight container for up to 2 days to maintain their flaky texture. Allow them to come to room temperature before serving.
Freezer: For longer storage, freeze the baked hand pies in an airtight container or a freezer bag for up to 2 months. Thaw overnight in the fridge before reheating.
Reheating: To enjoy them warm, reheat your Nutella Mummy Hand Pies in a preheated oven at 180°C for about 5-7 minutes. This will restore their delightful crispiness!
What to Serve with Nutella Mummy Hand Pies
Warm and inviting, these delightful pastries are perfect for serving alongside cozy accompaniments that enhance their sweetness.
-
Dairy-Free Ice Cream: The creamy texture contrasts beautifully with the flaky hand pies, creating an indulgent dessert pairing. Vanilla or chocolate flavors work wonders!
-
Fresh Fruit Salad: A refreshing mixture of seasonal fruits adds a burst of color and balances the richness of the Nutella. Think berries, apples, and oranges for a zesty touch.
-
Spiced Apple Cider: This warm drink is the perfect complement to the sweet and chocolatey flavors of your hand pies. Sipping on spiced cider while enjoying the pastries will evoke the cozy spirit of fall.
-
Whipped Coconut Cream: Light and airy, this dairy-free topping adds a luxurious finish to each bite, making your Halloween treats even more special.
-
Pumpkin Spice Latte: Capture the essence of the season with this coffee drink that pairs deliciously with the rich chocolate filling of the hand pies. It’s a cozy combination to warm up your Halloween gathering.
-
Chocolate Drizzle: Add a touch of elegance and extra sweetness by drizzling warm chocolate sauce over the hand pies. Simple yet enhances the overall indulgence.
-
Sugary Dusting: A light sprinkle of icing sugar can elevate the presentation of your Nutella Mummy Hand Pies, making them look even more tempting for guests.
Nutella Mummy Hand Pies Recipe FAQs
How do I choose the best puff pastry for my Nutella Mummy Hand Pies?
Absolutely! When selecting puff pastry, ensure it is labeled as vegan and gluten-free if those are dietary requirements. Look for packages that have a good quality brand name. Additionally, check for any visible tears or holes in the sheet before you buy—this ensures it will create a proper flaky texture once baked.
How should I store leftover Nutella Mummy Hand Pies?
Very simple! Store your Nutella Mummy Hand Pies in an airtight container at room temperature for up to 2 days. If you’d like to keep them longer, move them to the fridge, where they can last up to 3 days. Just remember to let them come to room temperature before serving for the best taste and texture!
Can I freeze Nutella Mummy Hand Pies?
Of course! To freeze, place the baked hand pies in a single layer in an airtight container or a freezer bag. Try to remove as much air as possible to avoid freezer burn. They can be stored for up to 2 months. When you’re ready to enjoy them, thaw overnight in the fridge, then reheat in a preheated oven at 180°C for about 5-7 minutes to restore their flaky goodness.
What if my Nutella Mummy Hand Pies leak during baking?
If your pies do leak, don’t worry! This can happen if they are overfilled. Next time, ensure you fill them just enough to allow for sealing. If you notice any leaks, you can carefully use a spatula to slide the pies back together while they’re still hot. The best practice is to chill your pastry and handle them gently, which should minimize leaks in the future.
Are Nutella Mummy Hand Pies suitable for pets or specific allergies?
While Nutella Mummy Hand Pies are delightful for human consumption, they should not be shared with pets, particularly dogs, due to the chocolate. For allergies, vegan Nutella is generally nut-free, but always check the label for specific allergens. Additionally, if someone has a gluten intolerance, ensure that the puff pastry you choose is certified gluten-free to accommodate those dietary needs.
Can I use other fruits instead of bananas?
Absolutely! If bananas aren’t your favorite, consider using strawberries, apples, or even blueberries! Just remember to adjust the filling quantity accordingly. Apples may require slicing thinner to ensure they bake perfectly and maintain the desired texture in your Nutella Mummy Hand Pies. Enjoy experimenting!
Delightful Nutella Mummy Hand Pies for a Spooky Treat
Ingredients
Equipment
Method
- Preheat your oven to 180°C (fan) and line two baking trays with greaseproof paper.
- Unroll the puff pastry sheets on a clean surface and cut into rectangles of approximately 4x2.5 inches.
- Chill the pastry rectangles in the refrigerator for about 5 minutes.
- Spread a layer of vegan Nutella onto the center of each pastry rectangle, then top with banana slices.
- Brush dairy-free milk around the edges and lay reserved pastry strips in a zig-zag pattern to resemble mummy bandages.
- Brush the top of each assembled hand pie with dairy-free milk and sprinkle optional sugar.
- Bake for 15-18 minutes until golden brown.
- Allow to cool slightly before decorating with googly eyes or melted chocolate.